 程序设计实验室
微信公众号
程序设计实验室
微信公众号

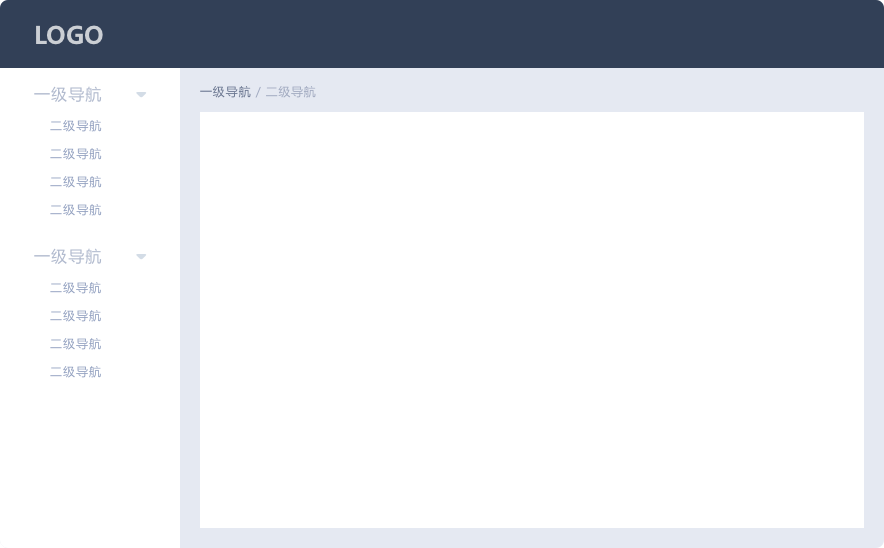
界面设计
按照ElementUI提供的布局来
左边是导航栏,右边上方是标签页,然后是主内容区
如图
开始写代码
主页面的内容已经比较复杂了,全部写在一个文件内不现实
我们来分解一下
根据这个布局,页面可以分为头部、主体、左侧导航栏三部分
所以我来新建三个vue页面
- HeaderBar.vue
- Navbar.vue
- MainContent.vue
完成之后目录结构如下
views
├── 404.vue
├── HeaderBar.vue
├── Home.vue
├── Login.vue
├── MainContent.vue
└── Navbar.vue
然后修改Home.vue页面
<template>
  <div class="container">
    <!-- 导航菜单栏 -->
    <navbar></navbar>
    <!-- 头部区域 -->
    <header-bar></header-bar>
    <!-- 主内容区域 -->
    <main-content></main-content>
  </div>
</template>

<script>
import HeaderBar from "./HeaderBar"
import Navbar from "./Navbar"
import MainContent from "./MainContent"

export default {
  // name: 'Home',
  components: {
    HeaderBar,
    Navbar,
    MainContent
  }
};
</script>

<style scoped lang="scss">
.container {
  position: absolute;
  top: 0;
  left: 0;
  right: 0;
  bottom: 0;
}
</style>
PS:一开始我给MainContent和HeaderBar的命名是简单的Main和Header,结果就出错了,页面加载一直是空白的,可能是和什么命名冲突了吧~
接下来开始写每个部分的代码
Navbar.vue
左侧导航包含上方Logo区域和下方导航菜单区域。
布局代码
<template>
  <div class="menu-bar-container">
    <!-- logo -->
    <div class="logo" style="background:#14889A" :class="'menu-bar-width'"
         @click="$router.push('/')">
      <img :src="logoSrc" alt="">
      <div>StarBlog</div>
    </div>
  </div>
</template>
js
export default {
  name: "Navbar",
  data(){
    return {
      logoSrc: require('@/assets/codelab.jpg')
    }
  }
}
scss
.menu-bar-container {
  position: fixed;
  top: 0;
  left: 0;
  bottom: 0;
  z-index: 1020;

  .logo {
    position: absolute;
    top: 0;
    height: 60px;
    line-height: 60px;
    background: #545c64;
    cursor: pointer;

    img {
      width: 40px;
      height: 40px;
      border-radius: 10px;
      margin: 10px;
      float: left;
    }

    div {
      font-size: 25px;
      color: white;
      text-align: left;
      padding-left: 20px;
    }

  }

  .menu-bar-width {
    width: 200px;
  }
}
HeaderBar.vue
头部导航主要是设置样式,并在右侧添加用户名和头像显示。
布局代码
<template>
  <div class="header" style="background:#14889A" :class="'position-left'">
    <!-- 工具栏 -->
    <span class="toolbar">
      <el-menu class="el-menu-demo" background-color="#14889A" text-color="#14889A" active-text-color="#14889A"
               mode="horizontal">
        <el-menu-item index="1">
          <!-- 用户信息 -->
          <span class="user-info"><img :src="user.avatar"/>{{ user.name }}</span>
        </el-menu-item>
      </el-menu>
    </span>
  </div>
</template>
js
export default {
  name: "HeaderBar",
  data() {
    return {
      user: {
        name: "CodeLab",
        avatar: require("@/assets/star.jpg"),
        role: "超级管理员",
      },
      activeIndex: '1',
      langVisible: false
    }
  },
  methods: {
    selectNavBar(key, keyPath) {
      console.log(key, keyPath)
    }
  },
  mounted() {
    let user = sessionStorage.getItem("user")
    if (user) {
      this.user.name = user
      this.user.avatar = require("@/assets/star.jpg")
    }
  }
}
scss
.header {
  position: fixed;
  top: 0;
  right: 0;
  z-index: 1030;
  height: 60px;
  line-height: 60px;
  border-color: rgba(180, 190, 190, 0.8);
  border-left-width: 1px;
  border-left-style: solid;
}

.navbar {
  float: left;
}

.toolbar {
  float: right;
}

.user-info {
  font-size: 20px;
  color: #fff;
  cursor: pointer;

  img {
    width: 40px;
    height: 40px;
    border-radius: 10px;
    margin: 10px 0 10px 10px;
    float: right;
  }
}

.position-left {
  left: 200px;
}
MainContent.vue
主内容区域包含标签页导航和主内容区域,在主内容中放置route-view,用于路由信息。
布局代码
<template>
  <div id="main-container" class="main-container" :class="'position-left'">
    <!-- 标签页 -->
    <div class="tab-container"></div>
    <!-- 主内容区域 -->
    <div class="main-content">
      <keep-alive>
        <transition name="fade" mode="out-in">
          <router-view></router-view>
        </transition>
      </keep-alive>
    </div>
  </div>
</template>
scss
.main-container {
  padding: 0 5px 5px;
  position: absolute;
  top: 60px;
  left: 1px;
  right: 1px;
  bottom: 0;
  background: rgba(67, 69, 70, 0.1);

  .main-content {
    position: absolute;
    top: 45px;
    left: 5px;
    right: 5px;
    bottom: 5px;
    padding: 5px;
  }
}

.position-left {
  left: 200px;
}
测试效果
OK,来看看效果
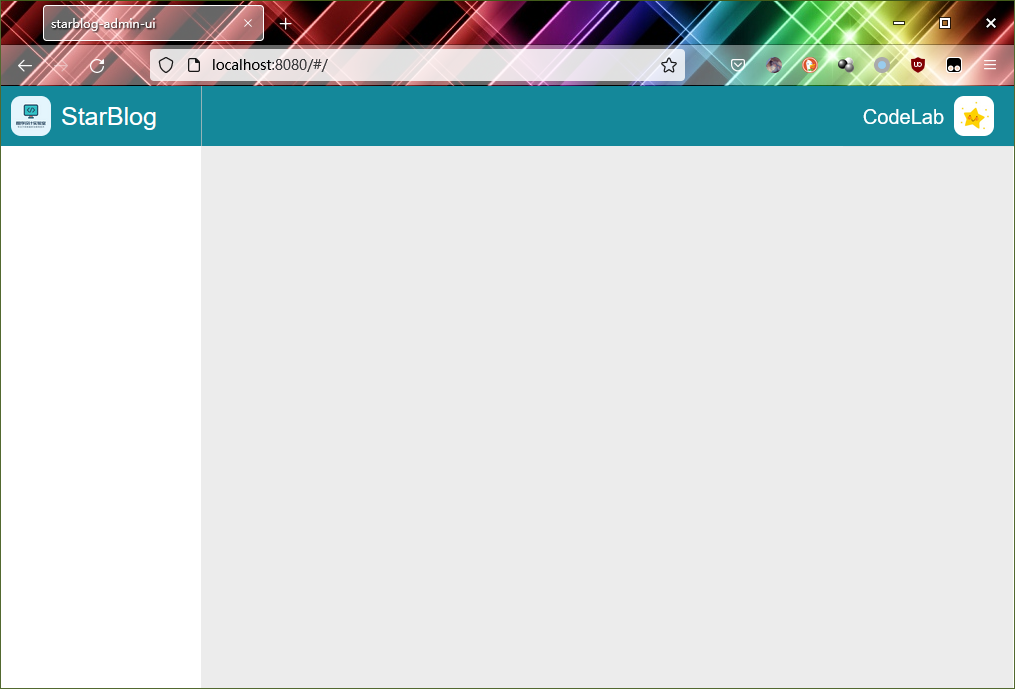
完成,收工~