

IT Home Academy: Make Win10 File Explorer's Details Pane Show More Information
When you enable the details pane in Windows Explorer and then select a file (the IT Home editor selected an exe file), you will see some information about this file on the right half of the window, including the modified date, created date, file size, and availability. However, for some users, this information is quite limited and still not detailed enough. In this article, IT Home will demonstrate how to configure the settings so that File Explorer can display more useful information about the selected file in the details pane. The method below applies
When you enable the details pane in Windows Explorer and then select a file (the IT Home editor selected an exe file), you will see some information about this file on the right half of the window, including the modified date, created date, file size, and availability. However, for some users, this information is quite limited and still not detailed enough.
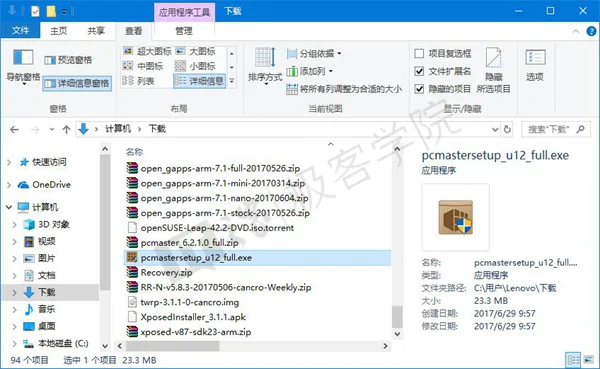
In this article, IT Home will demonstrate how to configure the settings so that File Explorer can display more useful information about the selected file in the details pane.

The method below applies to Windows Vista, Windows 7, Windows 8/8.1, and Windows 10. Before you begin, please note that modifying the registry is risky. Although following the steps in this article will not adversely affect your computer's system, mistaken operations may prevent your computer from continuing to work normally. Let's begin.
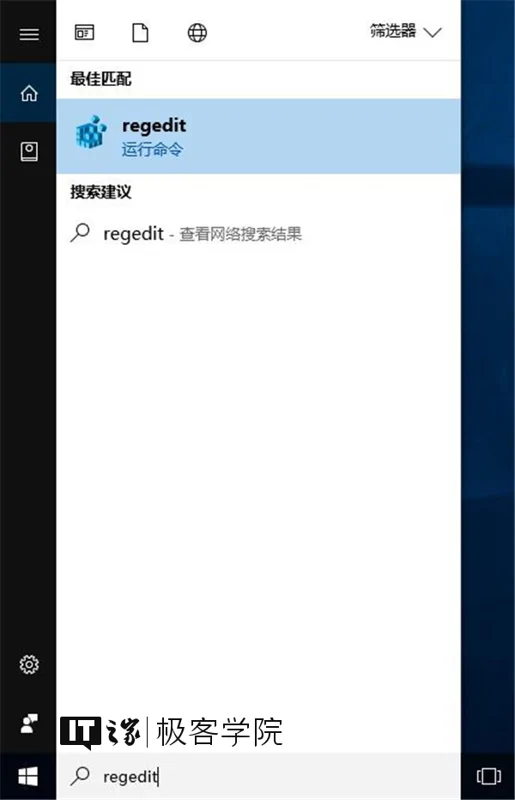
Search for and open regedit in Microsoft Cortana;
Go to the following path:
\HKEY_CLASSES_ROOT\
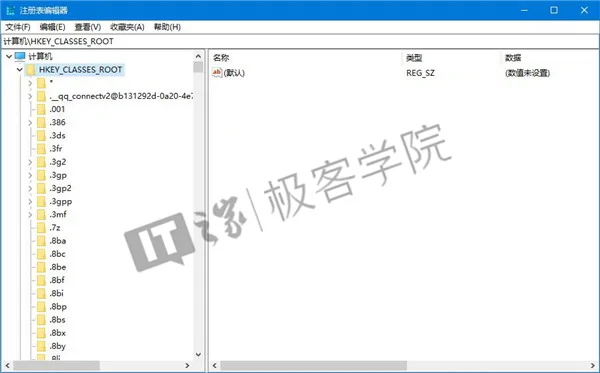
In this directory, you will see many subkeys that start with "." followed by file extensions such as 3gp, docx, and exe.
Here, the IT Home editor wants to make it so that when we select an exe file, the details pane can display more information about this file, so we select the subkey named .exe in the \HKEY_CLASSES_ROOT\ directory.
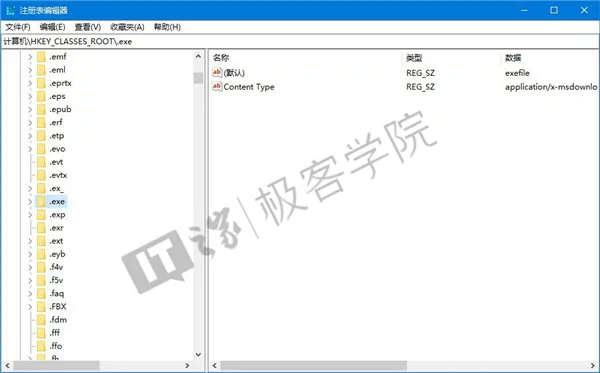
After selecting it, look to the right half of the window. We will see a string value named (Default), whose data value is exefile.
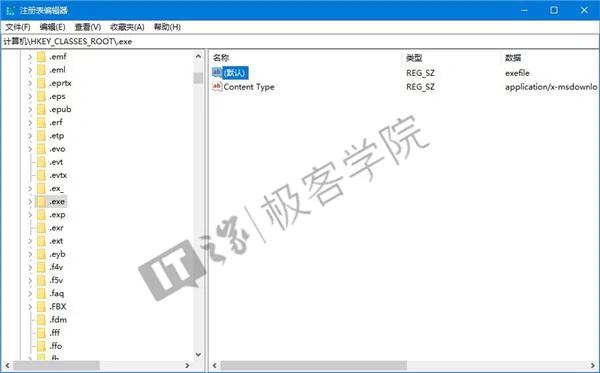
Remember this word, find it in the \HKEY_CLASSES_ROOT\ directory, and then click to enter that subkey.
Here for the IT Home editor, the full path of the exefile subkey is:
\HKEY_CLASSES_ROOT\exefile
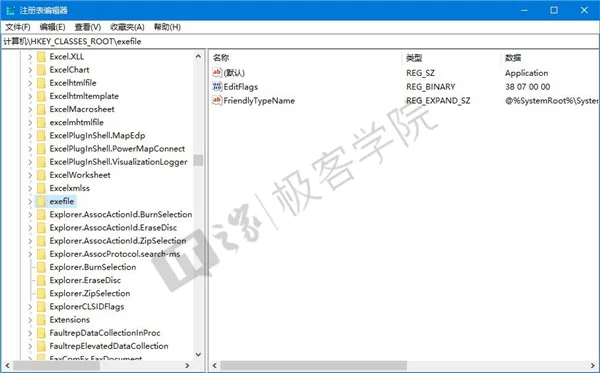
After selecting it, look to the right half of the window, place the mouse cursor in a blank area, right-click, choose New - String Value, and name the newly created string value:
PreviewDetails
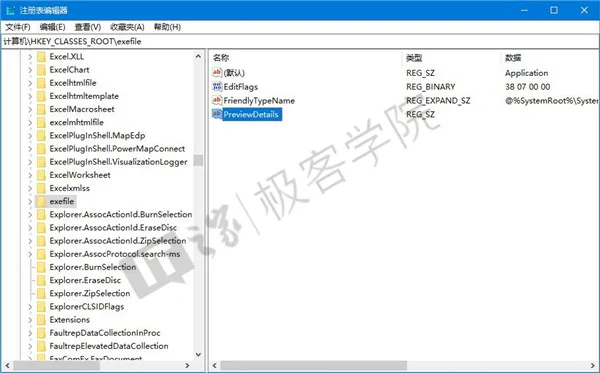
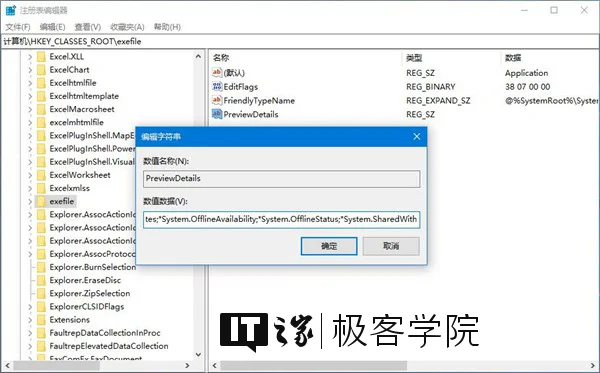
Double-click the string value named PreviewDetails that you just created, and set its value data to the following:
prop:System.ItemNameDisplay;System.ItemTypeText;System.ItemFolderPathDisplay;System.Size;System.DateCreated;System.DateModified;System.FileAttributesSystem.FileOwner;System.FileAttributes;*System.OfflineAvailability;*System.OfflineStatus;*System.SharedWith
Then click the OK button.
At this point, go back to Explorer, with the focus still on the exe file you just selected. Click the refresh button to the right of the address bar, or press F5 on the keyboard, and you will see that the details pane on the right side of the window now displays more useful information.
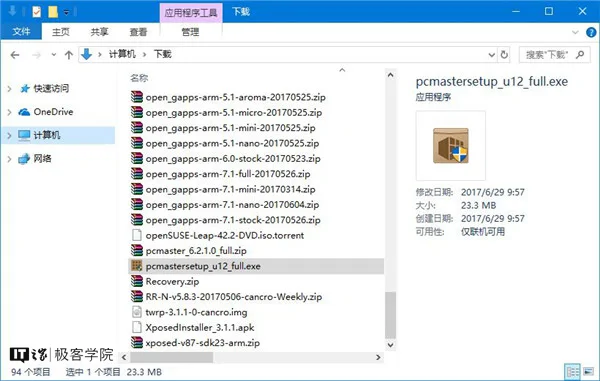
▲ Before modification
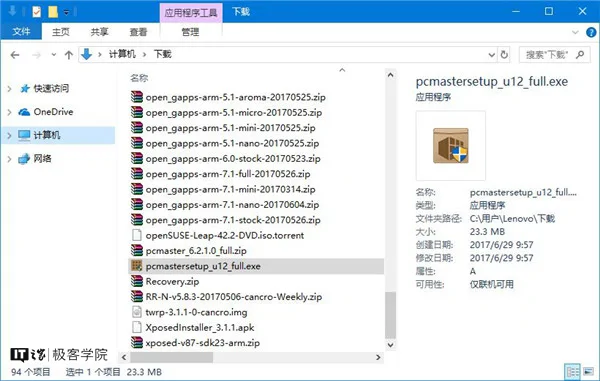
▲ After modification
Just now, we set the value data of the PreviewDetails string value. Now, let's see what this value includes.
-
System.ItemNameDisplay — file name;
-
System.ItemTypeText — file type;
-
System.ItemFolderPathDisplay — the full path of the folder containing this file;
-
System.Size — file size;
-
System.DateCreated — the file's creation date;
-
System.DateModified — the file's last modified date;
-
System.FileAttributesSystem.FileOwner — the owner of this file;
-
System.FileAttributes — the file's availability.
You can customize which information about the file you want to display in the file's details pane according to your personal preference, and modify the value data of the PreviewDetails string value accordingly.
Of course, the metadata given in the example above is not complete. Microsoft has listed a more complete list of prop: metadata on the MSDN site. This list is very long. If you want to view this list, please click here to visit that page on the MSDN site.
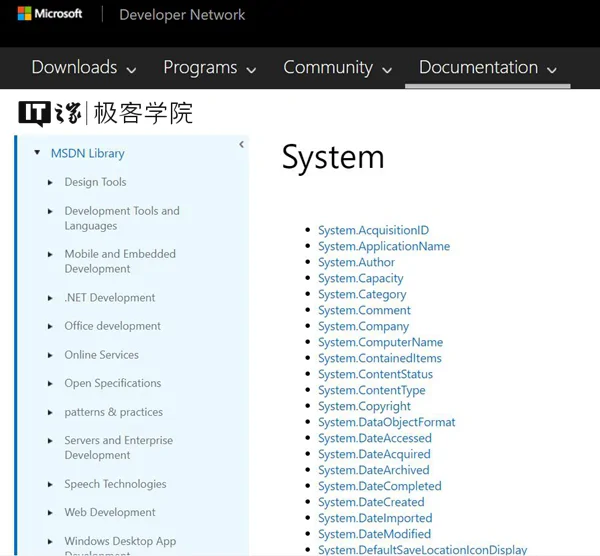
If you want to restore the information items displayed in the details pane to the default values, you can open the registry and delete the string value named PreviewDetails in
\HKEY_CLASSES_ROOT\exefile
For more general knowledge and practical tutorials, please follow IT Home Academy.
_EOF_
IT Home Academy: Make Win10 File Explorer's Details Pane Show More Information
- 本文作者:
- 程序设计实验室
- 版权声明:
- 本博客所有文章除特别声明外,均采用 BY-NC-SA 许可协议。转载请注明出处!
相关文章
如何阻止Win10重置默认应用?
前言 Win10比之前版本的Windows系统更现代,然而却不见得更好用,喜欢自作主张重置默认应用就是一个大问题。 就像这样,真的是烦。 解决方法 改注册表。 新建一个 去除重置默认应用.reg 的注册表文件,粘贴一下代码。 Windows Registry Editor Version 5.00 ;Description: Prevents Windows 10 from resetting
2021-12-18 · Windows · 约 1 分钟
在Windows上将git与ssh-agent搭配使用
Windows git 还自带 ssh?真是老土的兼容性思路。一行配置就能解决,不过得先管好 ssh-agent 的连接。 ProxyCommand 居然又添乱,难怪老出毛病。
2025-08-21 · Windows · 约 1 分钟
Windows的Linux子系统上配置SSH服务器
安装openssh 这个不用啰嗦太多,首先需要安装openssh-server和openssh-client。 修改sshd-config配置 需要关注的就是这三行。 UsePrivilegeSeparation no #因为wsl没有实现chroot PasswordAuthentication yes ListenAddress 0.0.0.0
2021-12-18 · Windows · 约 1 分钟
Windows设置Pageant开机自动启动并且加载秘钥
场景 用Linux的时候ssh和git这些很方便,因为只要一次ssh-add就可以一劳永逸,以后需要认证的时候ssh-agent会帮我们搞定,不需要输入秘钥的密码。 其实Windows也可以实现这种生产力解放,就是用putty附带的工具里的Pageant。 Pageant主要负责和服务器端进行身份验证,但是每次在启动Pageant后都需要手动的加载秘钥文件,本文就是要介绍让Pageant开机自动加
2021-12-18 · Windows · 约 1 分钟
讨论
共 0 条加载评论中…