

StarBlog Development Notes (15): Generating Random-Size Images
Series Articles Developing a Blog Project with .NetCore: StarBlog - (1) Why Write Your Own Blog? Developing a Blog Project with .NetCore: StarBlog - (2) Environment Setup and Creating the Project Developing a Blog Project with .NetCore: StarBlog - (3) Model Design Developing a Blog Project with .NetCore: StarBlog - (4) Batch Import of Markdown Posts Developing a Blog Project with .NetCore: StarBl
目录8 个章节
Series Articles
- Developing a Blog Project with .NetCore: StarBlog - (1) Why Write Your Own Blog?
- Developing a Blog Project with .NetCore: StarBlog - (2) Environment Setup and Creating the Project
- Developing a Blog Project with .NetCore: StarBlog - (3) Model Design
- Developing a Blog Project with .NetCore: StarBlog - (4) Batch Import of Markdown Posts
- Developing a Blog Project with .NetCore: StarBlog - (5) Starting to Build the Web Project
- Developing a Blog Project with .NetCore: StarBlog - (6) Page Development: Blog Post List
- Developing a Blog Project with .NetCore: StarBlog - (7) Page Development: Post Detail Page
- Developing a Blog Project with .NetCore: StarBlog - (8) Displaying Category Hierarchy
- Developing a Blog Project with .NetCore: StarBlog - (9) Batch Image Import
- Developing a Blog Project with .NetCore: StarBlog - (10) Image Waterfall Layout
- Developing a Blog Project with .NetCore: StarBlog - (11) Implementing Visit Statistics
- Developing a Blog Project with .NetCore: StarBlog - (12) Dynamic Compilation of Razor Pages
- Developing a Blog Project with .NetCore: StarBlog - (13) Adding Friend Links
- Developing a Blog Project with .NetCore: StarBlog - (14) Implementing Theme Switching
- Developing a Blog Project with .NetCore: StarBlog - (15) Generating Random-Size Images
- ...
Preface
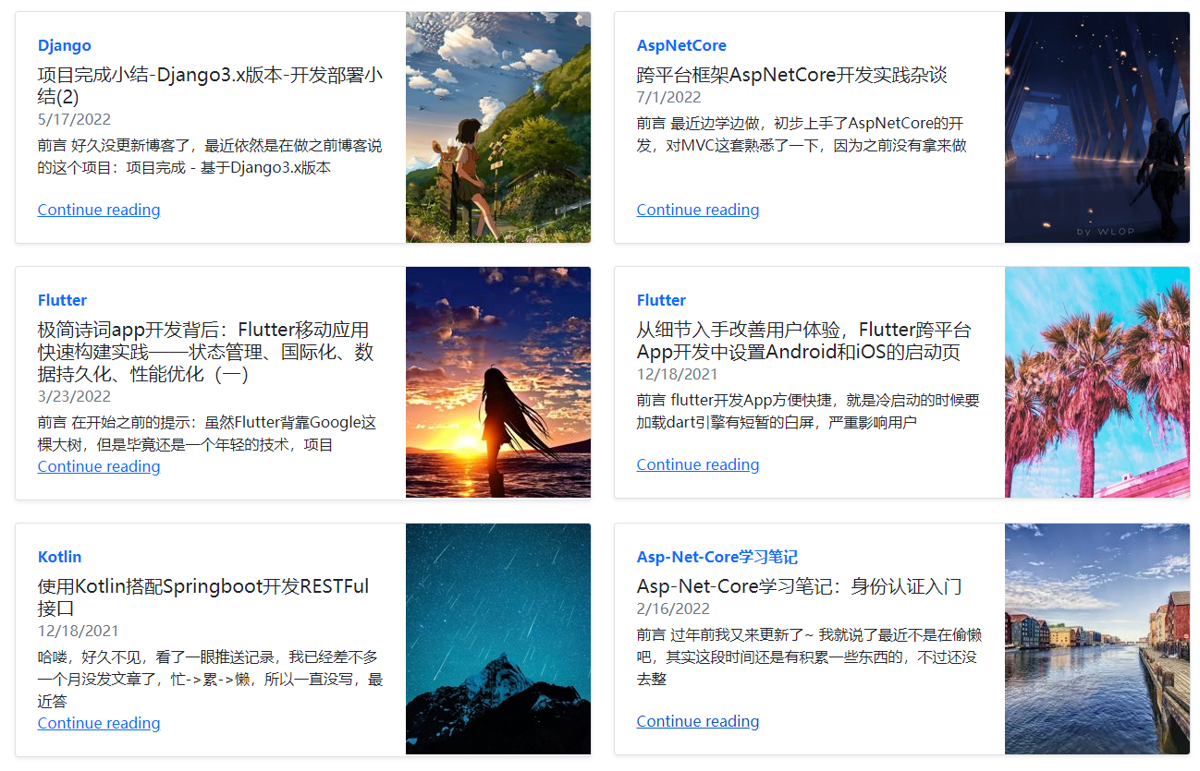
Previously I wrote an article .NetCore Image Scaling and Cropping - Based on ImageSharp, which included an algorithm for generating random-size images, and that was also the original implementation in the StarBlog blog. However, when occasionally refreshing the page I noticed some images failed to load. After debugging I found it was throwing errors—the original algorithm had a bug. So I spent the weekend reimplementing it, and now it can be considered perfect~
The random-size image generation feature is currently used on article cards. Originally it used the service provided by LoremPicsum, but its servers are overseas, and after going live I found loading was too slow and images often failed to load, so I decided to implement a version myself. The foundation of this feature is ImageSharp from the article mentioned above.
Approach
First, Let's Clarify the Requirements
- Specify a directory as the image library location, put previously collected wallpaper images into it—a few hundred should be enough
- Iterate to get the list of images in the library
- Randomly pick one image
- Scale or crop the image according to the specified size
There are also implementations of extended features such as specifying a random seed, statically mapping seeds to images, and so on.
Key Functionality
The key functionality is "scaling or cropping the image according to the specified size"
The difficulty is that when cropping and scaling images we must ensure:
- Do not change the original aspect ratio of the image
- Try to preserve the original content elements of the image as much as possible
In the first version I handled landscape and portrait images separately. (When the input size does not exceed the original image size) I first adjusted the side with the closer ratio to the same size, then cropped the middle portion. But the problem was obvious: if after resizing the other side's length was smaller than the input length, the image would be stretched, causing the aspect ratio to change.
After referring to several similar MATLAB and Python projects, I switched to a different approach:
- When the input size does not exceed the original image size, first crop according to the input size ratio, then resize
- If it exceeds the original image size, first scale the original image proportionally, then repeat step 1
An Example
For example, the original image is 1080 x 2340, and the input size is 400 x 200
First, we determine the size does not exceed the original, so no scaling is needed
Then comes "crop according to the input size ratio", simplify 400 x 200 to a 2 : 1 ratio
Crop a 2 : 1 size from the original image, i.e. 1080 x 540
Then resize the cropped image to 400 x 200, done!
Let's see the result
| Original | Output (400x200) | Output (200x300) |
|---|---|---|
 |  |  |
Although it uses a tiny bit more memory than the original approach, it genuinely improved the success rate of generating images, nice~
Code Implementation
I'll just show the code. Following the approach mentioned above, it's done in two steps, and the code is also cleaner than the original solution
async Task<(Image, IImageFormat)> GenerateSizedImageAsync(string imagePath, int width, int height) {
        await using var fileStream = new FileStream(imagePath, FileMode.Open);
        var (image, format) = await Image.LoadWithFormatAsync(fileStream);

        // 输出尺寸超出原图片尺寸,放大
        if (width > image.Width && height > image.Height) {
            image.Mutate(a => a.Resize(width, height));
        }
        else if (width > image.Width || height > image.Height) {
            // 改变比例大的边
            if (width / image.Width < height / image.Height)
                image.Mutate(a => a.Resize(0, height));
            else
                image.Mutate(a => a.Resize(width, 0));
        }

        // 将输入的尺寸作为裁剪比例
        var (scaleWidth, scaleHeight) = GetPhotoScale(width, height);
        var cropWidth = image.Width;
        var cropHeight = (int) (image.Width / scaleWidth * scaleHeight);
        if (cropHeight > image.Height) {
            cropHeight = image.Height;
            cropWidth = (int) (image.Height / scaleHeight * scaleWidth);
        }

        var cropRect = new Rectangle((image.Width - cropWidth) / 2, (image.Height - cropHeight) / 2, cropWidth, cropHeight);
        image.Mutate(a => a.Crop(cropRect));
        image.Mutate(a => a.Resize(width, height));

        return (image, format);
    }
It also uses calculating the image aspect ratio, which is simple: first find the greatest common divisor of the image width and height, then divide the width and height by this GCD respectively, and that's the ratio (i.e. simplifying a fraction)
Code for calculating the greatest common divisor
private static int GetGreatestCommonDivisor(int m, int n) {
    if (m < n) (n, m) = (m, n);

    while (n != 0) {
        var r = m % n;
        m = n;
        n = r;
    }
    return m;
}
Code for calculating the image ratio
private static (double, double) GetPhotoScale(int width, int height) {
    if (width == height) return (1, 1);
    var gcd = GetGreatestCommonDivisor(width, height);
    return ((double)width / gcd, (double)height / gcd);
}
References
- Cropping images proportionally with Python PIL: https://blog.csdn.net/lly1122334/article/details/122365539
- Python proportional image cropping: https://blog.csdn.net/chenping1993/article/details/110088858
- C# basic practice: finding the GCD and LCM of two numbers: https://blog.csdn.net/maybe_ice/article/details/104328202
_EOF_
StarBlog Development Notes (15): Generating Random-Size Images
- 本文作者:
- 程序设计实验室
- 版权声明:
- 本博客所有文章除特别声明外,均采用 BY-NC-SA 许可协议。转载请注明出处!
相关文章
StarBlog博客开发笔记(2):环境准备和创建项目
系列文章 基于.NetCore开发博客项目 StarBlog - (1) 为什么需要自己写一个博客? 基于.NetCore开发博客项目 StarBlog - (2) 环境准备和创建项目 ... 基于.NetCore开发博客项目 StarBlog - 接口返回值包装 基于.NetCore开发博客项目 StarBlog - 上传图片功能 基于.NetCore开发博客项目 StarBlog - 身份认证
2022-04-22 · StarBlog博客开发笔记 · 约 1 分钟
StarBlog博客开发笔记(21):开始开发RESTFul接口
前言 最近电脑坏了,开源项目的进度也受到一些影响 这篇酝酿很久了,作为本系列第二部分(API接口开发)的第一篇,得想一个好的开头,想着想着就鸽了好久,索性不扯那么多了,直接开写吧~ 关于RESTFul 网上很多相关的文章都要把RESTFul历史来龙去脉给复制一遍,所以我这就不重复了,现在主要的HTTP接口风格就俩:RPC和RESTFul。 举个例子就可以看出这俩的区别 RPC风格 分别是增删改查的
2023-01-02 · StarBlog博客开发笔记 · 约 1 分钟
StarBlog博客开发笔记(26):集成Swagger接口文档
前言 这是StarBlog系列在2023年的第一篇更新😃~ 在之前的文章里,我们已经完成了部分接口的开发,接下来需要使用 curl、Postman 这类工具对这些接口进行测试,但接口一多,每次测试都要一个个填入地址和对应参数会比较麻烦… 我们需要一种直观的方式来汇总项目里的所有接口,并且如果能直接在里面调试接口,那就更好了。 Swagger:诶嘿,说的不就是我吗?😎 Swagger介绍 来一段
2023-03-11 · StarBlog博客开发笔记 · 约 1 分钟
StarBlog博客开发笔记(3):模型设计
系列文章 基于.NetCore开发博客项目 StarBlog - (1) 为什么需要自己写一个博客? 基于.NetCore开发博客项目 StarBlog - (2) 环境准备和创建项目 基于.NetCore开发博客项目 StarBlog - (3) 模型设计 ... 基于.NetCore开发博客项目 StarBlog - 接口返回值包装 基于.NetCore开发博客项目 StarBlog - 上传
2022-04-22 · StarBlog博客开发笔记 · 约 1 分钟
讨论
共 0 条加载评论中…