

AMD GPUs Can Enjoy AI Image Generation Too! A Complete Guide to Deploying ROCm + ComfyUI
Deploying ComfyUI on an AMD GPU with StabilityMatrix finally put ROCm to some real use. The visual workflow is way better than those early janky config UIs, even if you still have to manually fill in missing dependencies at launch. Watching GPU utilization max out while generating images made all the hassle worth it.
目录11 个章节
Introduction
In the previous article, we successfully trained a simple CNN model with PyTorch in a Windows + AMD GPU + ROCm environment (for details, see: Training an MNIST Digit Recognition Model). That task was relatively basic, though—even a regular CPU could finish it quickly—so it was hard to bring out the performance advantages of an AMD GPU.
So today, we're taking on some scenarios that actually need GPU compute behind them—AI image generation! In today's open-source model-training scene, besides fine-tuning large models, the hottest thing is AI image generation 😄. If you're tired of playing with large models, why not try AI drawing to unwind.
Among mainstream AI image generation tools, ComfyUI is definitely a standout. Compared to SD WebUI, which I introduced before (for details, see: Getting Started with AI Drawing in Stable Diffusion), ComfyUI's biggest advantage is support for visual workflow configuration, with flexibility maxed out.
I hadn't followed open-source AI drawing tools for a while. Picking up ComfyUI again this time, I was immediately blown away—I didn't expect the toolchain to have become this complete. The barrier to deployment has dropped significantly, while the features have gotten even more powerful. Next, I'll walk everyone through setting up ComfyUI in a ROCm environment step by step, covering the full process from deployment to generating images.
StabilityMatrix
For anyone who wants to get started quickly, I recommend using StabilityMatrix to deploy ComfyUI, saving you the tedious steps of configuring the environment by hand. Here's the process in detail.
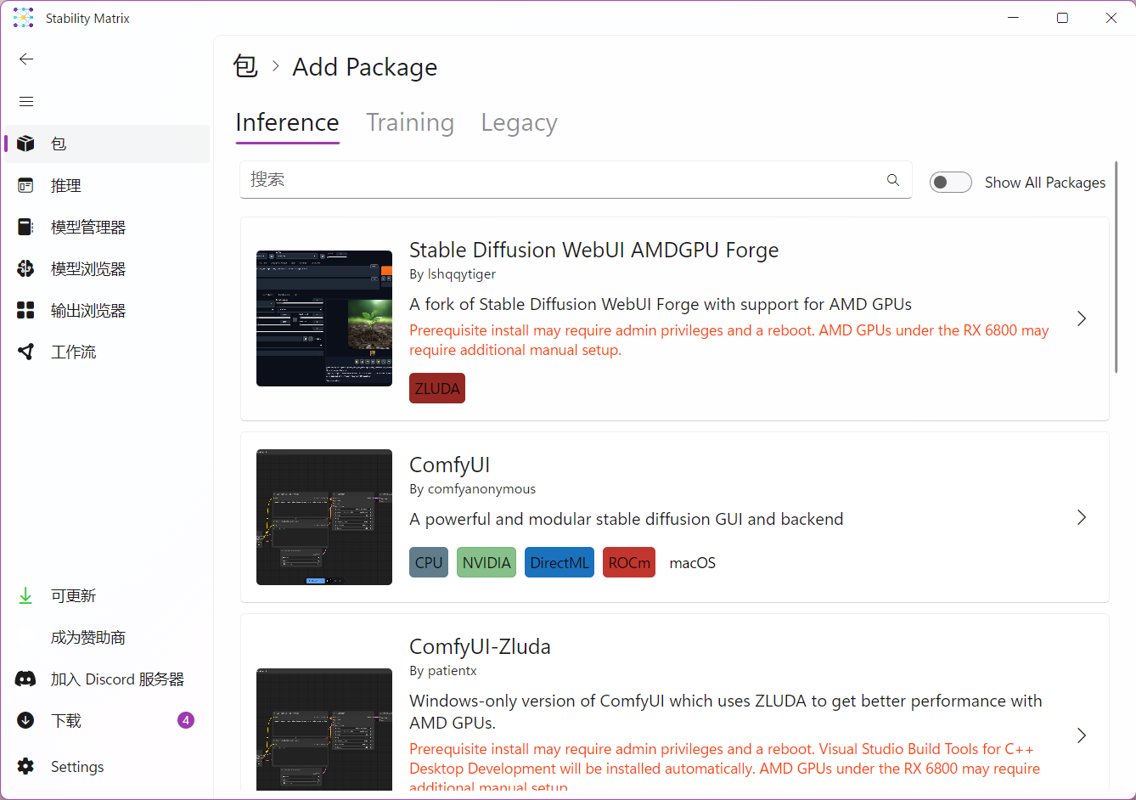
Add a package
After opening StabilityMatrix, just search for and add the ComfyUI package in the package manager. For beginners, this is the most hassle-free way and can quickly complete the basic deployment.
One note, though: if you have some technical background, I'd rather recommend cloning the official ComfyUI project from GitHub directly (official repo). Custom configuration and feature extensions later will be more flexible.
Set options
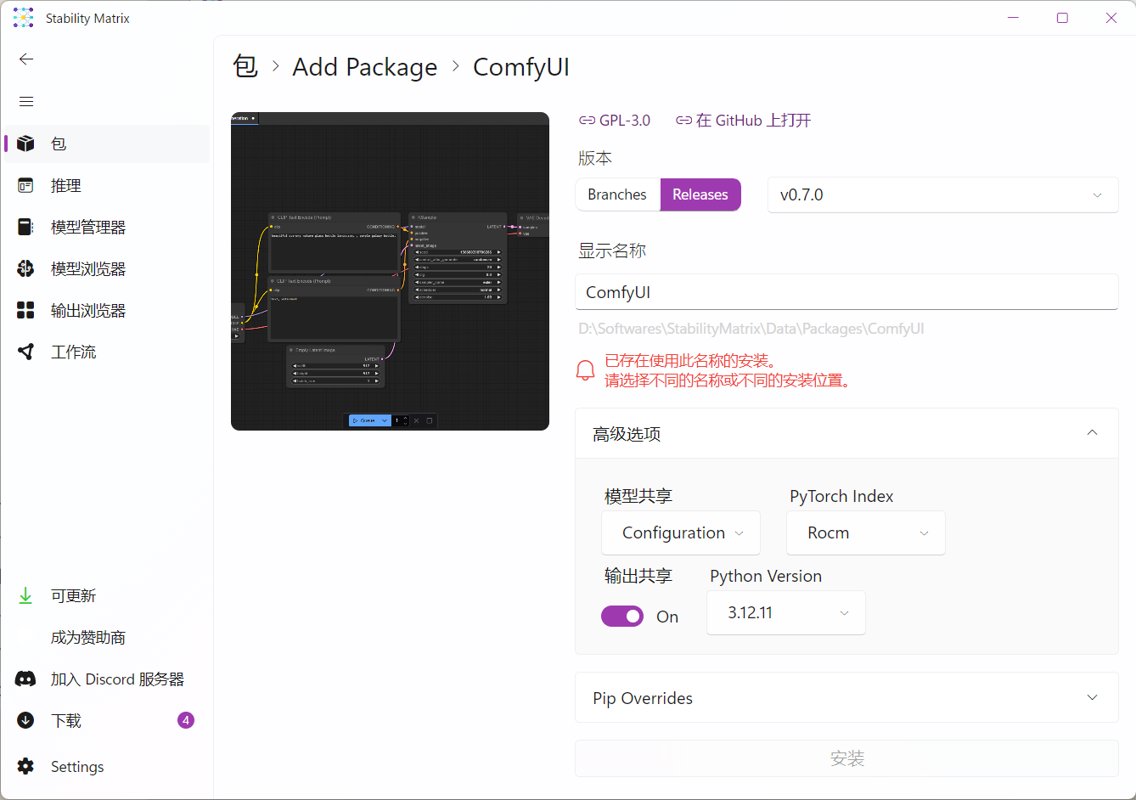
Go into the advanced options settings screen. The key is to select the ROCm environment so that ComfyUI can correctly tap the AMD GPU's compute. (Actually, later you still have to uninstall the bundled PyTorch yourself and install the PyTorch we compiled ourselves.)
Gotta complain about the model sharing feature here: this part of the settings is rather tedious, and for most users you'll probably only use ComfyUI as your one UI tool afterward, so model sharing is basically unused. That's one of the reasons I recommend people with some background clone the GitHub project directly—you can avoid these unnecessary configuration hassles.
Set parameters
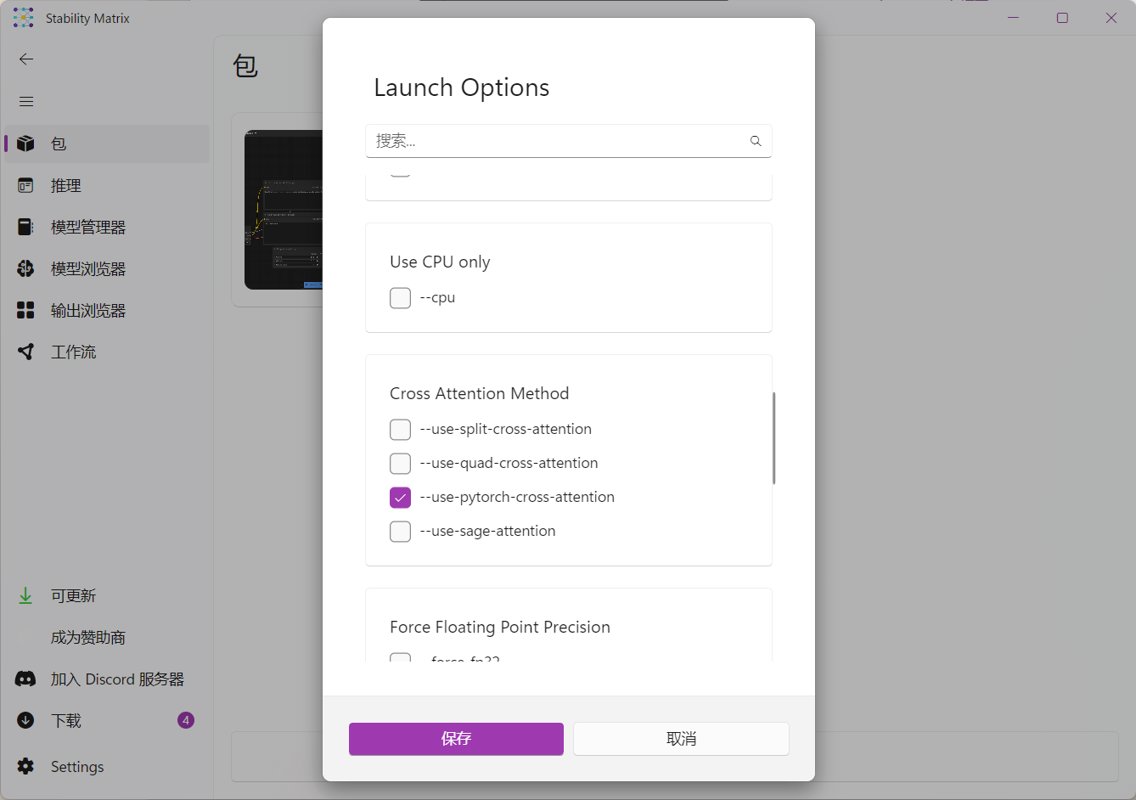
To make ComfyUI run stably on AMD GPU + ROCm and avoid issues like running out of VRAM or sluggish performance, I put together a set of optimal launch parameters. Just check them off as listed:
- --normalvram: regular VRAM mode, suitable for most mid-range AMD GPUs (such as the RX 6650 XT)
- --preview-method auto: automatically choose the preview method, balancing preview speed and resource usage
- --use-pytorch-cross-attention: use PyTorch cross-attention, improving generation efficiency
- --fp16-vae: VAE uses FP16 precision, reducing VRAM usage while keeping image quality
- --disable-xformers: disable xformers (ROCm's support for xformers is incomplete; it's more stable after disabling it)
Launch
Everything's ready—launch!
It's a bit embarrassing that it threw an error, but this line in the logs is very charming: Device: cuda:0 AMD Radeon RX 6650 XT : native
It proves that the PyTorch we compiled by hand has perfectly recognized and driven the GPU, and the gfx1032 architecture was identified correctly too.
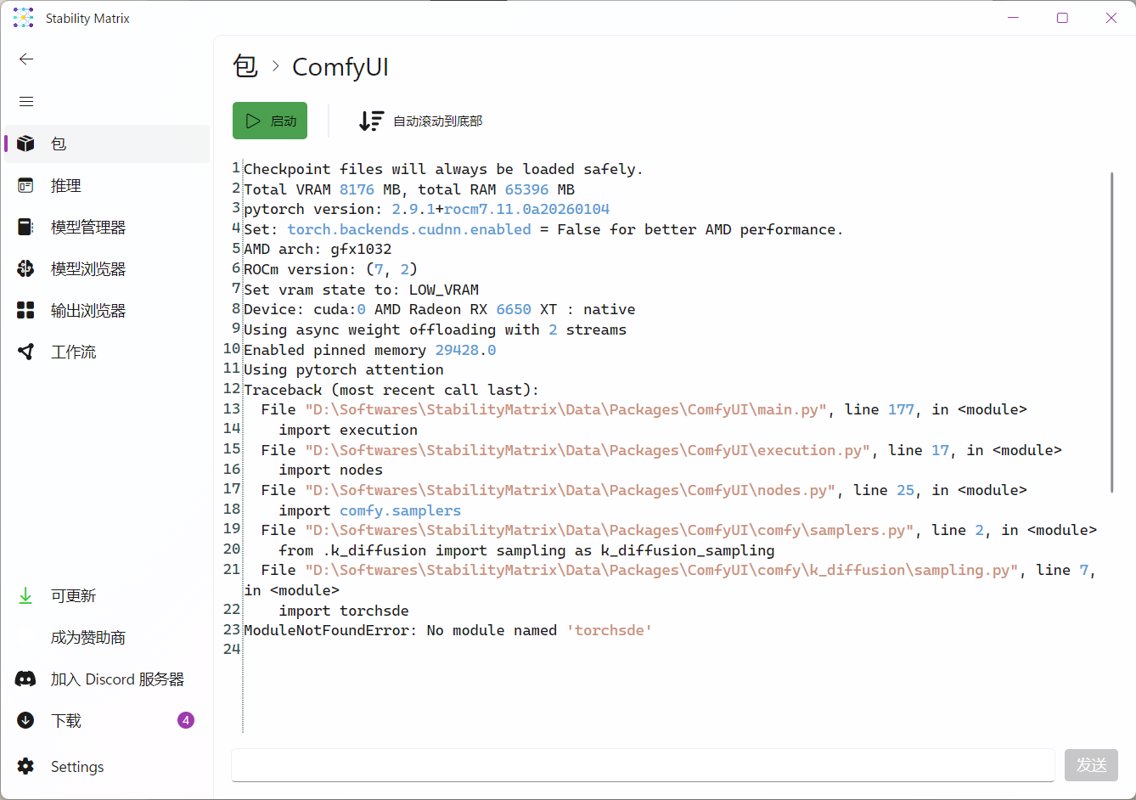
The current error ModuleNotFoundError: No module named 'torchsde' is still because of missing dependencies.
Manually enter the environment and fill in the dependencies:
cd D:\Softwares\StabilityMatrix\Data\Packages\ComfyUI
.\venv\Scripts\activate
pip install -r requirements.txt
This time it launched perfectly!
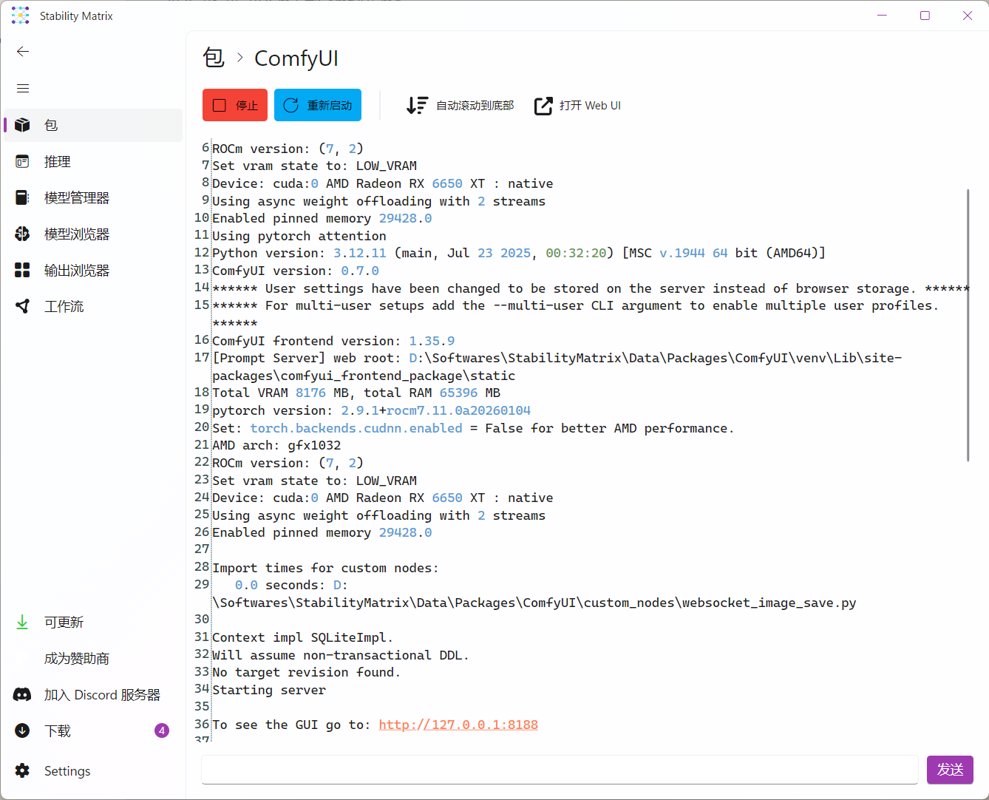
Comfy-UI
After ComfyUI starts successfully, visit the address shown in the logs in your browser (the default is http://127.0.0.1:8188) to enter the ComfyUI interface.
Whoa, at first glance I couldn't help but marvel—the toolchain is this complete now!
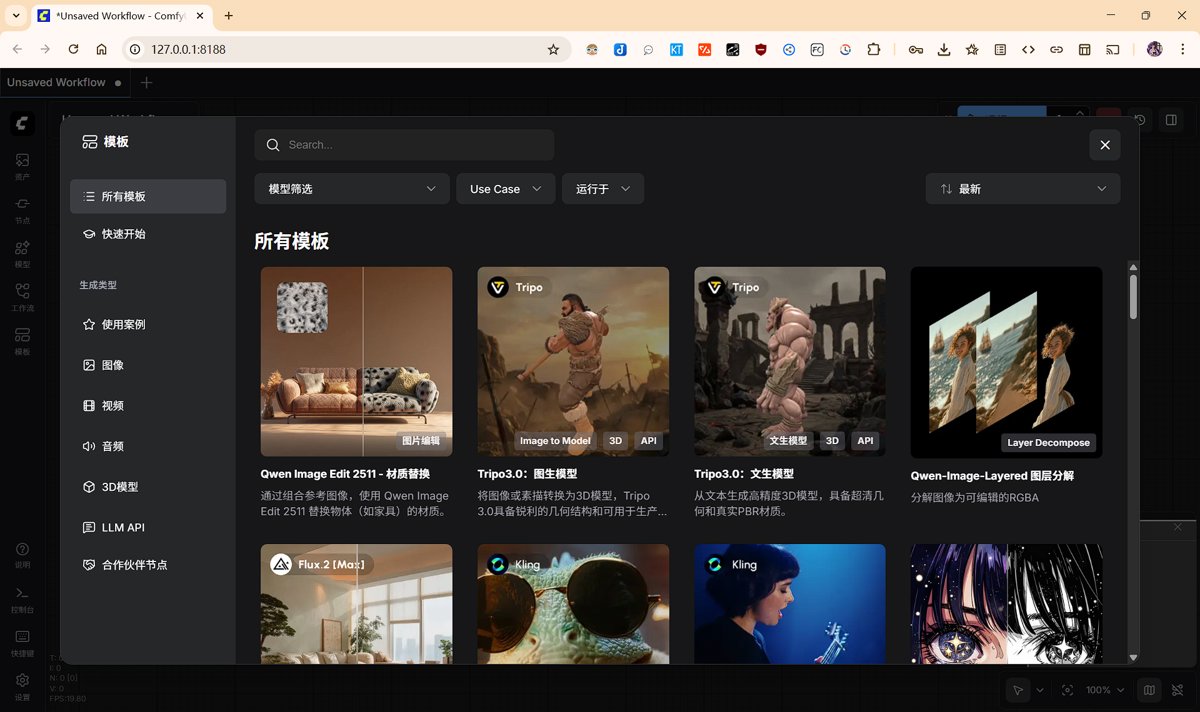
The visual workflow interface is clear and straightforward. Every functional module is visible at a glance, and the interaction logic is smooth too.
When I first played with AI drawing a few years ago, the interface still looked like this:
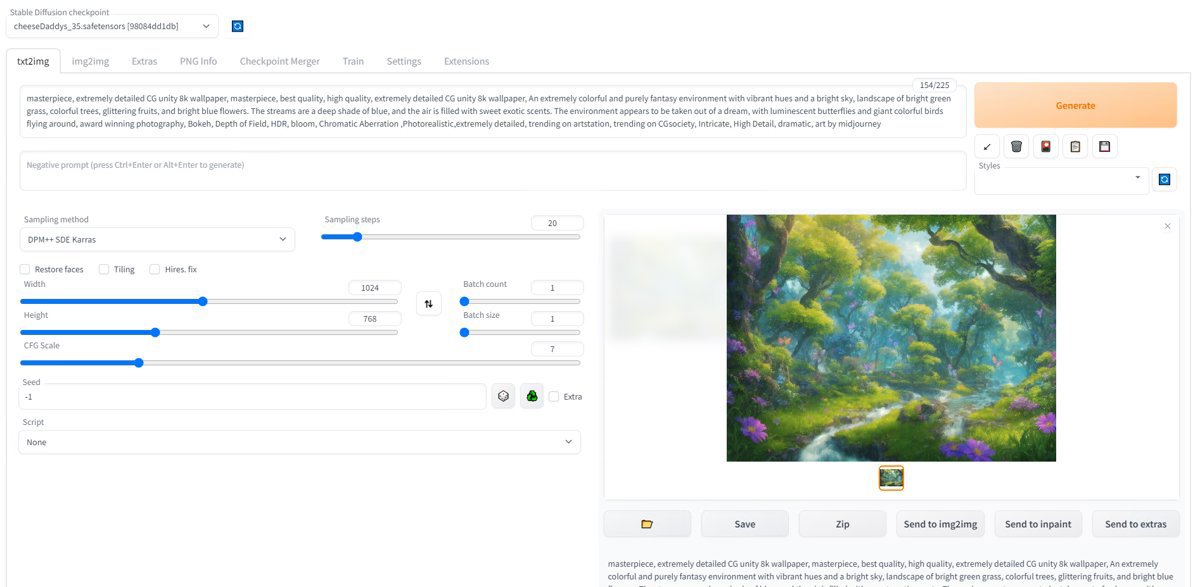
Compared to that, it's a complete dimensional stomp!
From the tedious parameter-configuration UIs of the early days to today's intuitive visual workflows, you can clearly feel the progress of the open-source community—making the barrier to AI drawing lower and lower, while flexibility keeps getting higher.
Workflow
The biggest difference between ComfyUI and traditional AI drawing tools is that it's "workflow-driven"—all generation logic is defined through workflows. You can freely combine different functional modules like building blocks, customizing the entire pipeline from prompt to final image.
For beginners, no need to rush into building your own workflow. ComfyUI has a rich built-in template library; just pick a ready-made template to get started quickly. This time I used the basic "Image Generation" template for the SD1.5 model from the template library, which is suitable for a first try.
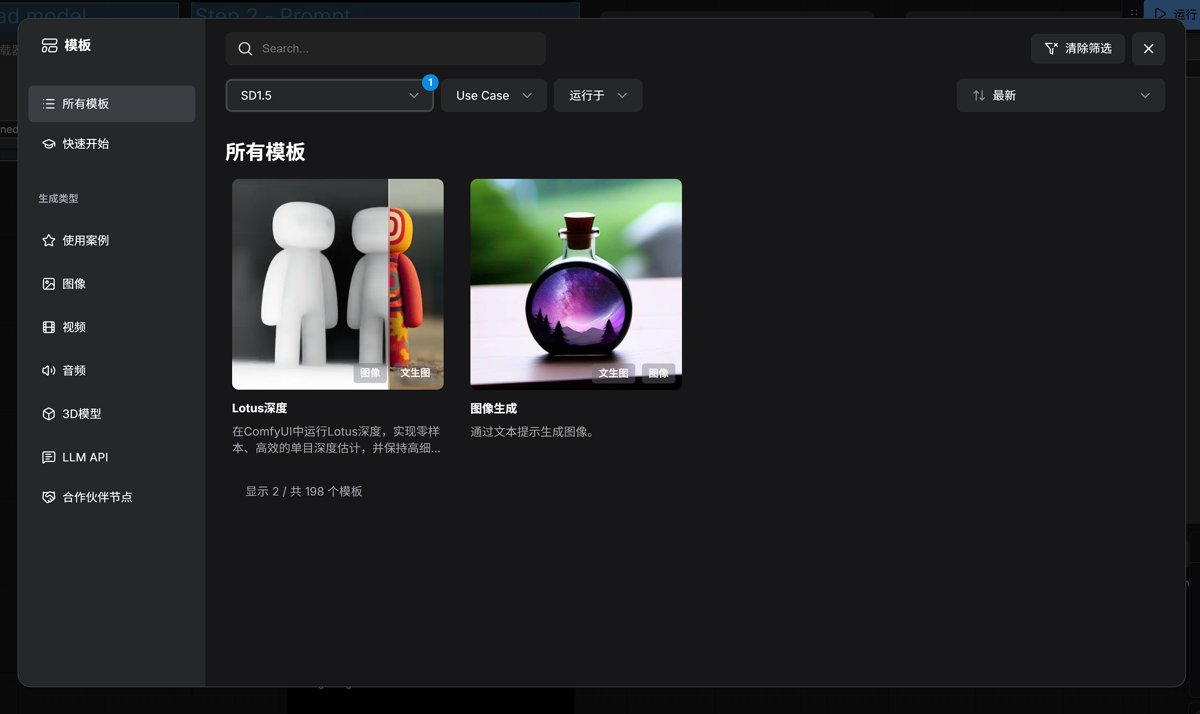
After loading the template, the initial form of the workflow appears, including core modules such as prompt input, model selection, sampler configuration, and image output. Later you can adjust parameters or add modules based on your needs:
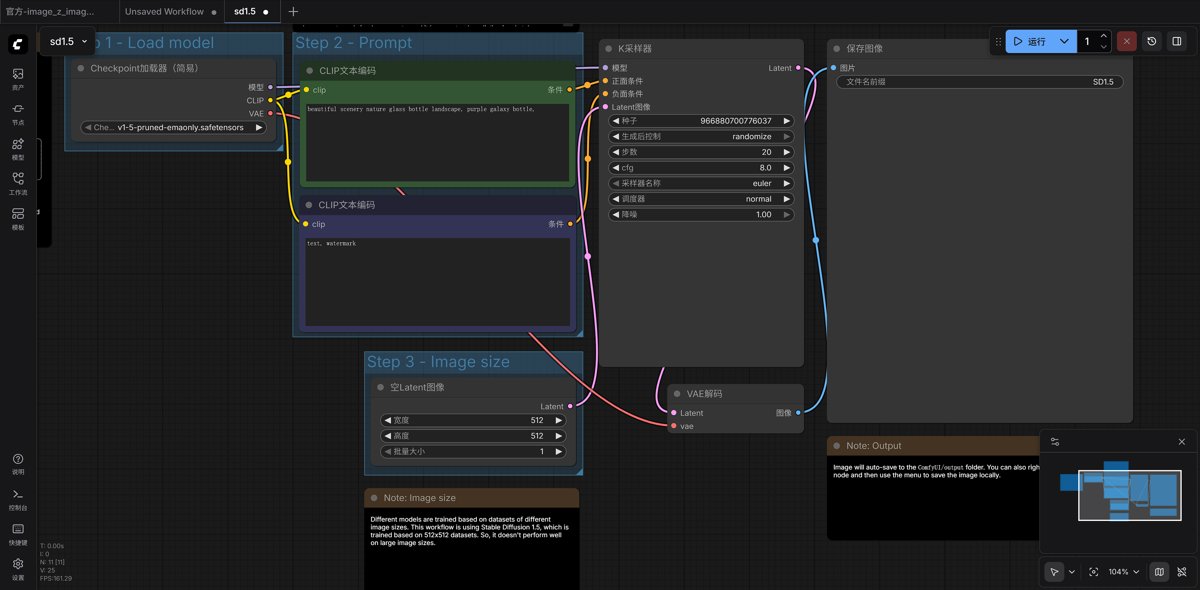
Start AI drawing
Once the workflow is loaded, you don't need to make many adjustments—you can start generating using the template's built-in prompt. Click the "Run" button in the upper-right corner of the interface, and ComfyUI will tap the AMD GPU's compute and start drawing.
From Task Manager you can clearly see the AMD GPU's utilization immediately maxed out—this is truly putting the GPU's performance advantage to work! Compared to the earlier CNN training task, AI drawing demands more compute power, and better demonstrates the value of setting up the ROCm environment.
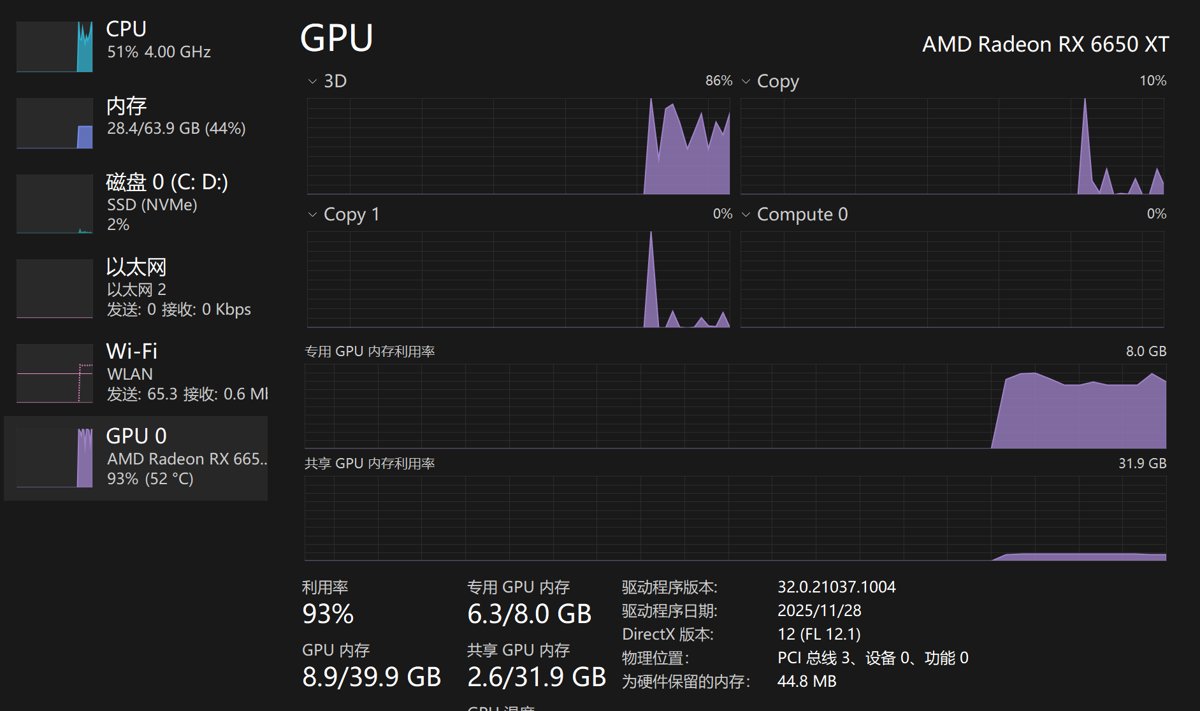
Output results
Using the built-in template's prompt: beautiful scenery nature glass bottle landscape, purple galaxy bottle (beautiful natural scenery glass bottle landscape, purple galaxy bottle)
After waiting a few dozen seconds, the generated image exceeded expectations—harmonious color matching, rich details, with both the glass bottle's texture and the galaxy's dreamlike quality coming through well. For a beginner trying this for the first time, this result is already quite satisfying.
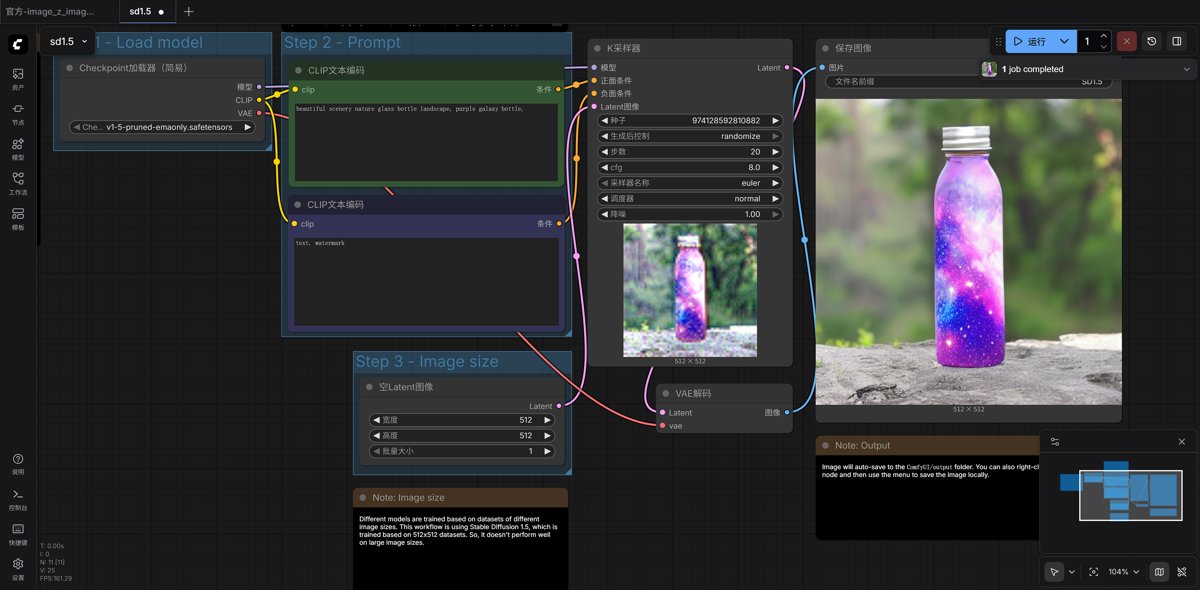
Recap
This time we successfully deployed ComfyUI quickly via StabilityMatrix in a Windows + AMD GPU + ROCm environment, and completed our first AI drawing. Going through the whole process, the biggest takeaway is: AMD GPUs' AI ecosystem is getting more and more complete nowadays. AI drawing scenarios that used to be "NVIDIA-exclusive" can now be easily done by AMD GPU users through ROCm, and the experience doesn't fall short.
To sum up the key points: first, StabilityMatrix can deploy ComfyUI quickly and is beginner-friendly; second, launch parameters for the ROCm environment need to be configured correctly to avoid stability or performance issues; third, ComfyUI's visual workflows are very flexible—beginners can start from templates and gradually explore custom workflows later.
Later you can try swapping in different models and tweaking prompts and sampling parameters to further improve generation results. If you run into problems during deployment or use, feel free to discuss in the comments~
_EOF_
AMD GPUs Can Enjoy AI Image Generation Too! A Complete Guide to Deploying ROCm + ComfyUI
- 本文作者:
- 程序设计实验室
- 版权声明:
- 本博客所有文章除特别声明外,均采用 BY-NC-SA 许可协议。转载请注明出处!
相关文章
Windows + AMD ROCm + PyTorch:debuff拉满的6650xt A卡炼丹折腾经历
用6650XT在Windows上跑PyTorch?AMD官方都不支持这卡,还得自己编译ROCm。折腾一晚上环境变量和编译错误,结果连个wheel都没生成出来。所以为什么非要在Windows上给A卡炼丹?
2026-05-09 · ROCm · 约 1 分钟
Windows + AMD 显卡,终于能用 PyTorch 炼丹了
Windows+AMD+ROCm+PyTorch这地狱级组合居然跑通了。无非是用了官方ROCm和保守的PyTorch 2.9.1,避开新版本那些破事。下一步?总算能试试炼丹和AI画图了。
2026-05-09 · ROCm · 约 1 分钟
ROCm on Windows 性能排查:RX 6650 XT 跑 PyTorch,为什么加速不明显?
自编译折腾半天,加速不到2倍?小模型+Windows+gfx1032非官方支持,能有这个速度算给面子了。别指望生产环境,当实验玩具玩吧。
2026-05-09 · ROCm · 约 1 分钟
打包ROCm环境的相关Wheel方便后续使用
呵,折腾半天才发现没法从site-packages直接提取Wheel,还得从官方源重新拖。几个G的ROCm全家桶,预编译好的二进制乐高,省得下次再对着源码干等几小时。
2026-05-09 · ROCm · 约 1 分钟
讨论
共 0 条加载评论中…