

I Also Got Into Tinkering With Hackintosh, and Succeeded~
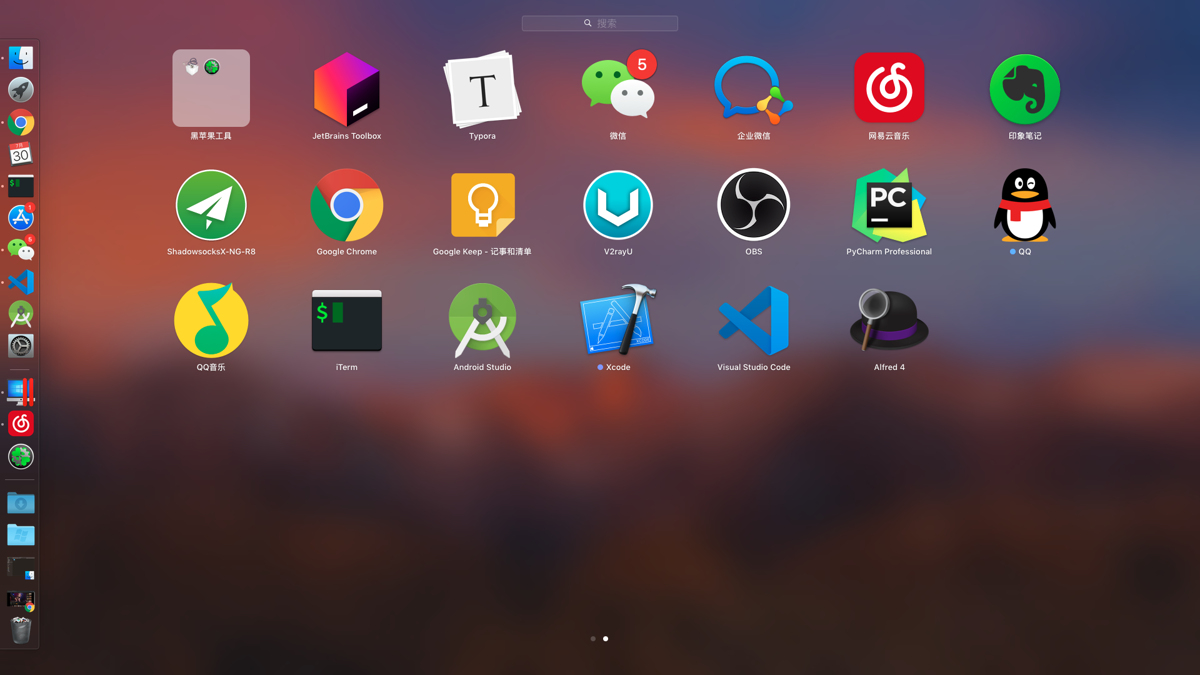
Preface Windows is really too hard to develop on... Linux would originally have been the best choice, but it's missing too much software. Things like WeChat and QQ—don't even think Tencent would develop them for you. The Wine versions are laggy, and the web versions can't send stickers = = So it's pretty frustrating, and there aren't many options left. The only remaining choice is a Mac, but Apple computers are expensive and have poor value for money—how could I possibly buy a Mac? So Hackintosh it is~~ Let me put a screenshot of the desktop first, so people don't get put off by too much text later. Actually, I already knew about this thing called Hackintosh before
目录8 个章节
Preface
Windows is really too hard to develop on... Linux would originally have been the best choice, but it's missing too much software. Things like WeChat and QQ—don't even think Tencent would develop them for you. The Wine versions are laggy, and the web versions can't send stickers = = So it's pretty frustrating, and there aren't many options left. The only remaining choice is a Mac, but Apple computers are expensive and have poor value for money—how could I possibly buy a Mac? So Hackintosh it is~~
Let me put a screenshot of the desktop first, so people don't get put off by too much text later.
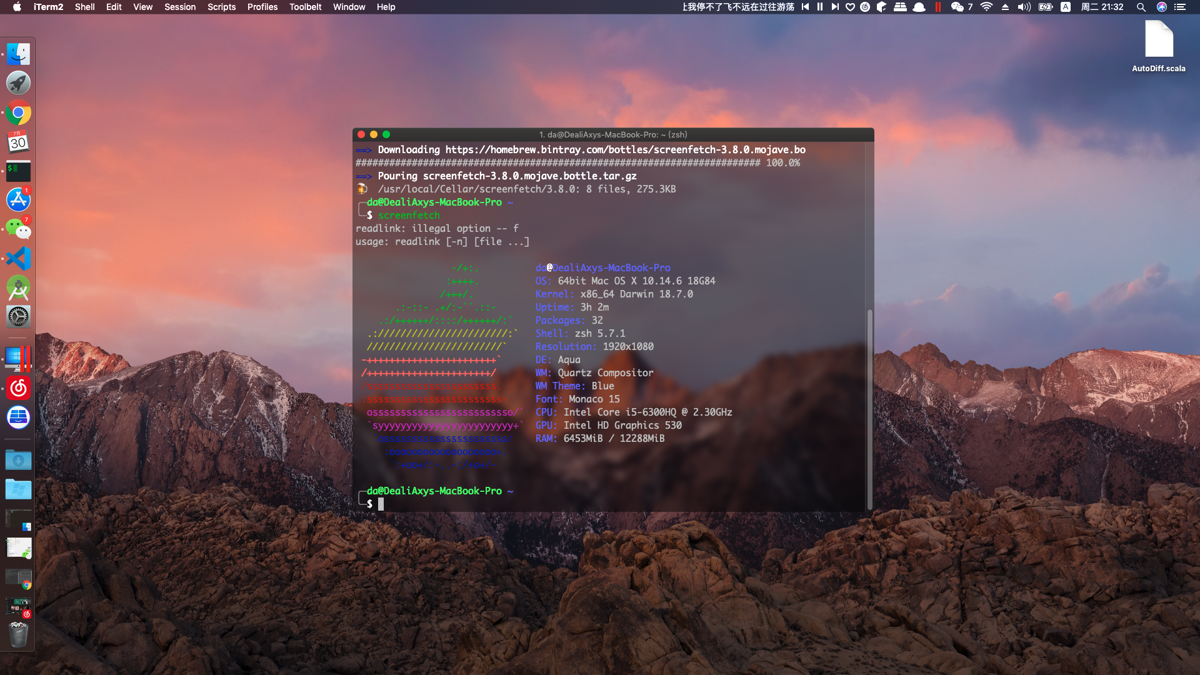
Actually, I already knew about this thing called Hackintosh before. With my personality of liking to try new things and tinker, I should have started long ago. But after looking at various tutorials from others on forums, I always felt it was too complicated. Plus I have quite a lot of things to do right now, so I felt that just tinkering with Hackintosh would be too much of a waste of time. Time is precious = = So I never got around to Hackintosh.
Until recently, the motherboard of my ASUS gaming laptop broke. I got it repaired, and now I have three computers, so I figured I'd try installing Hackintosh on it to test the waters. At first I thought of finding a Taobao seller to install it for me. Not trying would have been fine, but after trying, Taobao's waters really run too deep. First of all, I can't say there are no reliable Hackintosh sellers on Taobao, but based on my two experiences with Taobao Hackintosh, those Tmall sellers ranked highest in sales are all super scammy. All the positive reviews are fake (low labor costs sure are nice). Let me talk about how these sellers rip you off:
- First, their method of installing Hackintosh is to have you download a pre-made recovery image, then use the software Paragon Disk to restore the system they previously packaged onto your hard drive. What really gets me is that this image even has a password added so you won't steal it... This method is pretty much like the Ghost installs of pirated Windows at computer malls ten years ago. It feels like it could damage the hard drive, and since it's not a clean system you don't know what bundled stuff is inside.
- Then, let's not even talk about whether these sellers' so-called “technicians” actually have any skills, but they are really irresponsible. After flashing this universal image onto your hard drive, as long as you can boot into the system that's good enough for them. They don't care whether your other hardware can be driven. Like my machine—after the seller flashed the image I could boot, then no Wi-Fi, and no sound. The seller just told me to plug in an Ethernet cable, and said the sound was unsolvable... And their attitude was pretty bad. I wanted a refund and they wouldn't allow it. After I said I would leave a negative review they called me several times in a row to harass me. I was truly speechless...
Anyway, that's how it is. I don't want to buy a real Mac (too expensive), and Taobao services are scammy, so I had to tinker myself. Holding onto the belief that there's nothing computer-related I can't figure out, let's begin~
Basic Knowledge Preparation
Apple doesn't seem to restrict what hardware the Mac system can be installed on, but the Mac product line is very limited, so the hardware supported by the Mac system is also quite limited, which is why Hackintosh is picky about hardware~
The mainstream approach now is to use Clover to emulate a Mac motherboard, thereby booting the Mac system. That is, you install Clover to the EFI partition, then install the Mac system to a partition with enough space, and you can boot. But just doing that still isn't enough, because you still need to drive other hardware...
Hackintosh drivers all go in Clover's kexts folder, so the most important step in installing Hackintosh is choosing a combination of kext files that suit your computer's hardware. Get it right and you can use Mac.
The usual approach is to disable the discrete GPU (you ask, didn't I lose money buying a 1060ti graphics card? That's right, a total loss), then adapt the iGPU, Wi-Fi, Bluetooth, sound card and such hardware. These aren't big problems. Just Google the corresponding hardware model + kext/mac/hack, and with these keywords you can find the corresponding kext files. (If you really can't find them, just accept defeat. If you can replace the hardware, replace it; if you can't, give up on Hackintosh.)
For Hackintosh I'll assume you already have a Windows system (duh, if you had a Mac why would you Hackintosh). First you need a system image, then a USB drive, to make a boot disk~ Then slowly tweak the kexts.
Enough talk, let's start the steps.
Making the Boot Disk
First prepare a USB drive of 8GB or larger~
Go download the original system image. I installed 10.14.6. You can download it here: https://blog.daliansky.net/macOS-Mojave-10.14.6-18G84-Release-version-with-Clover-5027-original-image.html#more
Oh right, use the etcher tool to make the installer disk~
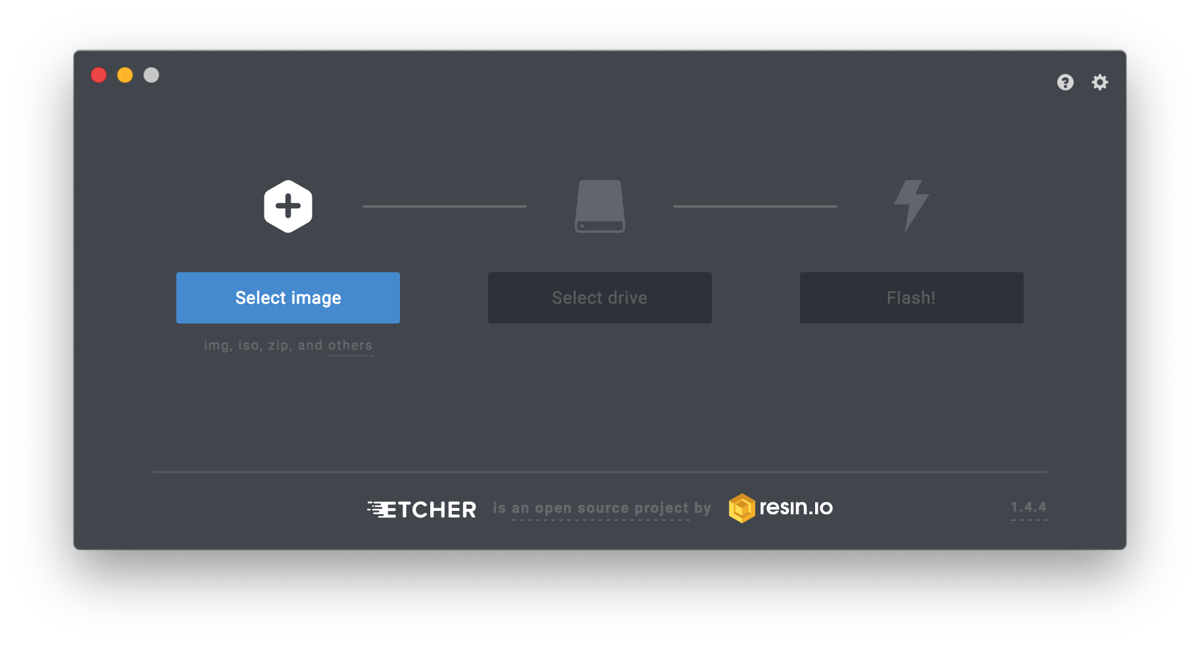
Then you can get started.
Entering System Installation
After making the boot disk, restart and enter Mac system installation. If you can't even get in this far, first look for Clover files for your model. First mount the USB drive's EFI partition under Windows (recommend using the system's built-in diskpart command). You can also use something like DiskGenius.
Mounting the EFI partition with diskpart is actually very simple, roughly as follows:
diskpart
list disk # 显示出所有磁盘
sel disk 2 # 选择你的U盘,具体几号自己看
list part # 显示所有分区
sel part 1 # 一般EFI分区都是第一个
assign letter=k # 分配一个盘符,具体多少自己定
Then Windows might have another frustrating part: after assigning a drive letter, you still can't open the drive, saying something about no permission... I'm done. At this point you can open PowerShell with administrator privileges, type notepad, click Open, and isn't there a file browse dialog in there? Just operate from there. Anyway that's about it. It's a bit of a hassle, nothing you can do, Windows is really trash.
Then prepare an empty partition. After entering the Mac installer interface, select Disk Utility.
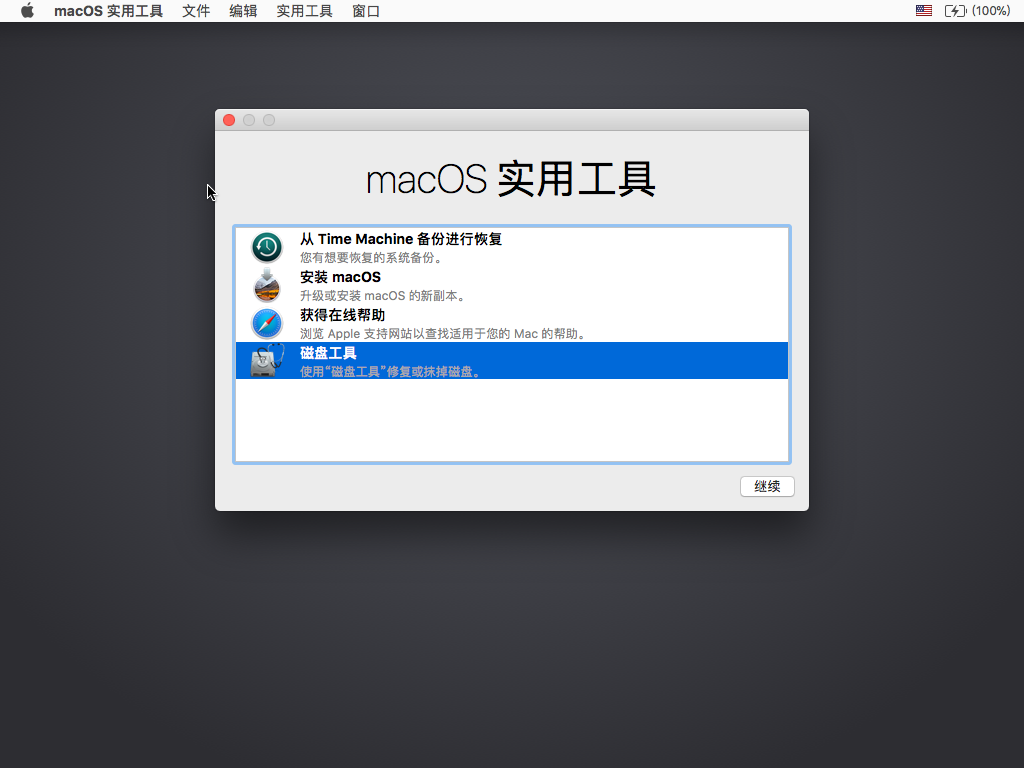
Erase that empty partition, choose Mac OS Extended or APFS format, both should be ok.
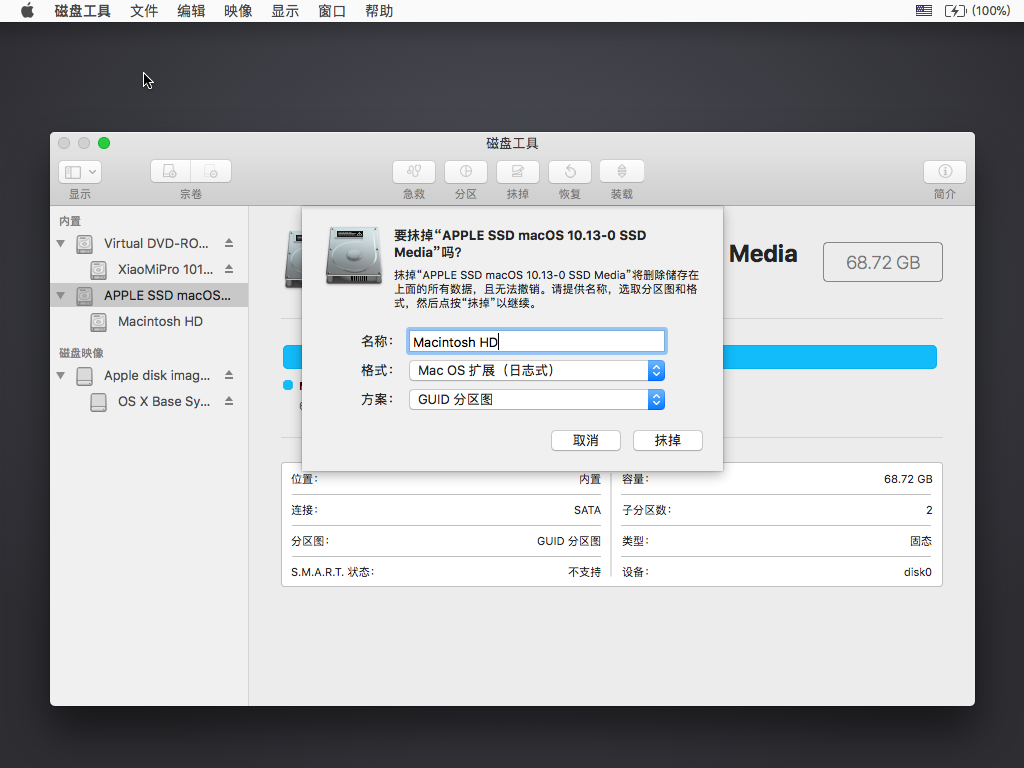
Then install onto this partition.
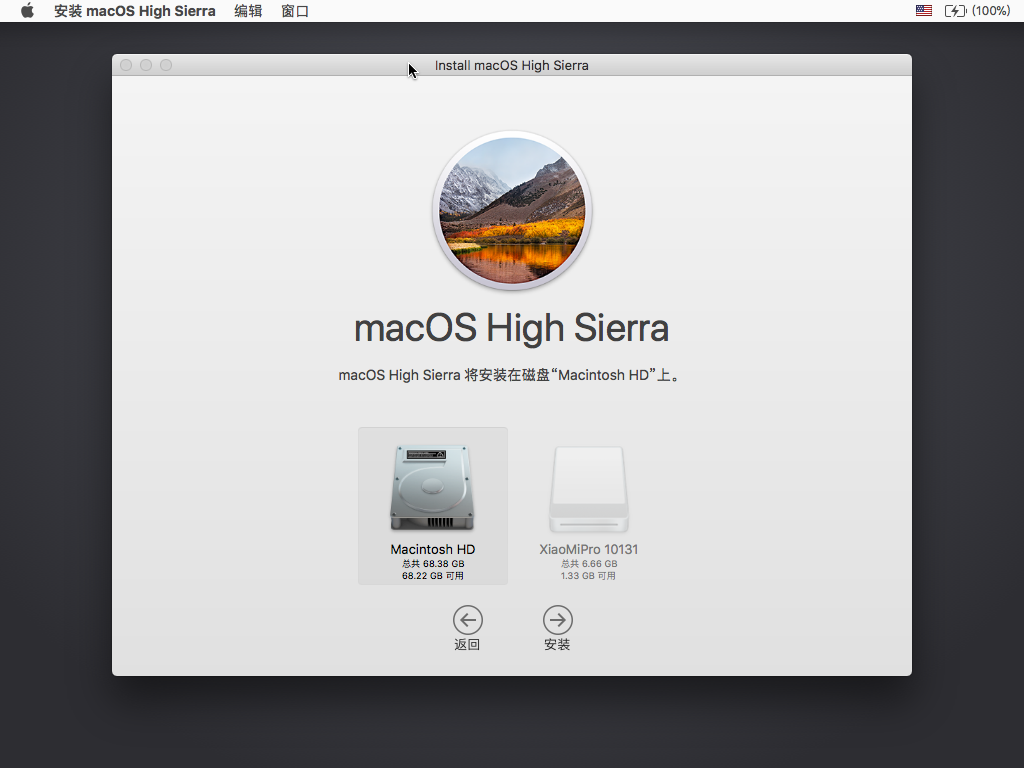
Then after going through various hardships, the Mac system is installed. At this point restart, don't pull out the USB drive, because you haven't installed Clover to the computer's EFI partition yet. If you pull out the USB you won't be able to reboot.
Restart and continue into the Mac system, for further installation and system setup.
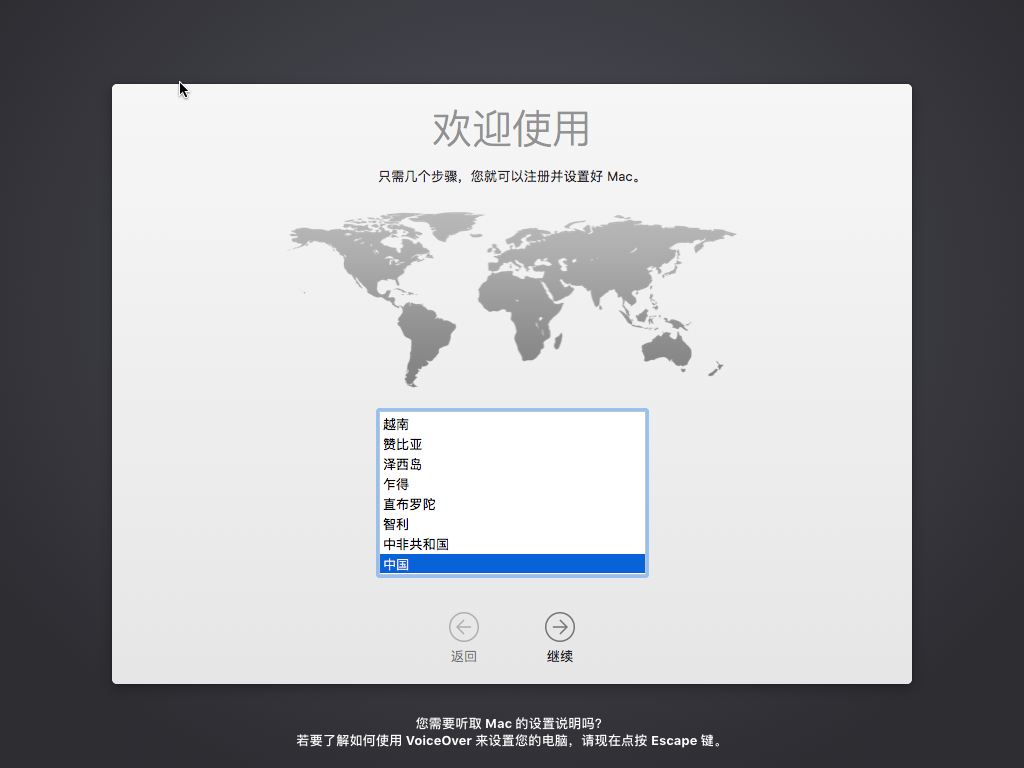
Configuration After Entering the System
If you can restart and enter the system, that proves the previous configuration and such is all ok, so you can copy Clover from the USB drive to the local machine's EFI partition. The method was roughly introduced above; you can likewise do it under Windows.
On Mac you need two tools, Kext Utility and Clover Configurator. Please download them yourself.
On Mac, use this Clover Configurator to mount the EFI partition, as shown.
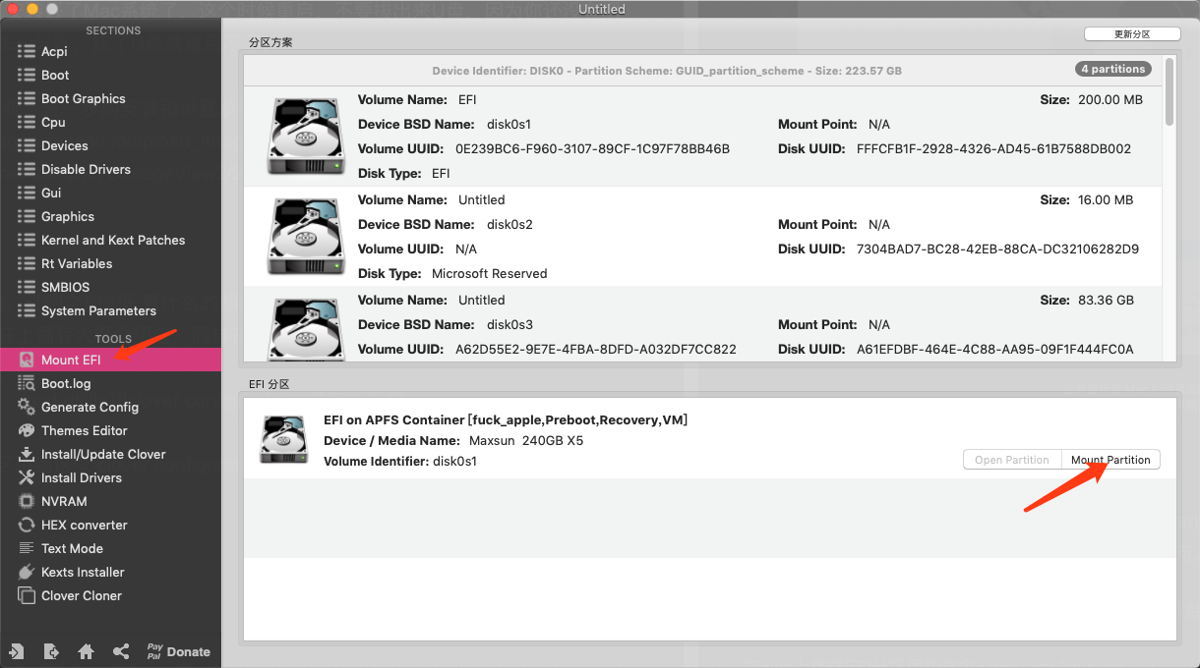
Then Kext Utility's purpose is to repair the permissions of kext files in /S/L/E (/System/Library/Extensions), and it also makes it convenient for you to add kext files to this folder. As soon as you open it, it will automatically set the permissions in /S/L/E. I won't take a screenshot.
Results
Let me put up a few screenshots. Doesn't seem like much = = The interface is rather rigid, the terminal isn't as good as Linux, file management isn't as good as Windows, but at least it's Unix-based. The upside is development is better than Windows, and there's more software than Linux. A compromise~
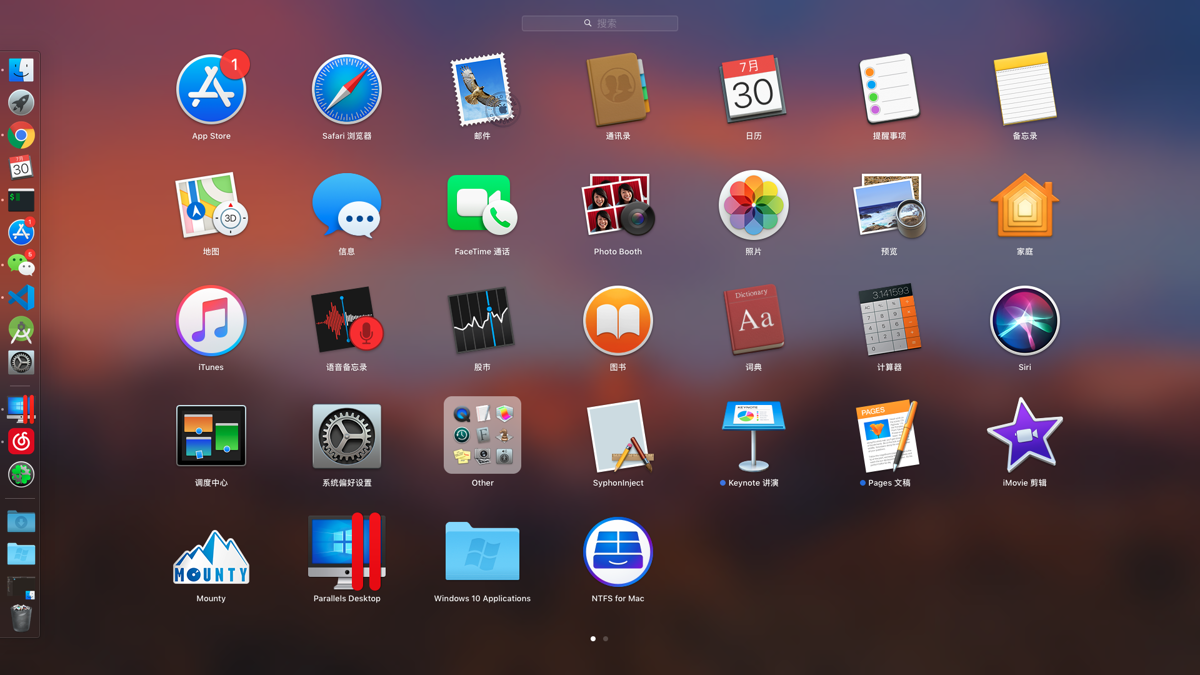
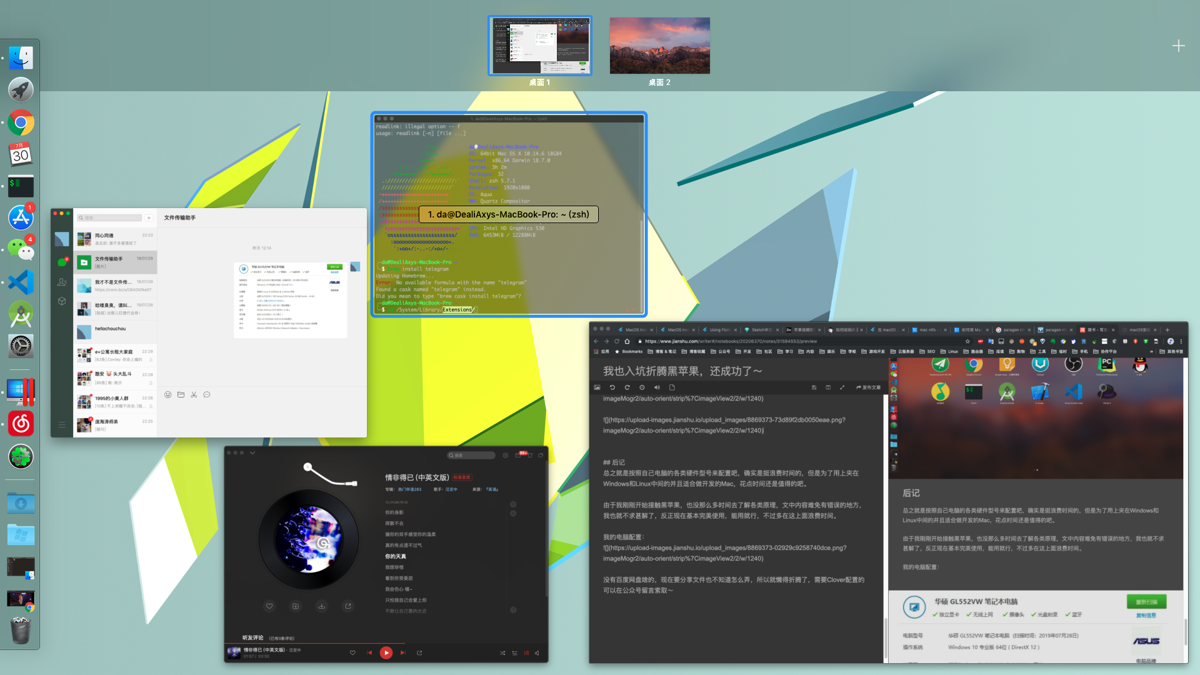
Things not yet perfected:
- Trackpad doesn't work
- Bluetooth signal seems rather weak = =
Folks with the same model machine can chat with me~
Afterword
In short, just configure according to your computer's various hardware models. It really is quite a waste of time, but to use a Mac that's sandwiched between Windows and Linux and suitable for development, spending a bit of time is still worth it, right.
Since I've only just started with Hackintosh, and don't have that much time to understand all the various principles, the content in this article inevitably has some errors. I won't seek a thorough understanding. Anyway I can basically use it perfectly now. As long as it works, that's enough—won't waste more time on this.
My computer specs:
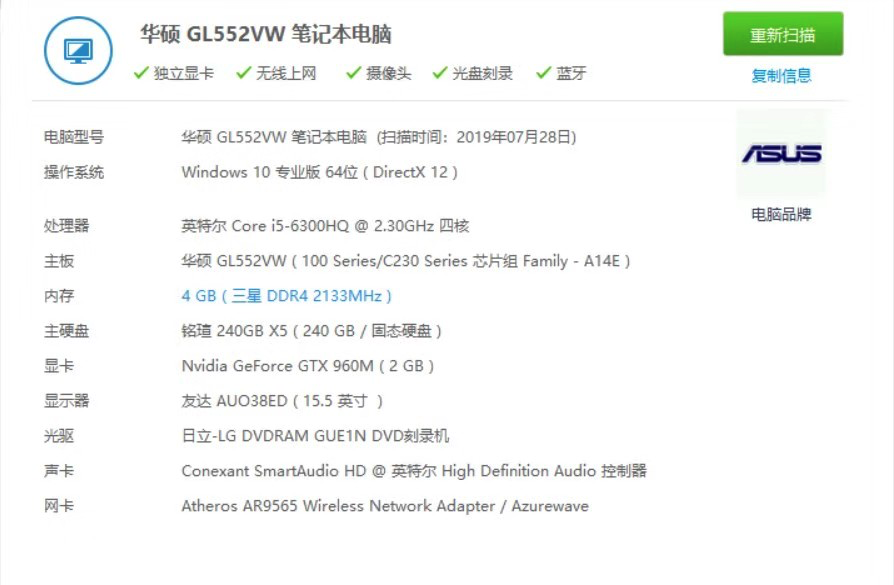
I don't have Baidu Netdisk or anything. I don't even know how to share files now, so I can't be bothered. If you need the Clover config you can leave a message on the WeChat official account to request it~
Feel Free to Chat With Me
- Coding livestream: https://live.bilibili.com/11883038
- WeChat official account: DealiAxy
- Zhihu: https://www.zhihu.com/people/dealiaxy
- Blog: https://blog.deali.cn
- Jianshu: https://www.jianshu.com/u/965b95853b9f
_EOF_
I Also Got Into Tinkering With Hackintosh, and Succeeded~
- 本文作者:
- 程序设计实验室
- 版权声明:
- 本博客所有文章除特别声明外,均采用 BY-NC-SA 许可协议。转载请注明出处!
相关文章
轻松解决百度云限速问题
前言 360网盘关闭后,百度网盘似乎要成为国内网盘的唯一选择,但百度的“吃相”难看,无论你用多大的带宽,只要没有会员,下载速度永远都是是100k/s,稍微大一点的文件就需要安装客户端才能下载,烦人得很。 今天介绍一种非常简单的方法解决百度云的限速问题。需要用到Tampermonkey浏览器插件和百度云下载脚本。 Tampermonkey介绍 Tampermonkey 是一款免费的浏览器扩展和最为流
2021-12-18 · 杂七杂八 · 约 1 分钟
喆大师写给前端的一些建议
书籍推荐 《 jvascript高级程序设计(第三版) 》 偏字典书籍,江湖人称望远镜,红宝石书,红皮书,更多叫法等你去发现 《 javascript权威指南(第五版)》 就是字典,江湖人称 犀牛书,特点:厚,全 《 javascript语言精粹 》 一位在 js 界很有权威的人写的书,作者是json的发明者 江湖人称 蝴蝶书,特点:薄 完全就是在讲 js 语法,不涉及前端,顺便屌了一些开发人员
2021-12-18 · 杂七杂八 · 约 1 分钟
一些实用工具软件记录
CrystalDisk系列 https://crystalmark.info/en/download/ CrystalDiskInfo CrystalDiskMark 磁盘空间分析 推荐 wiztree,速度很快 https://diskanalyzer.com/download
2022-11-06 · 杂七杂八 · 约 1 分钟
解决Chrome浏览器强制http重定向到https的问题
在chrome地址栏中输入 chrome://net-internals/ 选择 Domain Security Policy 在 Delete domain security policies 标签里输入要删除的域名
2021-12-18 · 杂七杂八 · 约 1 分钟
讨论
共 0 条加载评论中…