

Django Rapid Development Practice: A Guide to the DRF Framework and xadmin Configuration
Steps Since this is rapid development, I won't beat around the bush—straight to the steps: Install Django Install Django Rest Framework Define models Define Rest framework serializers Define Rest framework viewsets Configure the Rest framework router Configure the admin backend Write templates and corresponding views as needed After these steps you'll have a website with a complete backend
目录12 个章节
Steps
Since this is rapid development, I won't beat around the bush—straight to the steps:
- Install Django
- Install Django Rest Framework
- Define models
- Define Rest framework serializers
- Define Rest framework viewsets
- Configure the Rest framework router
- Configure the admin backend
- Write templates and corresponding views as needed
After these steps you'll have a website with a complete backend API and an admin management interface; if you write templates, you can cover the frontend work as well.
Next I'll record my development practice in the order mentioned above.
Define models
Doesn't seem like there's much to say. Django 3 added a few new features; you can define choices with a class, which is more convenient than the old tuple definition. Other than that, nothing much. Oh right, when defining ManyToMany it's best to set a related_name, which makes reverse lookups in code easier later.
Define serializers
This is really simple: just tell the framework which fields of the model you need to serialize. Official docs: https://www.django-rest-framework.org/tutorial/1-serialization/
Code example:
from .models import *
from rest_framework import serializers

class StudentSerializer(serializers.ModelSerializer):
    class Meta:
        model = Student
        fields = ['name', 'gender', 'number', 'faculty', 'major', 'year']
Here's the model code for this Student:
class Student(models.Model):
    name = models.CharField('姓名', max_length=10)
    gender = models.IntegerField('性别', default=1, choices=GenderChoices)
    number = models.CharField('学号', max_length=20, blank=True)
    faculty = models.CharField('学院', max_length=20, blank=True)
    major = models.CharField('专业', max_length=20, blank=True)
    year = models.CharField('届别', max_length=4)

    def __str__(self):
        return self.name
Define viewsets
It's just wiring the queryset and serializers together.
Here's the code, corresponding to the student serializers above.
from rest_framework import viewsets
from .models import *
from .serializers import *

class StudentViewSet(viewsets.ModelViewSet):
    queryset = Student.objects.all()
    serializer_class = StudentSerializer
Configure the router
You can think of it as Rest Framework's urls configuration.
Code:
from rest_framework import routers
from core import views

router = routers.DefaultRouter()
router.register('user', views.UserViewSet)
Then add it to Django's urls configuration:
urlpatterns = [
    path('admin/', admin.site.urls),
    path('api/', include(router.urls)),  # 这里
    path('api-auth/', include('rest_framework.urls')),  # 和这里
]
Clean and neat. This router should be nestable like urls, but I haven't studied Rest Framework in depth, so I don't know about that; I'll check the docs later if I need it.
Simple reference docs for drf:
Configure the admin backend
This step can actually be done earlier, right after you've defined the models, which makes managing data convenient.
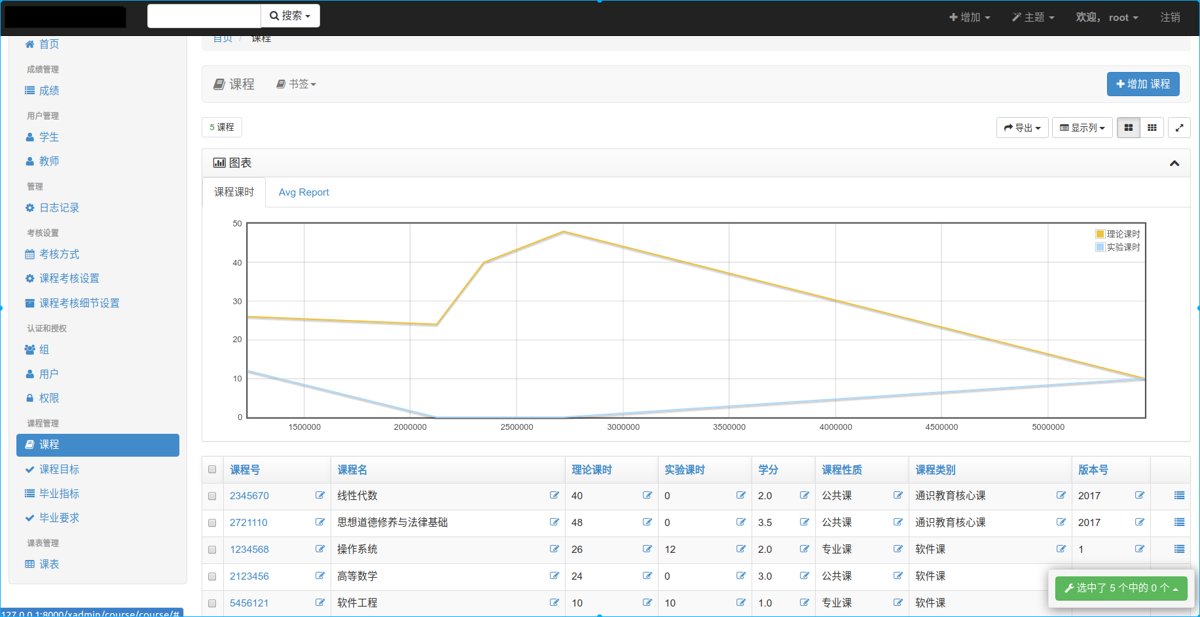
Django's built-in admin is pretty powerful and can save a lot of admin backend development work for small and medium-sized sites, but the default UI is pretty ugly—anyone who's used it knows that. You still want to use it though, so what do you do? Beautify it, of course. I used to only know about the xadmin library, developed by a Chinese author, based on a Bootstrap 3 UI, rewriting the entire admin codebase. The UI looks a lot better, but unfortunately there are lots of bugs, and there's almost no documentation; implementing many features you can only go read the code. The experience is terrible and seriously hurts development efficiency… (but for a nicer UI I still had to use it at first) For details on Django configuration, you can check Liu Jiang's blog; it's very thorough, in the first reference link below~
The UI looks roughly like this:
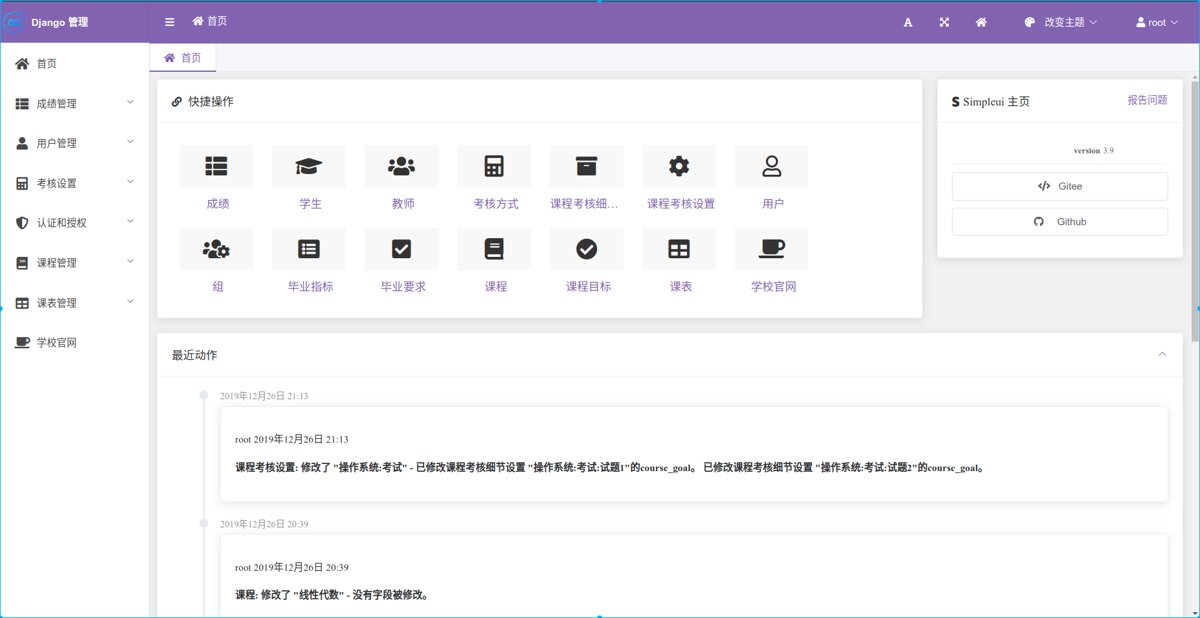
Then I found a new xadmin alternative called simpleui, which claims to be written with Vue + Element UI. The UI is pretty good too. As for the actual experience, emmm… it and xadmin each have their strengths. But this thing has a pro version, i.e. a paid edition, so if the open-source free version works, just quietly enjoy it—you know what I mean.
The UI is as follows, and you can switch themes too.
If you're interested, take a look at the official GitHub: https://github.com/newpanjing/simpleui
Install xadmin
Django-xadmin doesn't seem to be maintained anymore; at least on GitHub it looks like the author went off to write a pure-frontend xadmin framework, and installing it is also a whole ordeal. You can't just pip install it, because that's xadmin's 0.x version, which supports Django 1.x. You need to install xadmin's django2 branch to support Django 2.x. Then I started using Django 3, and this thing apparently also has compatibility issues with Django 3…
So how should you actually install it? The simpler method is what the official GitHub says:
pip install git+git://github.com/sshwsfc/xadmin.git@django2
But this method sometimes works and sometimes doesn't; GitHub might be blocked, sigh. So there's another method: install a packaged wheel file. Download the code from the official xadmin repo, then checkout the django2 branch, then run a command to package it into a wheel file, and then you can pip install it. When I have time I'll upload it to PyPI to make it easier for anyone who needs it.
After installing, running it may still throw an error: TypeError: render() got an unexpected keyword argument 'renderer'. The cause is an error when integrating DjangoUeditor; you need to modify the boundfield.py file in the virtualenv, located at venv/lib/python3.6/site-packages/django/forms/boundfield.py. The change:
89        return widget.render(
90            name=self.html_initial_name if only_initial else self.html_name,
91            value=self.value(),
92            attrs=attrs,
93            # renderer=self.form.renderer,(93行处注释掉,就能正常运行了)
94        )
xadmin configuration
xadmin's configuration is similar to Django's, but there are a few small differences. Luckily it supports Django's messages framework; simpleui doesn't seem to… toxic
Django admin configuration is written in the admin.py file under each app; xadmin has to be written in adminx.py, and it also doesn't seem possible to register admin classes with decorators like Django. The code below shows how to register an admin:
xadmin.site.register(model类, admin类)
Note that xadmin's admin class also cannot inherit the ModelAdmin class like Django; it can only inherit BaseAdminObject or just not write anything. Looking at xadmin's source, it inherits from object (same as not writing anything)
The example below is quite complete, covering configuration of various attributes.
class CourseAdmin(object):
    '''课程'''
    list_display = [ 'name','desc','detail','degree','learn_times','students']   #显示的字段
    search_fields = ['name', 'desc', 'detail', 'degree', 'students']             #搜索字段
    list_filter = [ 'name','desc','detail','degree','learn_times','students']    #过滤字段
    model_icon = 'fa fa-book'            #自定义图标
    ordering = ['-click_nums']           #排序功能
    readonly_fields = ['click_nums']     #只读字段,不能编辑
    exclude = ['fav_nums']               #不显示的字段
    inlines = [LessonInline,CourseResourceInline]    #增加章节和课程资源
    list_editable = ['degree','desc'] #在列表页可以直接编辑的
    list_display = ['get_zj_nums']  #直接使用函数名作为字段显示
    list_display = ['go_to']  # 跳转到上面定义的地址
    refresh_times = [3,5]           #自动刷新(里面是秒数)可选3或5秒
Details of admin class attributes
- model_icon: The icons use Font Awesome icons, but this site doesn't seem accessible in China, so we use the domestic version instead, http://www.fontawesome.com.cn/icons-ui/
- inlines configuration is similar to Django's, but you can't inherit xxxinline parent classes like Django… To define them, refer to the code below:
class LessonInline(object):
    model = Lesson
    extra = 0

class CourseResourceInline(object):
    model = CourseResource
    extra = 0
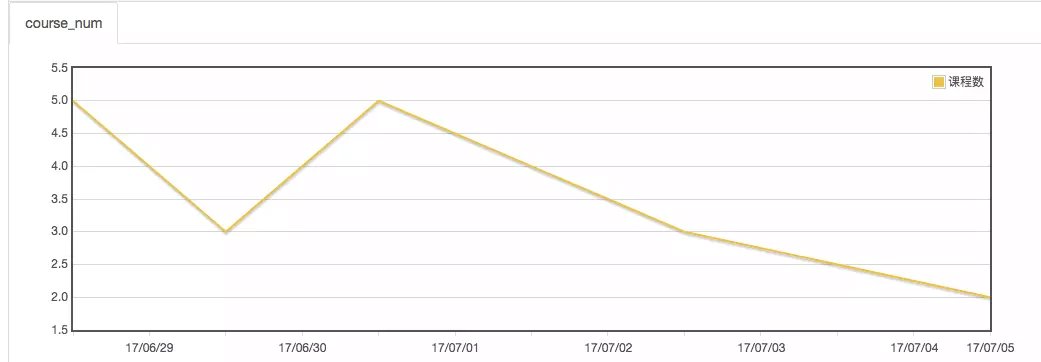
- There's also a chart feature, but I don't think it's useful; mainly, if you change the x-axis to a char field it won't display, which is annoying. Example:
data_charts = {
        "user_count": {'title': u"course_num", "x-field": "addtime", "y-field": ("course_num"),
                       "order": ('addtime',)
        }
}
It looks like this:
Overriding some methods of the admin class
Why override? Of course to customize some operations. For example, when saving user info you want to validate certain fields, save only if they pass, and show a prompt if they don't. How? Override the parent class methods!
Code example:
class ExamineAdmin(BaseAdminObject):
    .......

    def save_models(self):
        # 获取保存的新对象
        obj = self.new_obj
        # 获取原来的对象,如果是创建新对象,则org_obj为空
        org_obj = self.org_obj

        if 不满足条件:
            self.message_user(message="不满足xxx条件", level='error')
        else:
            return super().save_models()
That's about it. Displaying messages is basically sufficient, but even if it shows a “does not meet xxx conditions” message and does not save this model object, a save-success message still appears. xadmin doesn't seem to provide an API to turn this off, and the docs don't mention it at all. To solve this problem you'll still have to dig through the xadmin source yourself; otherwise relying on search and documentation is completely a black-box operation... I'm speechless
References:
- http://www.liujiangblog.com/course/django/93
- https://www.cnblogs.com/Eric15/articles/9589396.html
- https://www.jianshu.com/p/12808095cff3
Closing Remarks
I have to say, developing websites with Python Django is extremely efficient. You can conveniently put together a usable API plus admin backend, more than enough for all kinds of course projects and simple outsourcing jobs. There's also plenty of related material; if you're willing to learn, spending some time to master commercial website development is entirely within reach! As for people questioning Python's performance, Instagram's backend is built entirely with Django—that hundreds-of-millions user scale is no joke. After getting to know a technology, diving in to study and improve is far more useful than spending all day chasing flashy trends...
That said, after reading a lot of .NET Core blogs and Zhihu questions recently, I'm still optimistic about the future of .NET Core 5. Next I'll spend some time continuing to learn C#, even though work might involve more C++... (flees)
Welcome to Discuss
For questions, please leave a message on the WeChat official account backend. I'll reply to every message~
- WeChat official account: Star-Drawing Master
- Coding livestream: https://live.bilibili.com/11883038
- Zhihu: https://www.zhihu.com/people/dealiaxy
- Jianshu: https://www.jianshu.com/u/965b95853b9f
_EOF_
Django Rapid Development Practice: A Guide to the DRF Framework and xadmin Configuration
- 本文作者:
- 程序设计实验室
- 版权声明:
- 本博客所有文章除特别声明外,均采用 BY-NC-SA 许可协议。转载请注明出处!
相关文章
Django应用部署:Docker容器化实践
在此之前,我一直用uwsgi+virtualenv+nginx方式进行应用部署,操作起来比较麻烦,而且依赖于服务器上的Python版本,服务的管理方面单纯uwsgi + pid算不上特别麻烦但总没有docker compose方便,无奈原本的服务器是32位系统的用不上docker,现在又增加了一个新服务器,所以赶紧把docker安排上~ 不得不说真的太简单太方便了,全程傻瓜式操作,也基本没像之前u
2021-12-18 · Django · 约 1 分钟
Django探索验证码功能的实现 - DjangoStarter项目模板里的封装
前言 依然是最近在做的这个项目,用Django做后端,App上提交信息的时候需要一个验证码来防止用户乱提交,正好我的「DjangoStarter」项目脚手架也有封装了验证码功能,不过我发现好像里面只是把验证码作为admin后台登录的校验手段,并没有给出前后端分离项目的验证码相关接口。 所以本文介绍验证码功能实现的同时,也对「DjangoStarter」的验证码模块做一层封装,使其更方便使用~ 用哪
2022-04-09 · Django · 约 1 分钟
在 django-ninja 中实现类似腾讯阿里云的应用鉴权机制
Django-Ninja API鉴权机制?不就是又一套基于AppClient的认证系统,支持查询参数、请求头、Bearer Token认证,外加IP白名单和scopes权限控制?代码写得够复杂,够绕?
2025-07-10 · Django · 约 1 分钟
Django+Taro项目实现企业微信登录
前言 还是最近在做的一个小项目,后端用的是Django搭配RestFramework做接口,前端第一次尝试用京东开源的Taro框架来做多端(目前需要做用于企业微信的H5端和微信小程序) 本文记录一下企业微信登录的流程,上周看文档看得头晕晕的,其实很简单,封装好了就几行代码的事~ 两种方式 一种是先拼接好登录要用的地址authorize_url,回调地址设置成h5应用的网页入口,然后把authori
2022-04-08 · Django · 约 1 分钟
讨论
共 0 条加载评论中…