

StarBlog Blog Development Notes: Frontend Development (8) - Vuex and State Management
State Management In many application scenarios, we need to share state between components. For example, our left sidebar navigation needs collapse and expand functionality. When collapsed, its width is very small, showing only menu icons. Because the navigation menu bar's width changes after collapsing, the main content area on the right needs to occupy the space freed up by the navigation bar's collapse, and the main content area's width also needs to change according to the navigation bar's collapse state. However, the navigation bar and the main content area are two different components, and state passing between non-parent-child components is not supported, so the problem of state sharing between components arises. Previously, when I was writing Flutter, responsive de
目录11 个章节
State Management
In many application scenarios, we need to share state between components. For example, our left navigation bar requires a collapse and expand functionality. When collapsed, its width becomes very small, displaying only menu icons. Because the navigation menu's width changes upon collapse, the main content area on the right needs to occupy the space released by the navigation bar's collapse. Consequently, the main content area's width must also adjust according to the navigation bar's state. Since the navigation bar and the main content area are two different components, and state cannot be passed between non-parent-child components, the problem of state sharing between components arises.
Previously, when I was writing Flutter, the state management for responsive design left a deep impression on me. At that time, I used the provider library to manage global state. Then, in the Vue ecosystem, there is Vuex, which is said to draw inspiration from Flux, Redux, and The Elm Architecture. Unlike other patterns, Vuex is a state management library specifically designed for Vue.js to leverage Vue.js's fine-grained data reactivity system for efficient state updates.
Vuex is a state management pattern + library (状态管理模式 + 库) specifically designed for Vue.js applications. It uses centralized storage to manage the state of all components in the application and ensures that state changes occur in a predictable manner following specific rules.
Vuex official website: https://vuex.vuejs.org/zh/
Installing Vuex
Just install it without overthinking.
yarn add vuex@3.6.2
Note: Use the 3.x version of Vuex, as version 4.x is for Vue 3. Our project is currently still based on Vue 2.
Add store
Create a new store directory under the src directory to manage the application state specifically.
The directory structure is as follows:
store
├── modules
│   └── app.js
└── index.js
index.js
Import Vuex and organize the import and management of submodules uniformly in index.js.
The code is as follows:
import Vue from 'vue'
import vuex from 'vuex'

Vue.use(vuex);

// Import submodules
import app from './modules/app'

const store = new vuex.Store({
  modules: {
    app: app
  }
})

export default store
modules/app.js
app.js is a global configuration for the application, such as the theme color, navigation bar collapse state (导航栏收缩状态), etc. See the comments for details.
The code is as follows:
export default {
  state: {
    appName: "StarBlog",  // Application name
    themeColor: "#14889A",  // Theme color
    oldThemeColor: "#14889A",   // Previous theme color
    collapse: false,  // Navigation bar collapse state
    menuRouteLoaded: false    // Whether the menu and routes have been loaded
  },
  getters: {
    collapse(state) {// Corresponds to the state above
      return state.collapse
    }
  },
  mutations: {
    onCollapse(state) {  // Change collapse state
      state.collapse = !state.collapse
    },
    setThemeColor(state, themeColor) {  // Change theme color
      state.oldThemeColor = state.themeColor
      state.themeColor = themeColor
    },
    menuRouteLoaded(state, menuRouteLoaded) {  // Change menu and routes load status
      state.menuRouteLoaded = menuRouteLoaded;
    }
  },
  actions: {}
}
Introducing and Using the store
Introduce the store in src/main.js.
The code is as follows:
import store from './store'

new Vue({
  el: '#app',
  router,
  store, // Pass in the store
  components: {App},
  template: '<App/>'
})
Here, we'll use the sidebar collapse functionality as an example.
First, add a button to the top bar to control the sidebar collapse.
Adding a Collapse Component
Create a new components directory under src, and create a navigation bar collapse/expand component Hamburger inside it.
The directory structure is as follows:
src
└── components
    └── Hamburger
        └── index.vue
The component is drawn using SVG, which determines whether to rotate based on the isActive state and displays different graphics for collapsed and expanded states.
The code is as follows:
<template>
  <svg t="1492500959545" @click="onClick == null ? emptyClick : onClick" class="hamburger" fill="#fff"
       fill-opacity="0.8" :class="{'is-active':isActive}" viewBox="0 0 1024 1024"
       version="1.1" xmlns="http://www.w3.org/2000/svg" p-id="1691" xmlns:xlink="http://www.w3.org/1999/xlink"
       width="64" height="64">
    <path
      d="M966.8023 568.849776 57.196677 568.849776c-31.397081 0-56.850799-25.452695-56.850799-56.850799l0 0c0-31.397081 25.452695-56.849776 56.850799-56.849776l909.605623 0c31.397081 0 56.849776 25.452695 56.849776 56.849776l0 0C1023.653099 543.397081 998.200404 568.849776 966.8023 568.849776z"
      p-id="1692"></path>
    <path
      d="M966.8023 881.527125 57.196677 881.527125c-31.397081 0-56.850799-25.452695-56.850799-56.849776l0 0c0-31.397081 25.452695-56.849776 56.850799-56.849776l909.605623 0c31.397081 0 56.849776 25.452695 56.849776 56.849776l0 0C1023.653099 856.07443 998.200404 881.527125 966.8023 881.527125z"
      p-id="1693"></path>
    <path
      d="M966.8023 256.17345 57.196677 256.17345c-31.397081 0-56.850799-25.452695-56.850799-56.849776l0 0c0-31.397081 25.452695-56.850799 56.850799-56.850799l909.605623 0c31.397081 0 56.849776 25.452695 56.849776 56.850799l0 0C1023.653099 230.720755 998.200404 256.17345 966.8023 256.17345z"
      p-id="1694"></path>
  </svg>
</template>

<script>
export default {
  name: 'hamburger',
  props: {
    isActive: {
      type: Boolean,
      default: false
    },
    onClick: {
      type: Function,
      default: null
    }
  },
  methods: {
    emptyClick() {

    }
  }
}
</script>

<style scoped>
.hamburger {
  display: inline-block;
  cursor: pointer;
  width: 20px;
  height: 20px;
  transform: rotate(90deg);
  transition: .38s;
  transform-origin: 50% 50%;
}

.hamburger.is-active {
  transform: rotate(0deg);
}
</style>
HeaderBar Page References Collapse Component
Edit HeaderBar.vue to import the hamburger component in the header area HeadBar, and bind its isActive state to the collapse state.
The layout code is as follows:
<template>
  <div class="header" style="background:#14889A"
       :class="collapse?'position-collapse-left':'position-left'">
    <!-- Navigation Collapse -->
    <span class="hamburg">
      <el-menu class="el-menu-demo" background-color="#14889A" text-color="#fff" active-text-color="#14889A"
               mode="horizontal">
        <el-menu-item index="1" @click="onCollapse"><hamburger :isActive="collapse"></hamburger></el-menu-item>
      </el-menu>
    </span>
    <!-- Toolbar -->
    <!-- Old code omitted -->
</template>
Use computed properties to import store properties so you can directly reference the collapse state value in the page. (Of course, if you don't mind the length, you can also reference it directly in the page via $store.state.app.collapse without using computed properties.)
Add the following JavaScript code:
// First, import
import {mapState} from 'vuex'
import Hamburger from "@/components/Hamburger"

export default {
  name: "HeaderBar",
  components: {
    Hamburger
  },
  methods: {
    // Collapse the navigation bar
    onCollapse: function () {
      this.$store.commit('onCollapse')
    },
  },
  computed: {
    ...mapState({
      collapse: state => state.app.collapse
    })
  }
}
Add the following SCSS code:
.hamburg, .navbar {
  float: left;
}
.position-collapse-left {
  left: 65px;
}
Navbar Page Modifications
Modify Navbar.vue
Layout code modifications
<template>
  <div class="menu-bar-container">
    <!-- logo -->
    <div class="logo" style="background:#14889A" :class="collapse?'menu-bar-collapse-width':'menu-bar-width'"
         @click="$router.push('/')">
      <img v-if="collapse" src="@/assets/codelab.jpg"/>
      <div>{{ collapse ? '' : appName }}</div>
    </div>
  </div>
</template>
JavaScript code modifications
import {mapState} from 'vuex'
export default {
  computed: {
    ...mapState({
      appName: state => state.app.appName,
      collapse: state => state.app.collapse,
    })
  },
}
SCSS code addition
.menu-bar-collapse-width {
    width: 65px;
}
Main Content Page Modifications
Modify the layout code
<template>
  <div id="main-container" class="main-container"
       :class="$store.state.app.collapse?'position-collapse-left':'position-left'">
    <!-- Tab Pages -->
    <div class="tab-container"></div>
    <!-- Main Content Area -->
    <div class="main-content">
      <keep-alive>
        <transition name="fade" mode="out-in">
          <router-view></router-view>
        </transition>
      </keep-alive>
    </div>
  </div>
</template>
Add SCSS code
.position-collapse-left {
  left: 65px;
}
Test Results
Without collapsing the sidebar
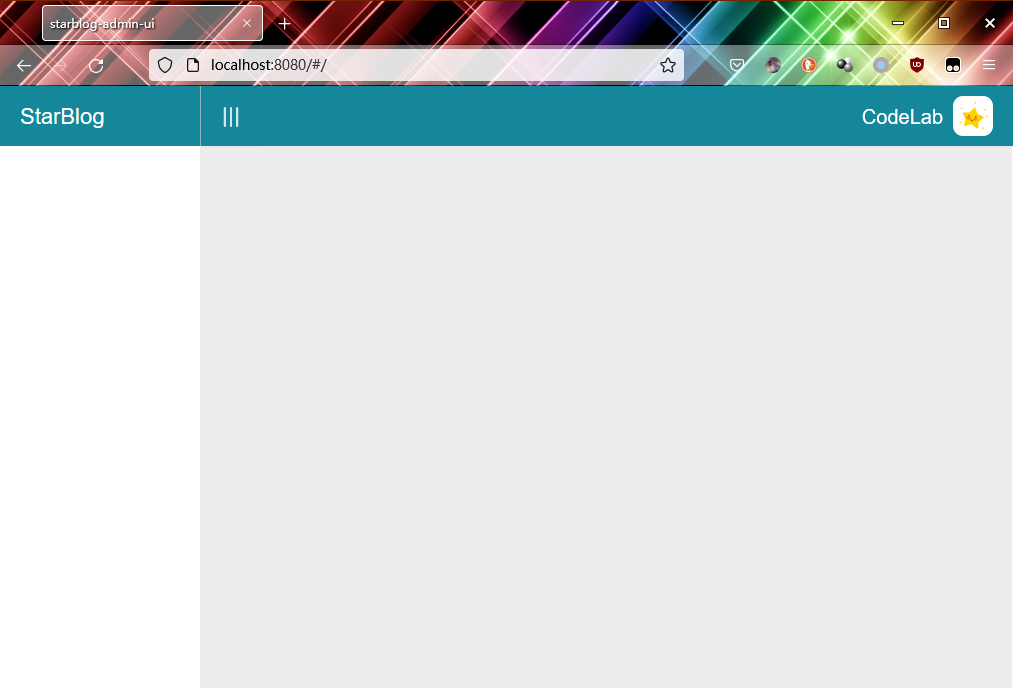
Click the button to collapse the sidebar
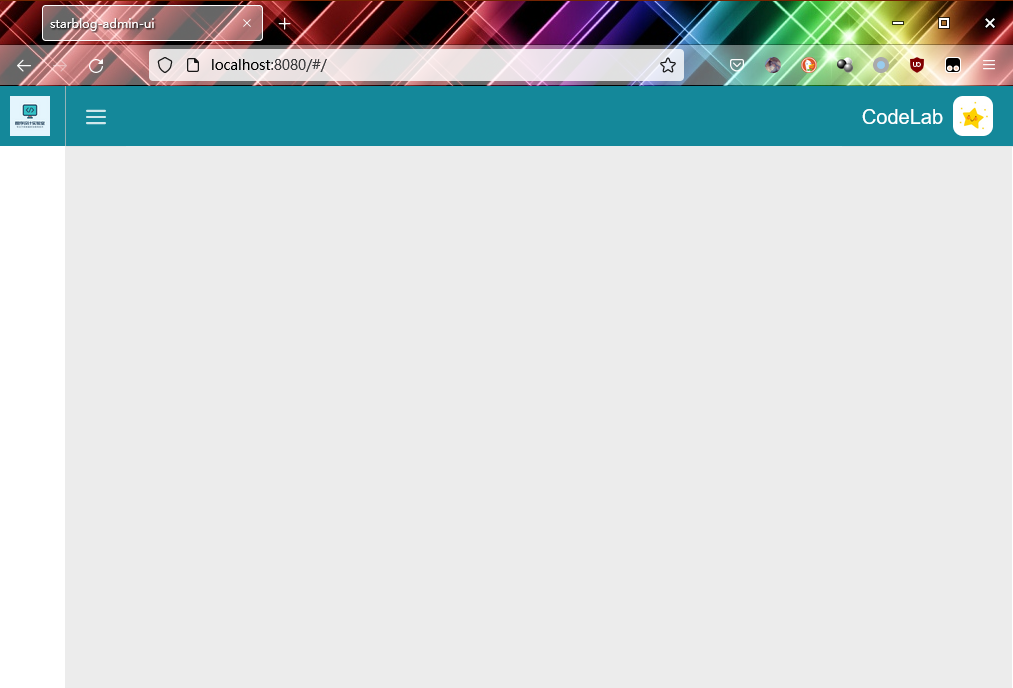
Done and dusted~
_EOF_
StarBlog Blog Development Notes: Frontend Development (8) - Vuex and State Management
- 本文作者:
- 程序设计实验室
- 版权声明:
- 本博客所有文章除特别声明外,均采用 BY-NC-SA 许可协议。转载请注明出处!
相关文章
StarBlog博客开发笔记:前端相关
markdown编辑器 v-md-editor,http://ckang1229.gitee.io/vue-markdown-editor/zh/ 在我的项目里最大化有问题,后面我自己搭配vuex实现了 优点是界面比较好,TOC可以放在左边 其他尝试 vue-element-admin整合的markdown编辑器:https://panjiachen.github.io/vue-element-a
2023-07-14 · StarBlog前端开发-Vue · 约 1 分钟
StarBlog博客开发笔记:前端开发之瀑布流图片列表
用到的组件:vue-waterfall 项目地址:https://github.com/MopTym/vue-waterfall 参考资料 Vue<瀑布流加载效果>:https://www.jianshu.com/p/97b89597ab5c
2023-07-14 · StarBlog前端开发-Vue · 约 1 分钟
StarBlog博客开发笔记:前端开发(6)之登录页面
前言 前端开发的准备工作在前面已经完成了,接下来就要开启写页面(Copy/Paste)操作了~ 用ElementUI写页面很简单,对照着官网文档代码一顿复制粘贴就完事了。 写代码 没啥好说的,直接代码 布局 template el-form :model=loginForm :rules=fieldRules ref=loginForm label-position=left label-wi
2023-07-14 · StarBlog前端开发-Vue · 约 1 分钟
StarBlog博客开发笔记:前端开发(1)准备篇
环境准备 NodeJs 首先需要安装NodeJs 下载地址:http://nodejs.cn/download/ 安装前端工具链 国内使用NPM需要设置国内镜像才能正常安装,之前常用的淘宝镜像说是要停止解析了,可以用这个npmmirror 中国镜像,命令如下: npm config set registry https://registry.npmmirror.com npmmirror 中国镜像
2024-12-10 · StarBlog前端开发-Vue · 约 1 分钟
讨论
共 0 条加载评论中…