StarBlog Blog Development Notes: Frontend Development (7) Main Page
Interface Design Follow the layout provided by ElementUI The left side is the navigation bar, the top right side has tabs, followed by the main content area As shown in the figure Secondary categories Start writing code The main page content is already quite complex, so it's not realistic to write everything in a single file Let's break it down According to this layout, the page can be divided into three parts: header, body, and left navigation bar So I will create three vue pages HeaderBar.vue Navbar.vue MainContent.vue After completion, the directory structure is as follows views ├──
目录6 个章节
Interface Design
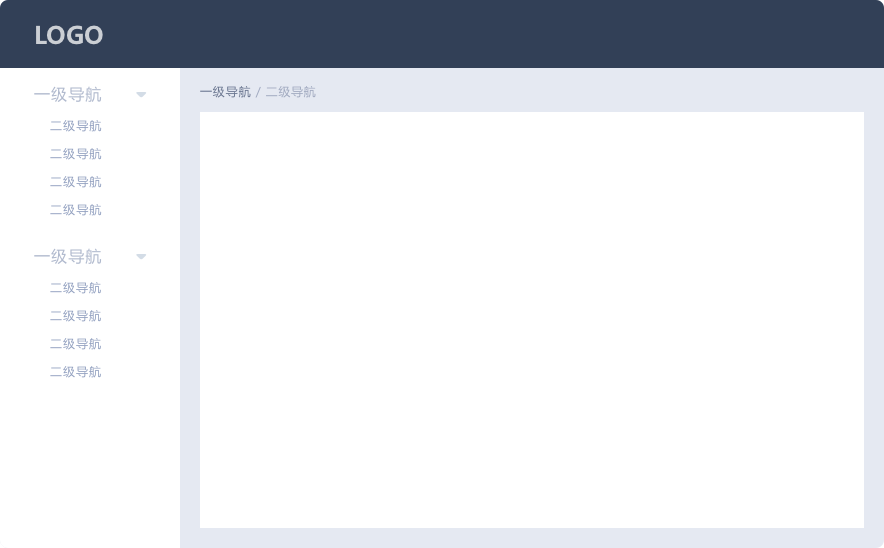
Based on the layout provided by ElementUI.
On the left is the navigation bar, on the right side above is the tabs, followed by the main content area.
As shown in the figure.
Starting to Write Code
The content of the main page has become quite complex, so it's unrealistic to write everything in a single file.
Let's break it down.
Based on this layout, the page can be divided into three parts: the header, the main body, and the left-side navigation bar.
So, I'll create three new Vue pages:
- HeaderBar.vue
- Navbar.vue
- MainContent.vue
After completion, the directory structure looks like this:
views
├── 404.vue
├── HeaderBar.vue
├── Home.vue
├── Login.vue
├── MainContent.vue
└── Navbar.vue
Next, modify the Home.vue page.
<template>
  <div class="container">
    <!-- Navigation Menu Bar -->
    <navbar></navbar>
    <!-- Header Area -->
    <header-bar></header-bar>
    <!-- Main Content Area -->
    <main-content></main-content>
  </div>
</template>

<script>
import HeaderBar from "./HeaderBar"
import Navbar from "./Navbar"
import MainContent from "./MainContent"

export default {
  // name: 'Home',
  components: {
    HeaderBar,
    Navbar,
    MainContent
  }
};
</script>

<style scoped lang="scss">
.container {
  position: absolute;
  top: 0;
  left: 0;
  right: 0;
  bottom: 0;
}
</style>
PS: Initially, I named MainContent and HeaderBar simply as Main and Header, but this caused an error, and the page kept loading blankly. It might have conflicted with some existing naming.
Now, let's start writing the code for each part.
Navbar.vue
The left-side navigation includes an upper Logo area and a lower navigation menu area.
Layout Code
<template>
  <div class="menu-bar-container">
    <!-- logo -->
    <div class="logo" style="background:#14889A" :class="'menu-bar-width'"
         @click="$router.push('/')">
      <img :src="logoSrc" alt="">
      <div>StarBlog</div>
    </div>
  </div>
</template>
js
export default {
  name: "Navbar",
  data(){
    return {
      logoSrc: require('@/assets/codelab.jpg')
    }
  }
}
scss
.menu-bar-container {
  position: fixed;
  top: 0;
  left: 0;
  bottom: 0;
  z-index: 1020;

  .logo {
    position: absolute;
    top: 0;
    height: 60px;
    line-height: 60px;
    background: #545c64;
    cursor: pointer;

    img {
      width: 40px;
      height: 40px;
      border-radius: 10px;
      margin: 10px;
      float: left;
    }

    div {
      font-size: 25px;
      color: white;
      text-align: left;
      padding-left: 20px;
    }

  }

  .menu-bar-width {
    width: 200px;
  }
}
HeaderBar.vue
The header navigation primarily focuses on styling, adding username and avatar display on the right side.
Layout Code
<template>
  <div class="header" style="background:#14889A" :class="'position-left'">
    <!-- Toolbar -->
    <span class="toolbar">
      <el-menu class="el-menu-demo" background-color="#14889A" text-color="#14889A" active-text-color="#14889A"
               mode="horizontal">
        <el-menu-item index="1">
          <!-- User Info -->
          <span class="user-info"><img :src="user.avatar"/>{{ user.name }}</span>
        </el-menu-item>
      </el-menu>
    </span>
  </div>
</template>
JavaScript
export default {
  name: "HeaderBar",
  data() {
    return {
      user: {
        name: "CodeLab",
        avatar: require("@/assets/star.jpg"),
        role: "Super Admin",
      },
      activeIndex: '1',
      langVisible: false
    }
  },
  methods: {
    selectNavBar(key, keyPath) {
      console.log(key, keyPath)
    }
  },
  mounted() {
    let user = sessionStorage.getItem("user")
    if (user) {
      this.user.name = user
      this.user.avatar = require("@/assets/star.jpg")
    }
  }
}
SCSS
.header {
  position: fixed;
  top: 0;
  right: 0;
  z-index: 1030;
  height: 60px;
  line-height: 60px;
  border-color: rgba(180, 190, 190, 0.8);
  border-left-width: 1px;
  border-left-style: solid;
}

.navbar {
  float: left;
}

.toolbar {
  float: right;
}

.user-info {
  font-size: 20px;
  color: #fff;
  cursor: pointer;

  img {
    width: 40px;
    height: 40px;
    border-radius: 10px;
    margin: 10px 0 10px 10px;
    float: right;
  }
}

.position-left {
  left: 200px;
}
MainContent.vue
The main content area contains tab navigation and a main content section. The route-view is placed within the main content, used for routing information.
Layout code
<template>
  <div id="main-container" class="main-container" :class="'position-left'">
    <!-- Tab -->
    <div class="tab-container"></div>
    <!-- Main Content Area -->
    <div class="main-content">
      <keep-alive>
        <transition name="fade" mode="out-in">
          <router-view></router-view>
        </transition>
      </keep-alive>
    </div>
  </div>
</template>
scss
.main-container {
  padding: 0 5px 5px;
  position: absolute;
  top: 60px;
  left: 1px;
  right: 1px;
  bottom: 0;
  background: rgba(67, 69, 70, 0.1);

  .main-content {
    position: absolute;
    top: 45px;
    left: 5px;
    right: 5px;
    bottom: 5px;
    padding: 5px;
  }
}

.position-left {
  left: 200px;
}
Test Results
OK, let's see the effect
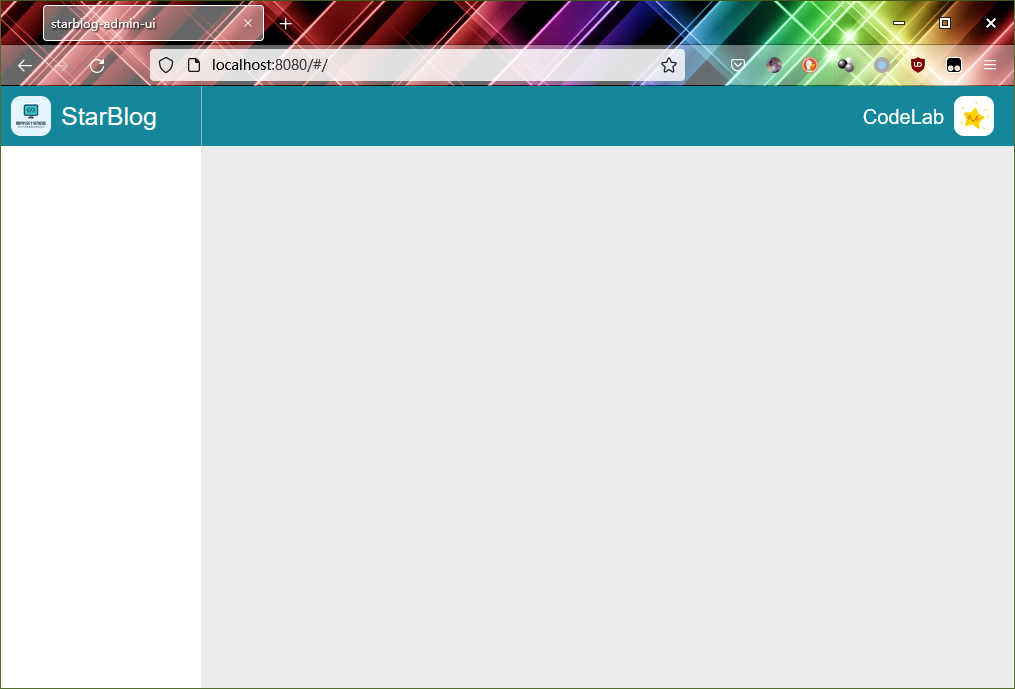
Done, finished~
_EOF_
StarBlog Blog Development Notes: Frontend Development (7) Main Page
- 本文作者:
- 程序设计实验室
- 版权声明:
- 本博客所有文章除特别声明外,均采用 BY-NC-SA 许可协议。转载请注明出处!
相关文章
StarBlog博客开发笔记:前端相关
markdown编辑器 v-md-editor,http://ckang1229.gitee.io/vue-markdown-editor/zh/ 在我的项目里最大化有问题,后面我自己搭配vuex实现了 优点是界面比较好,TOC可以放在左边 其他尝试 vue-element-admin整合的markdown编辑器:https://panjiachen.github.io/vue-element-a
2023-07-14 · StarBlog前端开发-Vue · 约 1 分钟
StarBlog博客开发笔记:前端开发(8)之vuex与状态管理
状态管理 在很多应用场景下,我们需要在组件之间共享状态,比如我们的左侧导航栏需要收缩和展开的功能,收缩状态时宽度很小,只显示菜单图标,因为导航菜单栏收缩之后宽度变了,所以右侧的主内容区域要占用导航栏收缩的空间,主内容区域宽度也要根据导航栏的收缩状态做变更,而导航栏和主内容区域是两个不同的组件,而非父子组件之间不支持状态传递,所以组件之间的状态共享问题发生了。 之前我写flutter的时候,响应式设
2023-07-14 · StarBlog前端开发-Vue · 约 1 分钟
StarBlog博客开发笔记:前端开发之导航守卫
路由对象router给我们提供了beforeEach方法,可以在每次路由之前进行一些相关处理,也叫导航守卫,我们这里就通过导航守卫实现一些类似身份认证的辅助功能。 修改router/index.js文件,添加导航守卫,在每次路由时判断用户会话是否过期。如果登录有效且跳转的是登录界面,就直接路由到主页;如果是非登录页面且会话过期,就跳到登录页面要求登录。 代码如下 router.beforeEach
2023-07-14 · StarBlog前端开发-Vue · 约 1 分钟
StarBlog博客开发笔记:前端开发之文件上传
参考资料 前端通过axios和FormData实现文件上传功能遇到的坑:https://segmentfault.com/a/1190000016927601 Element el-upload上传组件详解:https://segmentfault.com/a/1190000013796215
2023-07-14 · StarBlog前端开发-Vue · 约 1 分钟
讨论
共 0 条加载评论中…