

StarBlog Development Notes (14): Implementing Theme Switching
Series articles Building a Blog Project with .NetCore: StarBlog - (1) Why Write Your Own Blog? Building a Blog Project with .NetCore: StarBlog - (2) Environment Setup and Creating the Project Building a Blog Project with .NetCore: StarBlog - (3) Model Design Building a Blog Project with .NetCore: StarBlog - (4) Batch Import of Markdown Blog Posts Building a Blog Project with .NetCore: StarBl
目录8 个章节
Series Articles
- Building a Blog Project with .NetCore: StarBlog - (1) Why Write Your Own Blog?
- Building a Blog Project with .NetCore: StarBlog - (2) Environment Setup and Creating the Project
- Building a Blog Project with .NetCore: StarBlog - (3) Model Design
- Building a Blog Project with .NetCore: StarBlog - (4) Batch Import of Markdown Blog Posts
- Building a Blog Project with .NetCore: StarBlog - (5) Starting to Build the Web Project
- Building a Blog Project with .NetCore: StarBlog - (6) Page Development: Blog Post List
- Building a Blog Project with .NetCore: StarBlog - (7) Page Development: Post Detail Page
- Building a Blog Project with .NetCore: StarBlog - (8) Displaying Category Hierarchy
- Building a Blog Project with .NetCore: StarBlog - (9) Batch Image Import
- Building a Blog Project with .NetCore: StarBlog - (10) Image Waterfall Layout
- Building a Blog Project with .NetCore: StarBlog - (11) Implementing Visit Statistics
- Building a Blog Project with .NetCore: StarBlog - (12) Dynamic Compilation of Razor Pages
- Building a Blog Project with .NetCore: StarBlog - (13) Adding Friend Links
- Building a Blog Project with .NetCore: StarBlog - (14) Implementing Theme Switching
- ...
Preface
Recently I've been writing code and adding some new features to the blog. I originally wanted to cover them all in one article, but it would probably be too long, so I figured it's better to split them up~
This article covers the theme switching feature. StarBlog's pages are built on Bootstrap 5. Bootstrap's own design is fairly clean and elegant, but it can get boring after a while, and tweaking CSS yourself is a hassle. Luckily, in the Bootstrap world there's something called Bootswatch that provides dozens of themes. I just need to npm install and then I can implement theme switching~
The Result
As usual, let's look at the result first
| Default Theme | Quartz Theme |
|---|---|
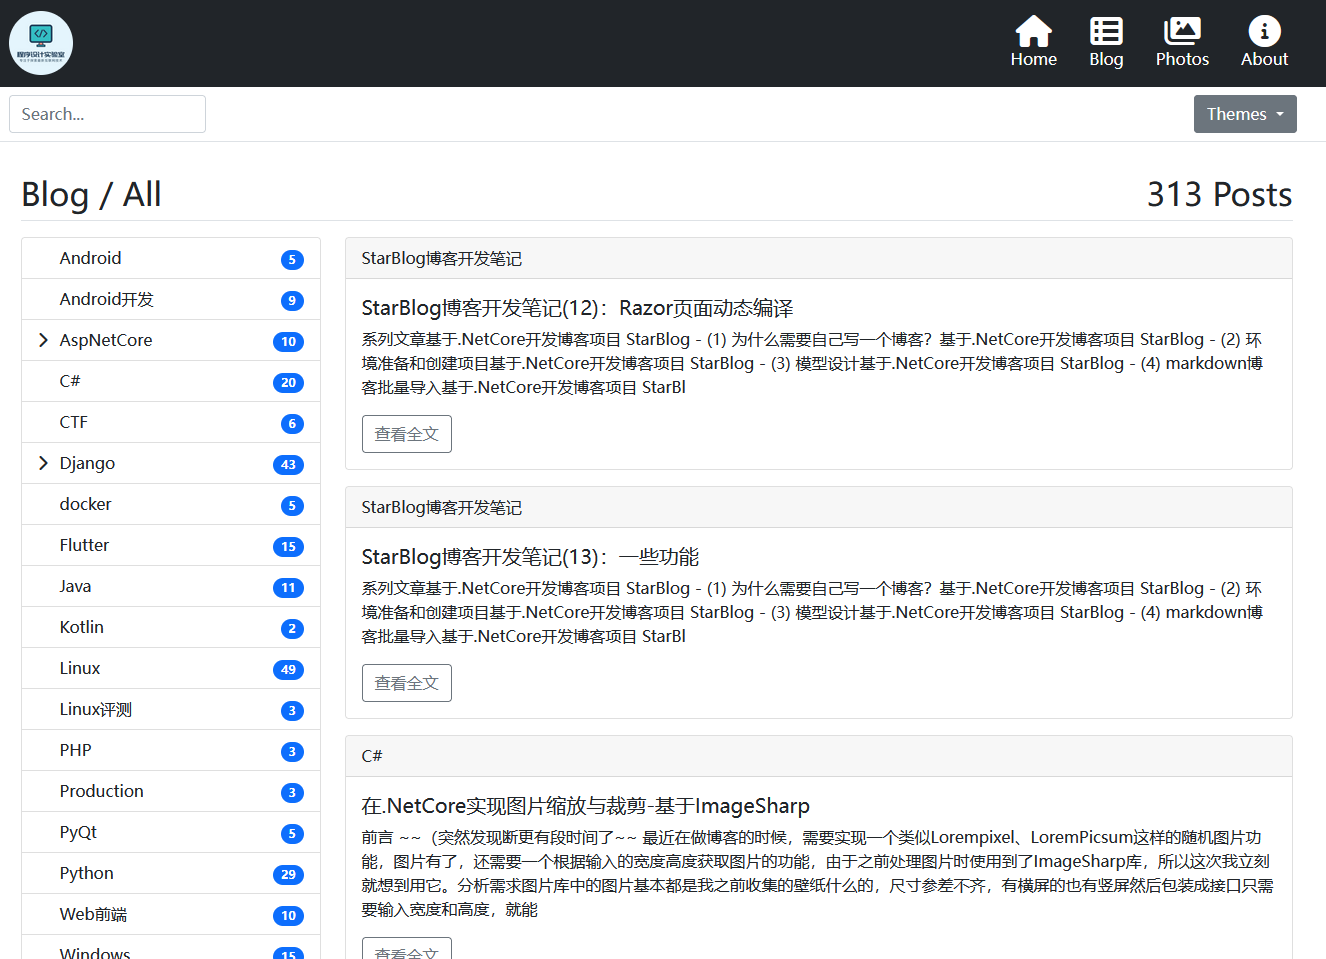 | 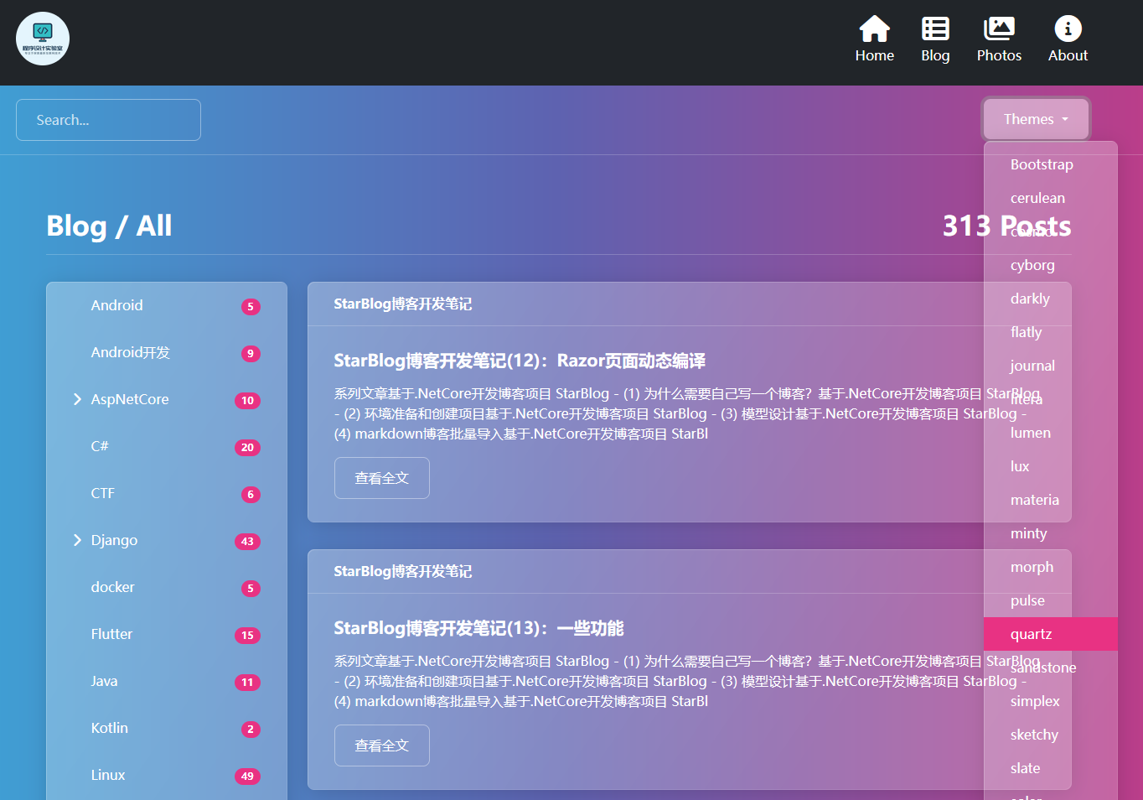 |
PS: Light themes currently adapt fairly well; dark themes are still being adapted, and some pages don't display well yet
Approach
Bootswatch switches themes by including the bootstrap.css file it provides, which overrides Bootstrap's default styles
The theme switching I implemented in DjangoStarter used Django's TemplateTag, which can add the corresponding CSS file reference based on the user's selected theme when the template is rendered
In theory, the StarBlog project built with ASP.NET Core MVC could implement theme switching the same way, but I ran into some issues that were a bit of a hassle to deal with during development, so I decided instead to expose a theme API and load CSS dynamically via JS.
Adding Dependencies
Let's start coding~
First, add the bootswatch dependency. It needs to match the Bootstrap version. This project uses Bootstrap 5.1.3, so this Bootswatch version also needs to be 5.1.3
yarn add bootswatch
Configure automatic copying in gulpfile.js
//使用 npm 下载的前端组件包
const libs = [
    {name: "bootswatch", dist: "./node_modules/bootswatch/dist/**/*.*"},
];
Run the gulp move command in the StarBlog.Web directory. Gulp will automatically copy the Bootswatch-related files into the wwwroot/lib directory for later use
For details on managing static assets with NPM and Gulp, see this earlier article: ASP.NET Core Development Notes: Managing Frontend Static Files with NPM and Gulp
Writing the Service
Add ThemeService.cs under StarBlog.Web/Services
First, define the Theme model
public class Theme {
    public string Name { get; set; }
    public string Path { get; set; }
    public string CssUrl { get; set; }
}
Then ThemeService scans all themes in wwwroot/lib/bootswatch and also adds Bootstrap's default theme
public class ThemeService {
    public const string BootstrapTheme = "Bootstrap";
    private const string CssUrlPrefix = "/lib/bootswatch/dist";

    public List<Theme> Themes { get; set; } = new() {
        new Theme {Name = BootstrapTheme, Path = "", CssUrl = ""}
    };

    public ThemeService(IWebHostEnvironment env) {
        var themePath = Path.Combine(env.WebRootPath, "lib", "bootswatch", "dist");
        foreach (var item in Directory.GetDirectories(themePath)) {
            var name = Path.GetFileName(item);
            Themes.Add(new Theme {
                Name = name,
                Path = item,
                CssUrl = $"{CssUrlPrefix}/{name}/bootstrap.min.css"
            });
        }
    }
}
Then register it as a singleton service and you're good
builder.Services.AddSingleton<ThemeService>();
Writing an API
Next we also need to write an API
Add a ThemeController.cs under the StarBlog.Web/Apis directory. The code is simple — just one action that gets all themes
/// <summary>
/// 页面主题
/// </summary>
[ApiController]
[Route("Api/[controller]")]
[ApiExplorerSettings(GroupName = "common")]
public class ThemeController : ControllerBase {
    private readonly ThemeService _themeService;

    public ThemeController(ThemeService themeService) {
        _themeService = themeService;
    }

    [HttpGet]
    public List<Theme> GetAll() {
        return _themeService.Themes;
    }
}
Frontend Implementation
The backend part of themes is done. The frontend needs to complete three parts:
- Request the API to get the full theme list
- Set the theme and dynamically include CSS
- Save the currently selected theme so it's automatically applied the next time the page is opened
To make DOM operations easier, I used Vue, included at the bottom of Views/Shared/_Layout.cshtml
<script src="~/lib/bootstrap/dist/js/bootstrap.bundle.min.js"></script>
<script src="~/lib/vue/dist/vue.js"></script>
<script src="~/js/site.js"></script>
First, let's write the code for the last included file, site.js. Using Vue, when the page opens it loads the theme list via the fetch function and then displays it on the page
Also, when switching themes, save the current theme's name and CSS URL in localStorage so they can be automatically applied the next time the page loads
let app = new Vue({
    el: '#vue-header',
    data: {
        currentTheme: '',
        themes: []
    },
    created: function () {
        fetch('/Api/Theme')
            .then(res => res.json())
            .then(res => {
                this.themes = res.data
            })

        // 读取本地主题配置
        let theme = localStorage.getItem('currentTheme')
        if (theme != null) this.currentTheme = theme
    },
    methods: {
        setTheme(themeName) {
            let theme = this.themes.find(t => t.name === themeName)
            loadStyles(theme.cssUrl)
            this.currentTheme = themeName
            localStorage.setItem('currentTheme', themeName)
            localStorage.setItem('currentThemeCssUrl', theme.cssUrl)
            // 换主题之后最好要刷新页面,不然可能样式冲突
            location.reload()
        }
    }
})
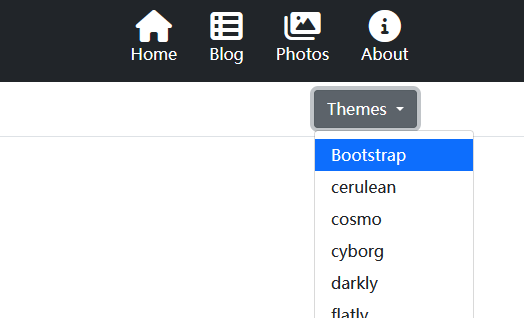
Here the themes are loaded, and through Vue's two-way binding they're rendered in the top menu (with the current theme highlighted)
Which is this place
<div class="px-3 py-2 border-bottom mb-3">
    <div class="container d-flex flex-wrap justify-content-center">
        <form class="col-12 col-lg-auto mb-2 mb-lg-0 me-lg-auto" asp-controller="Search" asp-action="Blog">
            <input type="search" class="form-control" placeholder="Search..." aria-label="Search" name="keyword">
        </form>

        <div class="text-end">
            <span class="dropdown me-2">
                <a class="btn btn-secondary dropdown-toggle" href="#" role="button" id="dropdownMenuLink" data-bs-toggle="dropdown" aria-expanded="false">
                    Themes
                </a>
                <ul class="dropdown-menu" aria-labelledby="dropdownMenuLink">
                    <li v-for="theme in themes">
                        <a v-if="theme.name===currentTheme" class="dropdown-item active">{{theme.name}}</a>
                        <a v-else class="dropdown-item" v-on:click="setTheme(theme.name)">{{theme.name}}</a>
                    </li>
                </ul>
            </span>
        </div>
    </div>
</div>
Finally, we also need to read the theme configuration when the page refreshes and automatically load the current theme
Because dynamically switching themes can cause some style conflicts and such, we need to include it before the page has finished loading
So I also wrote a site.preload.js and placed it in the page's <head> section
<script src="~/js/site.preload.js"></script>
The code is as follows: first read the current theme; if a theme has been set, read the CSS URL and include it
(The loadStyles function is also used in the earlier site.js)
// 动态加载CSS
function loadStyles(url) {
    let link = document.createElement("link");
    link.rel = "stylesheet";
    link.type = "text/css";
    link.href = url;
    let head = document.getElementsByTagName("head")[0];
    head.appendChild(link);
}

let currentTheme = localStorage.getItem('currentTheme')
if (currentTheme !== 'Bootstrap') {
    let themeCssUrl = localStorage.getItem('currentThemeCssUrl')
    if (themeCssUrl != null) loadStyles(themeCssUrl)
}
PS: The code for dynamically loading CSS comes from: http://lengyun.github.io/js/3-2-2dynamicAddCSS.html
Done~
_EOF_
StarBlog Development Notes (14): Implementing Theme Switching
- 本文作者:
- 程序设计实验室
- 版权声明:
- 本博客所有文章除特别声明外,均采用 BY-NC-SA 许可协议。转载请注明出处!
相关文章
StarBlog博客开发笔记(4):markdown博客批量导入
系列文章 基于.NetCore开发博客项目 StarBlog - (1) 为什么需要自己写一个博客? 基于.NetCore开发博客项目 StarBlog - (2) 环境准备和创建项目 基于.NetCore开发博客项目 StarBlog - (3) 模型设计 基于.NetCore开发博客项目 StarBlog - (4) markdown博客批量导入 ... 前言 上周介绍了博客的模型设计,现在模
2025-04-27 · StarBlog博客开发笔记 · 约 1 分钟
StarBlog博客开发笔记(5):开始搭建Web项目
系列文章 基于.NetCore开发博客项目 StarBlog - (1) 为什么需要自己写一个博客? 基于.NetCore开发博客项目 StarBlog - (2) 环境准备和创建项目 基于.NetCore开发博客项目 StarBlog - (3) 模型设计 基于.NetCore开发博客项目 StarBlog - (4) markdown博客批量导入 基于.NetCore开发博客项目 StarBl
2023-02-08 · StarBlog博客开发笔记 · 约 1 分钟
StarBlog博客开发笔记(27):使用JWT保护接口
前言 这是StarBlog系列在2023年的第二篇更新😂 这几个月都在忙,更新变得很不勤快,但是拖着不更新我的心里更慌,很久没写,要开头就变得很难😑 说回正题,之前的文章里,我们已经把博客关键的接口都开发完成了,但还少了一个最关键的「认证授权」,少了这东西,网站就跟筛子一样,谁都可以来添加和删除数据,乱套了~ 关于「认证授权」的知识,会比较复杂,要学习这块的话,建议分几步: 基础概念 AspN
2023-05-03 · StarBlog博客开发笔记 · 约 1 分钟
StarBlog博客开发笔记(9):图片批量导入
系列文章 基于.NetCore开发博客项目 StarBlog - (1) 为什么需要自己写一个博客? 基于.NetCore开发博客项目 StarBlog - (2) 环境准备和创建项目 基于.NetCore开发博客项目 StarBlog - (3) 模型设计 基于.NetCore开发博客项目 StarBlog - (4) markdown博客批量导入 基于.NetCore开发博客项目 StarBl
2022-05-30 · StarBlog博客开发笔记 · 约 1 分钟
讨论
共 0 条加载评论中…