

Installing, Configuring, and Using Sentry
Preface The previous article introduced ExceptionLess, a log collection system: Installing, Configuring, and Using ExceptionLess Because the official ExceptionLess clients only cover the .Net/.NetCore platforms and JS, this article continues by introducing another log collection system: Sentry Sentry is a real-time event logging and aggregation platform. (Officially it is called Error Monitor.) It is specifically designed to monitor errors and extract all the inf
目录8 个章节
Preface
The previous article introduced ExceptionLess, a log collection system: Installing, Configuring, and Using ExceptionLess
Because the official ExceptionLess clients only cover the .Net/.NetCore platforms and JS, this article continues by introducing another log collection system: Sentry
Sentry is a real-time event logging and aggregation platform. (Officially it is called Error Monitor.) It is specifically designed to monitor errors and extract all the information needed to take appropriate follow-up action, without any of the hassle of using a standard user feedback loop.
Sentry is developed with Python (Django) and is very feature-rich. Compared with ExceptionLess it is also much heavier (which is why we use ExceptionLess on the .NetCore platform). It supports a very complete set of platforms—basically every mainstream programming language/framework. See the screenshot.
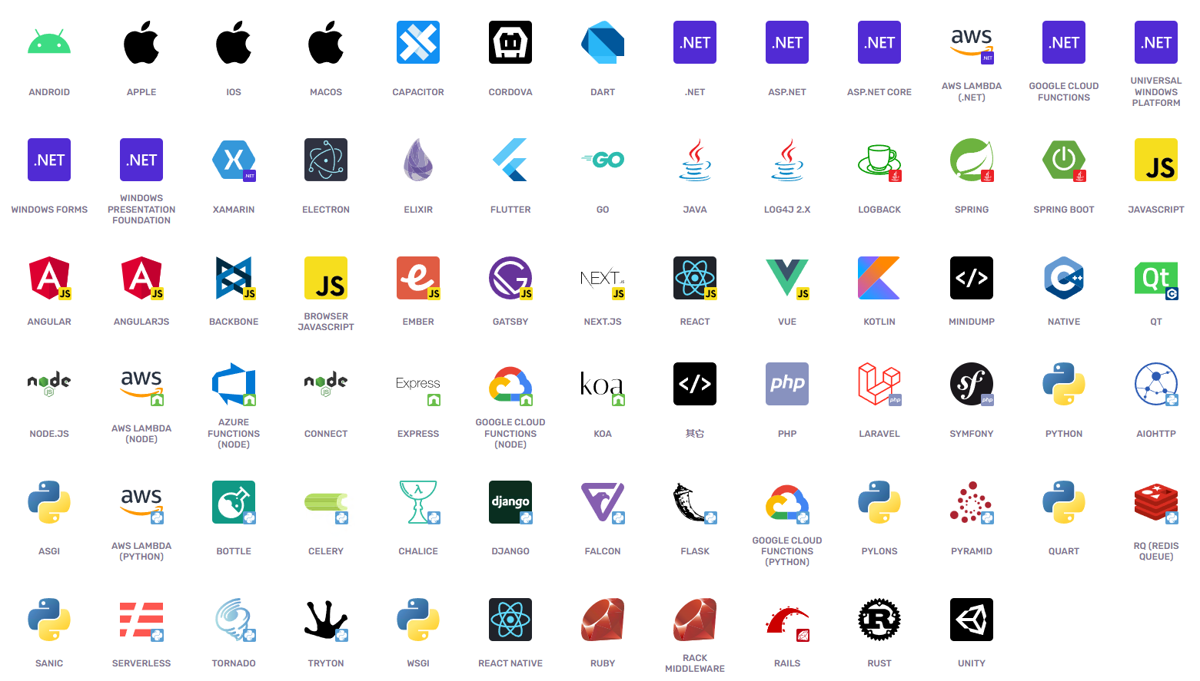
Apart from .NetCore projects, I use Sentry everywhere else to collect logs and error information. Overall it has been quite good to use, (it just uses a bit of memory). Please prepare a server with enough RAM—at least 8 GB~
In fact Sentry can do more than collect logs. It can also collect user feedback, analyze system performance, and a whole bunch of other features. You can even drag and drop to customize a monitoring dashboard. If you are willing to explore more deeply you should be able to discover even more uses.
Installation
Like ExceptionLess, Sentry can also be used online—you only need to register an account.
But since it is open source and free, deploying your own instance is more flexible and also faster (Sentry's servers are overseas).
As usual, use Docker for a local deployment. When I first started using this thing, installation was a real hassle. Later the official team released a convenient install script, so installing it should be easy now.
First clone this project locally: https://github.com/getsentry/self-hosted
Then enter the project directory and run ./install.sh. After a long pull and build, enter the admin username and password as prompted, and you are done.
The official solution also manages containers via docker-compose, so later we can also start and stop the system manually with docker-compose commands.
Once it is running, visit http://ip:9000 to see the login page (the port may differ depending on your actual configuration).
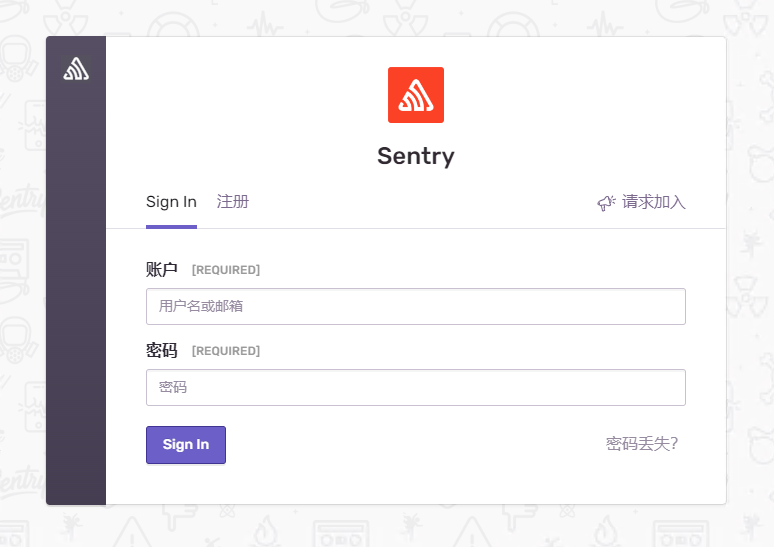
Just log in with the username and password you just created.
Configuration
Sentry really has a lot of configuration options. To this day I still have not figured out most of them. I only did some simple configuration for email, ports, and so on, and that was enough to get it flying.
Continuing from above, after you clone the official self-host project, you will see a sentry folder inside. The configuration files are in that directory.
Email is configured in the config.yml file (one improvement over ExceptionLess is that email addresses finally do not need to be escaped).
Here is Tencent Enterprise Mail as an example. In the config, find the # Mail Server # “node”.
mail.backend: 'smtp'  # Use dummy if you want to disable email entirely
mail.host: 'smtp.exmail.qq.com'
mail.port: 465
mail.username: 'demo@demo.com'
mail.password: 'password'
mail.use-tls: false
# mail.use-ssl: false
mail.from: 'demo@demo.com'
That should be enough to send email normally~
So how do you change the port? In the old onpremise version (that is, this self-host project) you changed it directly in docker-compose.yml, but modifying that file is no longer recommended (I cannot even make sense of the official compose config file)
Now you set it via environment variables. Use ll -a to list all files in the project directory, and you will find a .env file. Environment variables are configured in that file. There is a line that configures the port:
SENTRY_BIND=9000
Just change it and you are done~
Usage
Sentry's UI is much more complex than ExceptionLess's, and there is also more information in it—enough to make your eyes glaze over.
If you are using it as a log collection tool, the main place to look is the “Issues” page. You can filter by a specific project or look at everything. This is a bit more intuitive than ExceptionLess.
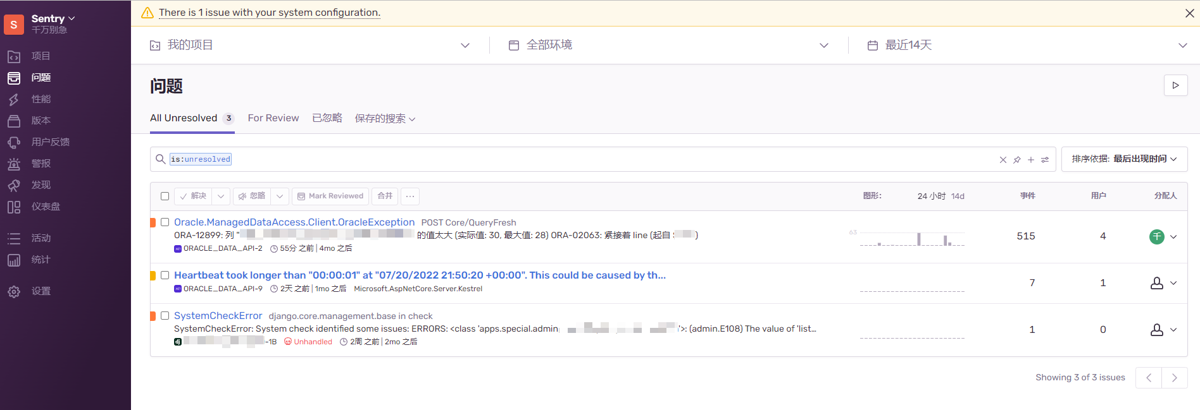
Click into a particular issue to see the error details.
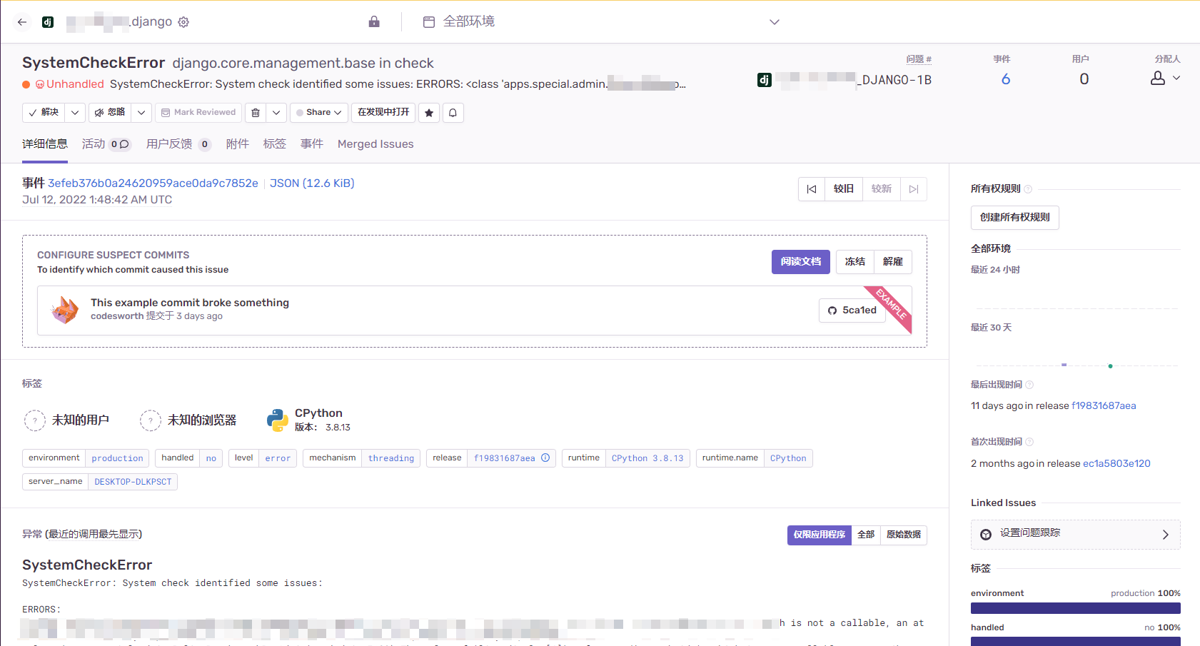
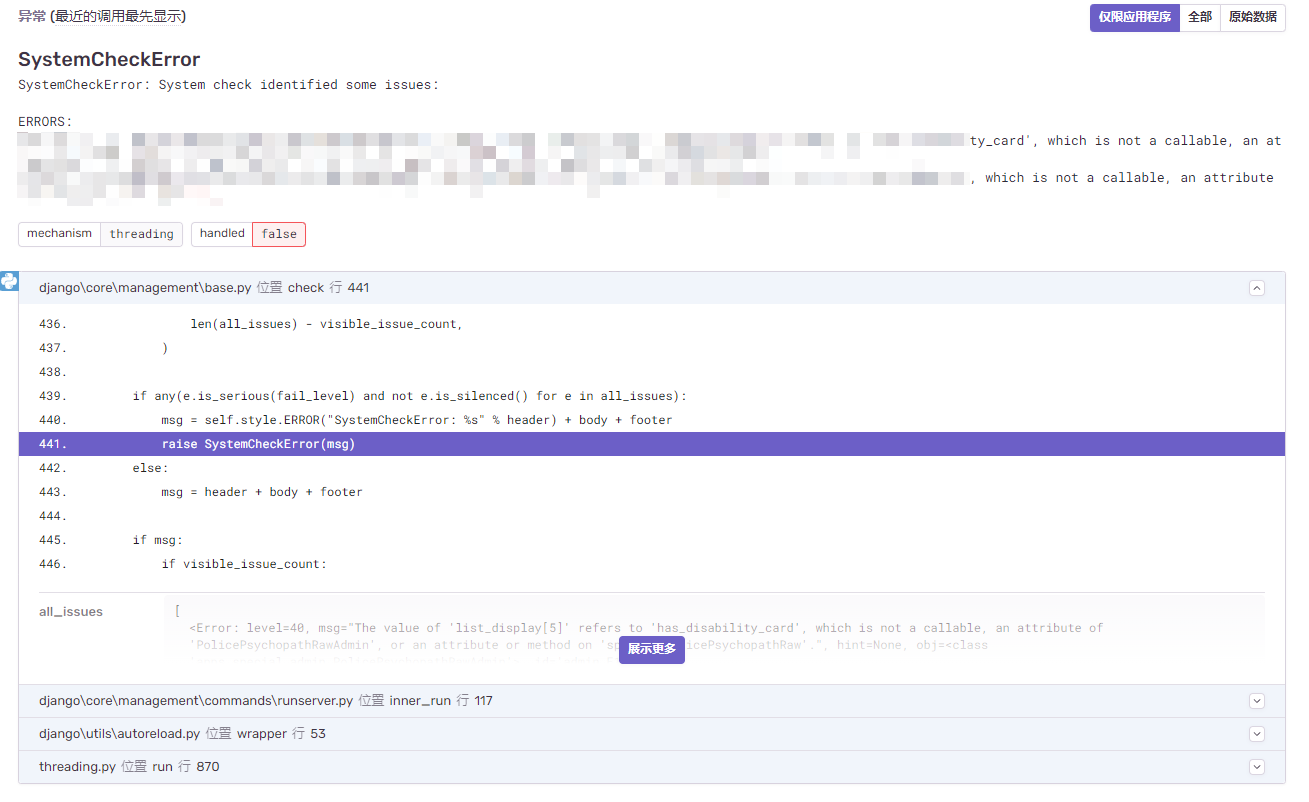
If it is a dynamic language like Python, you can even see exactly which piece of code threw the error. Super convenient.
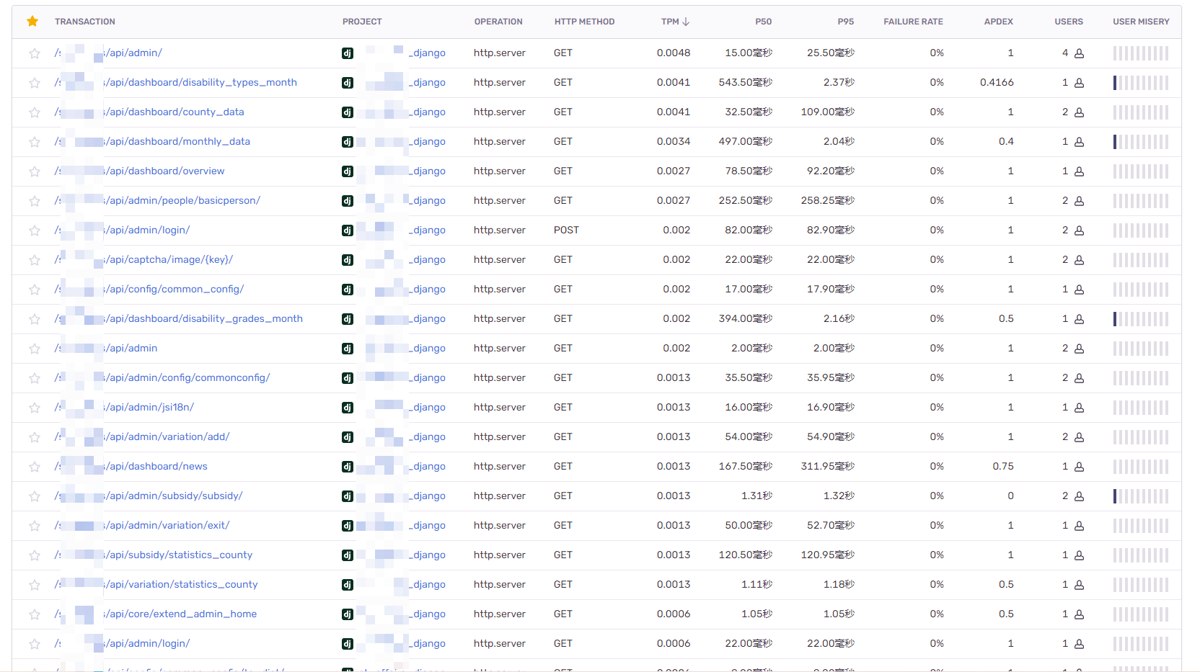
Then the Performance page can drill down to each request's response time, error frequency, number of visiting users, and so on.
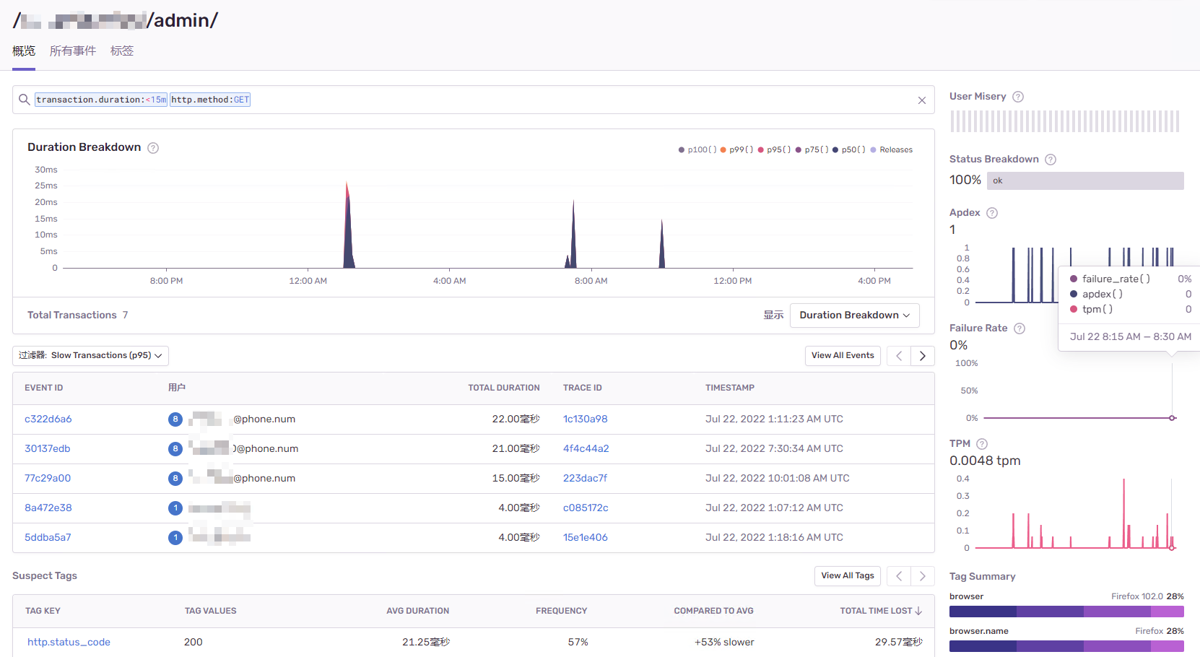
Then if you click into a particular URL you can also see some information about the users who visited that URL, including IP address, username (if logged in), time spent on the page, which time periods users visited, and so on. There are too many metrics; I do not fully understand some of them. Anyway, the features are definitely powerful~
That is about it. I have not gone deep into the other features yet. I will update the blog after I continue learning.
Project Integration
First you can look at the official docs. They are fairly complete, and most languages provide an integration demo.
Docs: https://docs.sentry.io/
Some demos: https://github.com/getsentry/sentry-dotnet/tree/main/samples
Here are a few project integration examples.
When you create a project in Sentry, the system also shows a simple integration guide. Here I will put up my customized version of the code.
Django Project
First, according to the guide you need to install a pip package.
pip install sentry-sdk
I am used to putting the project config settings.py under a config package, then listing each split-out config in that package for easier management.
Create sentry.py under config. The code is as follows.
import logging

import sentry_sdk
from sentry_sdk.integrations.django import DjangoIntegration
from sentry_sdk.integrations.logging import LoggingIntegration
from sentry_sdk.integrations.redis import RedisIntegration

sentry_logging = LoggingIntegration(
    level=logging.INFO,  # Capture info and above as breadcrumbs
    event_level=logging.ERROR  # Send errors as events
)

sentry_sdk.init(
    # 反正dsn这行无脑复制sentry上显示的就行
    dsn="http://key@sentry地址/id",
    integrations=[DjangoIntegration(), RedisIntegration(), sentry_logging],

    # 这里设置为1代表捕捉100%的transaction 用于性能监控
    traces_sample_rate=1,
    send_default_pii=True,
)
Then import it in settings.py and you are done.
from config import sentry
Flutter Project
According to the guide, first add the dependency.
dependencies:
  sentry_flutter: ^5.1.0
PS: This dependency now has a 6.x version. Initialization uses async operations. I have not updated yet, so I am still using the 5.x version.
This is the original App initialization code in main.dart.
void main() {
  WidgetsFlutterBinding.ensureInitialized();
  if (Platform.isAndroid) {
      // 以下两行 设置android状态栏为透明的沉浸。
      SystemUiOverlayStyle systemUiOverlayStyle = SystemUiOverlayStyle(statusBarColor: Colors.transparent);
      SystemChrome.setSystemUIOverlayStyle(systemUiOverlayStyle);
  }
  Global.init().then((value) => runApp(MyApp()));
}
After introducing Sentry, you need to wrap it with an extra layer.
import 'package:sentry_flutter/sentry_flutter.dart';

void main() {
  WidgetsFlutterBinding.ensureInitialized();

  SentryFlutter.init(
    (options) {
      options.dsn = 'http://1335793bf7684f21918248b11cebbf9c@sentry.sblt.deali.cn:9800/9';
    },
    appRunner: () {
      if (Platform.isAndroid) {
        SystemUiOverlayStyle systemUiOverlayStyle = SystemUiOverlayStyle(statusBarColor: Colors.transparent);
        SystemChrome.setSystemUIOverlayStyle(systemUiOverlayStyle);
      }
      Global.init().then((value) => runApp(MyApp()));
    }
  );
}
In other words, put the original App startup code inside SentryFlutter's appRunner to run.
AspNetCore Project
Although for AspNetCore projects we use ExceptionLess to collect logs, before switching to ExceptionLess we also used Sentry for a while. Sentry supports so many platforms that using it in AspNetCore is naturally no problem.
According to the official guide, first install the dependency.
dotnet add package Sentry.AspNetCore -v 3.19.0
Then write the Sentry config in appsettings.json.
"Sentry": {
  "Dsn": "https://examplePublicKey@o0.ingest.sentry.io/0",
  "MaxRequestBodySize": "Always",
  "SendDefaultPii": true,
  "MinimumBreadcrumbLevel": "Debug",
  "MinimumEventLevel": "Warning",
  "AttachStackTrace": true,
  "Debug": true,
  "DiagnosticsLevel": "Error"
}
Unlike ExceptionLess, Sentry does not use the approach of registering a service and adding middleware. Instead it implements an extension method on IWebHostBuilder and hooks into the system at ConfigureWebHostDefaults. In theory the capabilities are stronger. ExceptionLess via middleware can only catch HTTP exceptions such as a URL not existing; if an error occurs in the program you need to catch it manually and then submit. Sentry uses a hook approach (as the official site says) and can catch unhandled exceptions and report them. (This is inferred from the AspNetCore startup process in Microsoft's docs. I do not understand it deeply—if there are mistakes, please correct me, experts~)
So for an AspNetCore 3.1 project, modify the Program.cs file and add one line of code: webBuilder.UseSentry();
public static IHostBuilder CreateHostBuilder(string[] args) =>
  Host.CreateDefaultBuilder(args)
  .ConfigureWebHostDefaults(webBuilder => {
    webBuilder.UseSentry();
    webBuilder.UseStartup<Startup>();
  });
For an AspNetCore 6 project, it is also the Program.cs file (.Net 6 only has this file).
var builder = WebApplication.CreateBuilder(args);
builder.WebHost.UseSentry();
Done. Then Sentry will catch exceptions and submit them.
You can also submit manually, for example:
void Demo([FromServices] IHub sentry) {
  // 提交普通信息
  sentry.CaptureMessage("hello", SentryLevel.Debug);

  try {
    // 会出错的代码
  }
  catch (Exception err) {
      sentry.CaptureException(err);
  }
}
Of course, according to the docs you can also skip dependency injection.
using Sentry;

try {
    // 会出错的代码
}
catch (Exception err) {
    SentrySdk.CaptureException(err);
}
OK, that is it for now. For other examples just look at the official site~
_EOF_
Installing, Configuring, and Using Sentry
- 本文作者:
- 程序设计实验室
- 版权声明:
- 本博客所有文章除特别声明外,均采用 BY-NC-SA 许可协议。转载请注明出处!
相关文章
lighthouse-fw:一个管理腾讯云轻量服务器防火墙的终端工具
公网IP一换手动改防火墙?这效率也配叫程序员? 一个增量diff引擎+系统钥匙串+TUI/CLI双模,443行重构包完事。 uvx直接跑,别告诉我还要pip install。
2026-05-02 · DevOps · 约 1 分钟
Coolify: Vercel 的开源版私有化部署平替版
又一个Vercel平替,开源自托管PaaS。自动构建部署是像模像样,但界面简陋得让人想翻白眼。网络要求还挑剔,国内服务器就别凑热闹了。
2026-02-05 · DevOps · 约 1 分钟
code-porter 代码工作区迁移工具
换电脑几十个项目手动拷?你不是懒就是蠢。写了code-porter,自动扫描、智能打包(bundle/zip),脏仓库也能保留未提交改动,一行uvx搞定。零依赖跨平台,U盘一插完事。别问我为什么不用rsync——它懂你项目结构?
2026-05-22 · DevOps · 约 1 分钟
Traefik,想说爱你不容易:一场动态反向代理的心累之旅
如果说 Nginx 是稳重的老好人,那 Traefik 就像一个特立独行的极客。它不按常理出牌,拒绝繁琐配置文件,宣称“自动发现,一切皆自动”,用 Docker label 就能配好反向代理,听起来是不是很优雅?
2025-04-16 · DevOps · 约 1 分钟
讨论
共 0 条加载评论中…