

Windows + AMD ROCm + PyTorch: A Debuff-Maxed Journey Training on a 6650 XT AMD GPU
Running PyTorch on Windows with a 6650 XT? AMD doesn't even officially support this card, so you have to compile ROCm yourself. After a night of wrestling with environment variables and compile errors, I didn't even get a single wheel out of it. So why insist on training on an AMD GPU on Windows?
目录17 个章节
Preface
Recently I've been seeing the z-image model a lot, and it seemed pretty interesting.
Embarrassingly enough, it's also been a while since I last tinkered with AI image generation. The servers at the studio have long been maxed out by large models, so piling on more tasks would be a bit inhumane.
So I set my sights on my own desktop.
The RX 6650 XT I bought a few years ago—back then I never even considered using it for training. But years later, AMD's ROCm has gradually matured.
It used to be something you could only tinker with on Linux, but this year ROCm v7 started supporting Windows, which suddenly made this somewhat feasible.
The only problem: PyTorch still only has official support on Linux, so on Windows you have to compile it yourself.
Alright then, let's give it a shot.
This article records my complete journey of pitfalls on the Windows 11 + AMD 6650 XT + ROCm + PyTorch path.
As of this article's publication, I still haven't succeeded 😂
But I'll treat this as an ongoing series, and keep writing until I succeed (or give up completely).
Virtual Environment
This step is basic Python stuff, so I'll go over it briefly.
Creating a Virtual Environment
mkdir d:/code/2/_temp
cd d:/code/2/_temp
python -m venv venv
The above commands will create a virtual environment at d:/code/2/_temp/venv, with the same Python version as the system install.
Of course, you can also use solutions like conda / mamba / uv.
I initially used Stability Matrix to install ComfyUI, which automatically created a virtual environment for me, so I just went ahead and used that.
Activating the Virtual Environment
Stay in the d:/code/2/_temp directory and use the following command
venv/scripts/activate
Then make sure to verify
pip --version
Make sure the output path points to the pip inside the virtual environment, not the system-wide one.
Installing ROCm
Next is the most critical step: installing ROCm, which you can think of as CUDA for AMD GPUs.
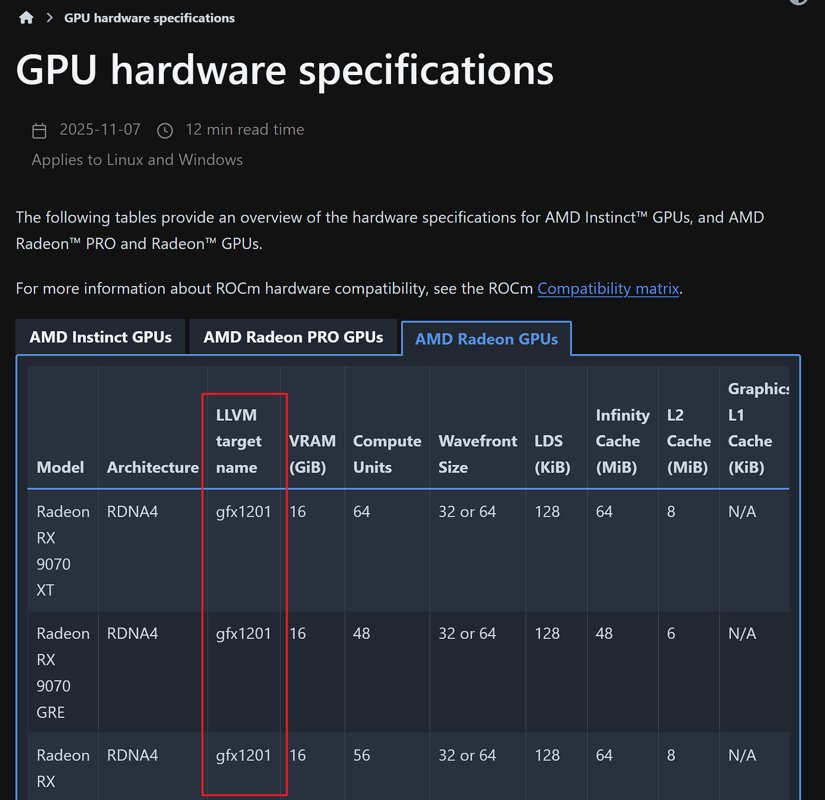
My GPU is an AMD RX 6650 XT, whose corresponding code name is gfx1032.
Confirming the GPU Architecture
You can look up the mapping between GPUs and architectures in the official ROCm docs:
https://rocm.docs.amd.com/en/latest/reference/gpu-arch-specs.html
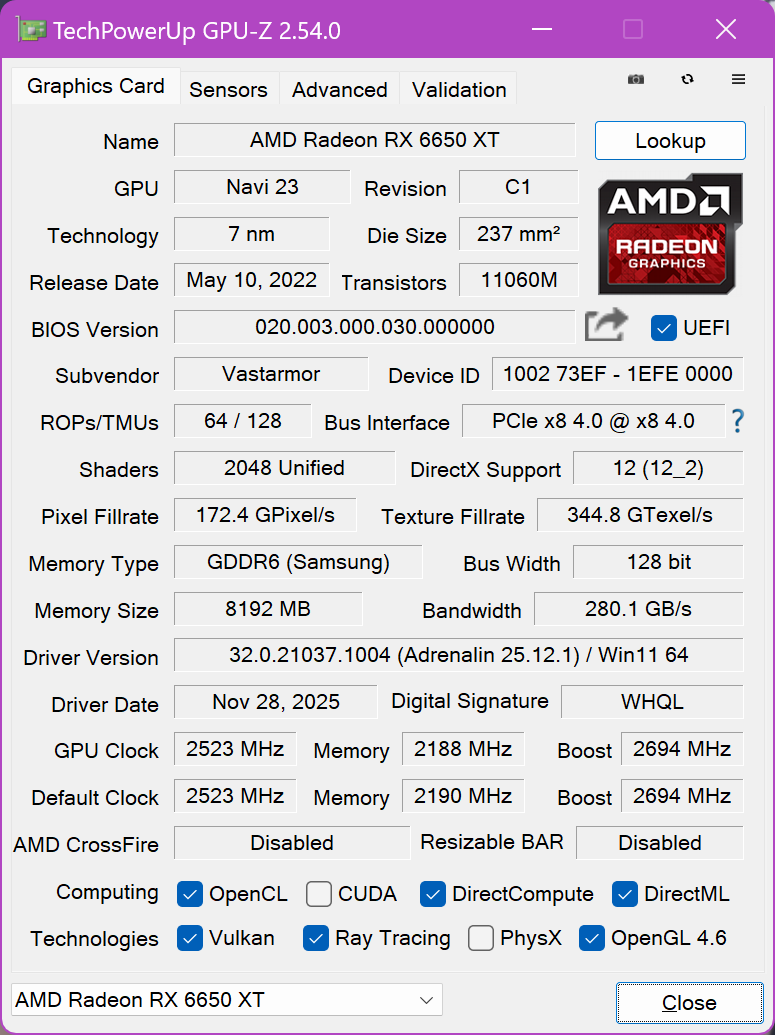
There's another method: use the GPU-Z tool to check the GPU architecture. For example, this card of mine is Navi 23.
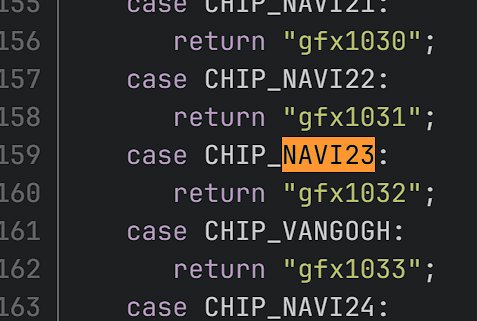
Then look up the corresponding code name in Mesa's source: https://gitlab.freedesktop.org/mesa/mesa/-/blob/main/src/amd/common/amd_family.c to find the matching code name in the source
About GPU Support
Note that AMD's official ROCm v7 does not support the 6x00/6x50 series GPUs.
That means for a card like the 6650 XT, you either use a third-party prebuilt version, or compile it yourself.
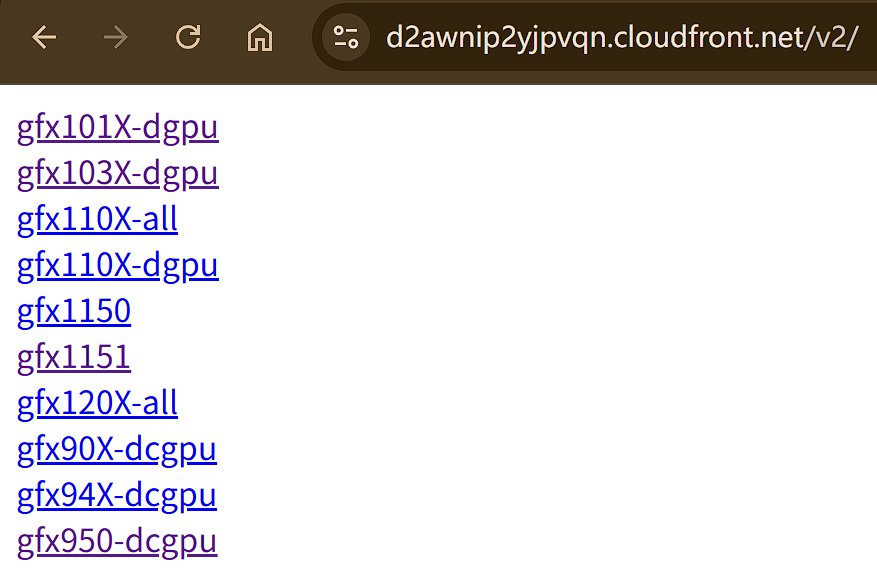
If your GPU is not on the official support list, you can visit this page to find the corresponding prebuilt packages: https://d2awnip2yjpvqn.cloudfront.net/v2/
If you happen to have an officially supported model (like the 7000 series), things are much simpler. Just use AMD's official packages. For example, here's the install for 7x00 series GPUs:
pip install --index-url https://rocm.nightlies.amd.com/v2/gfx110X-all/ "rocm[libraries,devel]"
And the install command for the 6650 XT is:
python -m pip install --upgrade --index-url https://d2awnip2yjpvqn.cloudfront.net/v2/gfx103X-dgpu/ rocm rocm-sdk-core rocm-sdk-devel rocm-sdk-libraries-gfx103x-dgpu
After installing, run a test
rocm-sdk test
If everything is fine, it will print a bunch of test results, ending with:
$ rocm-sdk test
...
Ran 22 tests in 258.284s
OK
Building PyTorch
After ROCm is installed, only one problem remains: PyTorch has no official Windows + ROCm release, so you have to compile it yourself.
Official docs: https://github.com/ROCm/TheRock/tree/main/external-builds/pytorch#build-instructions
Getting the Code
First clone the ROCm/TheRock repo, then enter the directory:
cd external-builds/pytorch
Use the official scripts to pull the PyTorch-related repos:
⚠️ Official reminder: on Windows, try to use shorter paths to avoid command length limits
python pytorch_torch_repo.py checkout --checkout-dir d:/code/2/pytorch
python pytorch_audio_repo.py checkout --checkout-dir d:/code/2/pytorch-audio
python pytorch_vision_repo.py checkout --checkout-dir d:/code/2/pytorch-vision
Only after pulling did I realize how huge these repos are. I'd recommend adding the --depth=1 flag so you don't pull the full git history.
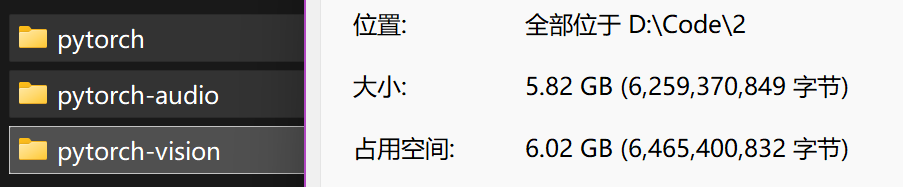
Environment Setup
This is the official build command, which includes an option to install ROCm. I had already installed ROCm, so I didn't follow this command.
python build_prod_wheels.py build ^
  --install-rocm --index-url https://rocm.nightlies.amd.com/v2/gfx110X-all/ ^
  --pytorch-dir C:/b/pytorch ^
  --pytorch-audio-dir C:/b/audio ^
  --pytorch-vision-dir C:/b/vision ^
  --output-dir %HOME%/tmp/pyout
If you already have ROCm, you only need to run this command. But hold on—the prep work isn't done yet.
python build_prod_wheels.py build ^
  --pytorch-dir d:/code/2/pytorch ^
  --pytorch-audio-dir d:/code/2/pytorch-audio ^
  --pytorch-vision-dir d:/code/2/pytorch-vision ^
  --output-dir d:/code/2/_temp/pyout
Installing and Configuring the clang / MSVC Build Environment
You also need to install Visual Studio 2022's C++ development tools.
The install takes a bit over 6 GB of space.
If you start compiling right after installing, it probably still won't work—it'll complain that it can't find VCToolsRedist or similar, because the paths haven't been added to the environment variables.
Adding Environment Variables
I first tried setting environment variables manually, for example:
# 1. 设置基础安装路径 (注意 VS 2022 默认通常在 'C:\Program Files', 确认你的在 x86)
$env:VCINSTALLDIR = "C:\Program Files (x86)\Microsoft Visual Studio\2022\BuildTools\VC"

# 2. 引用上面的变量来设置 Redist 路径 (使用双引号确保变量被解析)
$env:VCToolsRedistDir = "$($env:VCINSTALLDIR)\Redist\MSVC\14.44.35112\"

# 3. 验证是否设置成功
echo $env:VCToolsRedistDir
Although setting them manually can fix some errors, compiling PyTorch depends on dozens of complex environment variables (such as INCLUDE, LIB, PATH, etc.). Manually setting $env:VCToolsRedistDir only fixes this one error; later you might run into issues like cl.exe not being found.
Which I did, in fact 😂
Another approach: run the following commands in PowerShell to automatically load Visual Studio's full development environment (much more reliable than setting variables by hand):
# 导入 VS 编译环境到当前 PowerShell
Import-Module "C:\Program Files (x86)\Microsoft Visual Studio\2022\BuildTools\Common7\Tools\Microsoft.VisualStudio.DevShell.dll"
Enter-VsDevShell -VsInstallPath "C:\Program Files (x86)\Microsoft Visual Studio\2022\BuildTools" -SkipAutomaticLocation -Arch amd64
The most reliable approach: search for and open "x64 Native Tools Command Prompt for VS 2022" from the Start menu (x64 Native Tools Command Prompt).
Starting the Build
Once the prep is done, you can finally start compiling:
python .\build_prod_wheels.py build --pytorch-dir d:/code/2/pytorch --pytorch-audio-dir d:/code/2/pytorch-audio --pytorch-vision-dir d:/code/2/pytorch-vision --output-dir d:/code/2/_temp
After the first compile started I went to sleep, with auto-shutdown set for when the build finished. When I got up the next day, there was nothing.
Started a second compile, and this time it errored out. I asked Grandpa Gemini the LLM to help analyze it, and it told me the clang-cl compiler had strict mode enabled, treating warnings as errors.
I tried turning that option off with environment variables:
PowerShell commands
# 允许缺少原型警告
$env:CFLAGS = "-Wno-error=missing-prototypes -Wno-missing-prototypes -Wno-error"
$env:CXXFLAGS = "-Wno-error=missing-prototypes -Wno-missing-prototypes -Wno-error"
cmd commands (note: no spaces on either side of the equals sign)
set CFLAGS="-Wno-error=missing-prototypes -Wno-missing-prototypes -Wno-error"
set CXXFLAGS="-Wno-error=missing-prototypes -Wno-missing-prototypes -Wno-error"

# 验证一下
echo %CFLAGS%, %CXXFLAGS%
But it still errored after I changed that, so I tried clearing the build cache, because RegisterMeta_0.cpp in the error message is a generated intermediate file, and leftover cache can sometimes mess up the build logic.
Deleted the d:/code/2/pytorch/build folder and started the build again. This time no errors for now, and the CPU was maxed out at 100%.
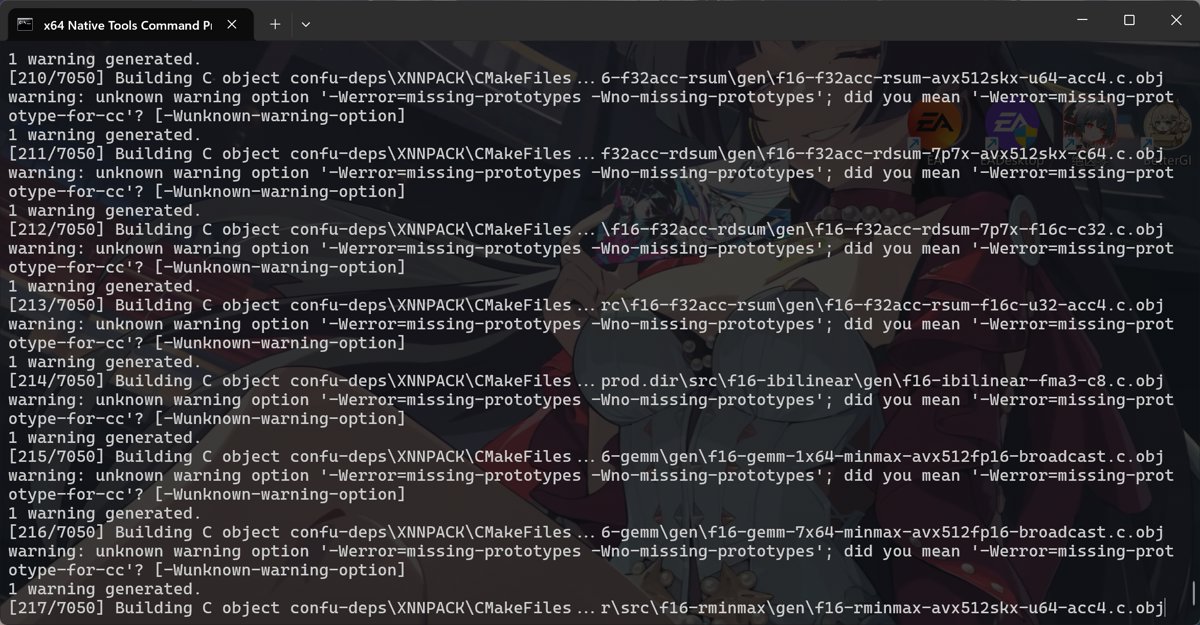
Error Analysis
It still errored out in the end
Error Messages
The error was too long
I'll paste the main errors here:
error: use of undeclared identifier 'Wno'
error: use of undeclared identifier 'error'
error: use of undeclared identifier 'missing'
error: use of undeclared identifier 'prototypes'
The corresponding context:
static const std::map<string, string> kMap = CAFFE2_BUILD_STRINGS;
And CAFFE2_BUILD_STRINGS was expanded like this in the auto-generated header file:
{"CXX_FLAGS", ""-Wno-error=missing-prototypes -Wno-missing-prototypes" /DWIN32 /D_WINDOWS ..."}
Note this double-quote structure:
""-Wno-error=missing-prototypes -Wno-missing-prototypes"
This is illegal C/C++ string concatenation, which directly causes the macro-expanded code to not be valid C++ syntax.
So it was probably the CFLAGS and CXXFLAGS environment variables I set earlier that were wrong?
Trying a Downgrade
This time Grandpa Gemini the LLM wasn't of any use, so I had to turn to Grandpa GPT, who told me it might be that the PyTorch source version was too new (I was using 2.11 here).
I decided to try downgrading to 2.10. Using the method shared in Building ROCm 7.1 and PyTorch on Windows for Unsupported GPUs: My Hands-On Guide, you can specify the version:
python pytorch_torch_repo.py checkout --repo-hashtag release/2.10 --gitrepo-origin https://github.com/ROCm/pytorch.git --depth=1 --checkout-dir d:/code/2/pytorch
python pytorch_audio_repo.py checkout --require-related-commit --depth=1 --checkout-dir d:/code/2/pytorch-audio --torch-dir d:/code/2/pytorch
python pytorch_vision_repo.py checkout --require-related-commit --depth=1 --checkout-dir d:/code/2/pytorch-vision --torch-dir d:/code/2/pytorch
Damn, it still didn't work. This time GPT doubled down on me, insisting that you can't compile PyTorch on Windows...
Fine, I'll jot this down for now.
References
- https://rocm.docs.amd.com/en/latest/reference/gpu-arch-specs.html
- https://github.com/ROCm/TheRock/blob/main/RELEASES.md#installing-releases-using-pip
- https://www.reddit.com/r/ROCm/comments/1n1jwh3/installation_guide_windows_11_rocm_7_rc_with/
- https://www.reddit.com/r/ROCm/comments/1p7knvx/amd_released_rocm_711_for_windows_with_pytorch/
- https://medium.com/@guinmoon/building-rocm-7-1-and-pytorch-on-windows-for-unsupported-gpus-my-hands-on-guide-0758d2d2b334
- https://www.bilibili.com/video/BV1PAeqz1E7q/?share_source=copy_web&vd_source=b9f4757ad714ceaaa3563ca316ff1901
_EOF_
Windows + AMD ROCm + PyTorch: A Debuff-Maxed Journey Training on a 6650 XT AMD GPU
- 本文作者:
- 程序设计实验室
- 版权声明:
- 本博客所有文章除特别声明外,均采用 BY-NC-SA 许可协议。转载请注明出处!
相关文章
Windows + AMD 显卡,终于能用 PyTorch 炼丹了
Windows+AMD+ROCm+PyTorch这地狱级组合居然跑通了。无非是用了官方ROCm和保守的PyTorch 2.9.1,避开新版本那些破事。下一步?总算能试试炼丹和AI画图了。
2026-05-09 · ROCm · 约 1 分钟
告别N卡CUDA垄断,Windows+AMD显卡ROCm跑深度学习:手把手实现 MNIST 手写数字识别
在Windows+AMD的debuff下硬是编译了ROCm版PyTorch,拿MNIST这种“Hello World”来验货。用CNN而不是老掉牙的全连接网络,总算对得起显卡算力。跑完500个batch损失降到0.03,这种基础任务也就测个环境能用罢了。
2026-05-09 · ROCm · 约 1 分钟
ROCm on Windows 性能排查:RX 6650 XT 跑 PyTorch,为什么加速不明显?
自编译折腾半天,加速不到2倍?小模型+Windows+gfx1032非官方支持,能有这个速度算给面子了。别指望生产环境,当实验玩具玩吧。
2026-05-09 · ROCm · 约 1 分钟
打包ROCm环境的相关Wheel方便后续使用
呵,折腾半天才发现没法从site-packages直接提取Wheel,还得从官方源重新拖。几个G的ROCm全家桶,预编译好的二进制乐高,省得下次再对着源码干等几小时。
2026-05-09 · ROCm · 约 1 分钟
讨论
共 0 条加载评论中…