

Using dnot.sh to Replace Windows Defender
dnot.sh stuffs a fake AV signature into Security Center, and Defender obediently clocks out—at least as far as the monitoring UI is concerned. In practice you still have to run extra-strip.bat to actually turn it off; both steps are indispensable, which is honestly a bit of a hassle. Once it's done you're running naked, so don't touch this if you're faint of heart.
目录6 个章节
Preface
Windows Defender has basically become a street rat that everybody shouts to beat. After buying a new computer or reinstalling the system, the first thing to do is turn off this piece of junk.
Its protection capabilities aren't actually bad, but in a development environment, these situations often occur:
- Scanning large amounts of source code, dependencies, and build artifacts
- Occupying disk IO and CPU
- False-positiving some development tools, debugging tools, and KMS tools
- Automatically quarantining files
- Even when you yourself know the files are fine, you still have to restore them over and over
But this thing is getting harder and harder to turn off now, unless you install a proper antivirus, such as Huorong, which has a relatively good reputation.
I previously never really wanted to install third-party antivirus software. Even the most lightweight antivirus still takes up resources; I still prefer a clean system.
Recently I tried using dnot.sh (defendnot) to replace Windows Defender.
Project URL:
https://github.com/es3n1n/defendnot
What Is dnot.sh?
Project URL: https://github.com/es3n1n/defendnot
dnot.sh is not a real antivirus.
Its core principle is to reverse-engineer Windows Security Center, that is, the related WSC interfaces, and register itself as a third-party antivirus.
Under normal circumstances, when Windows detects a third-party antivirus, Microsoft Defender will exit active protection mode.
After installation, you can see this in Windows Security Center:
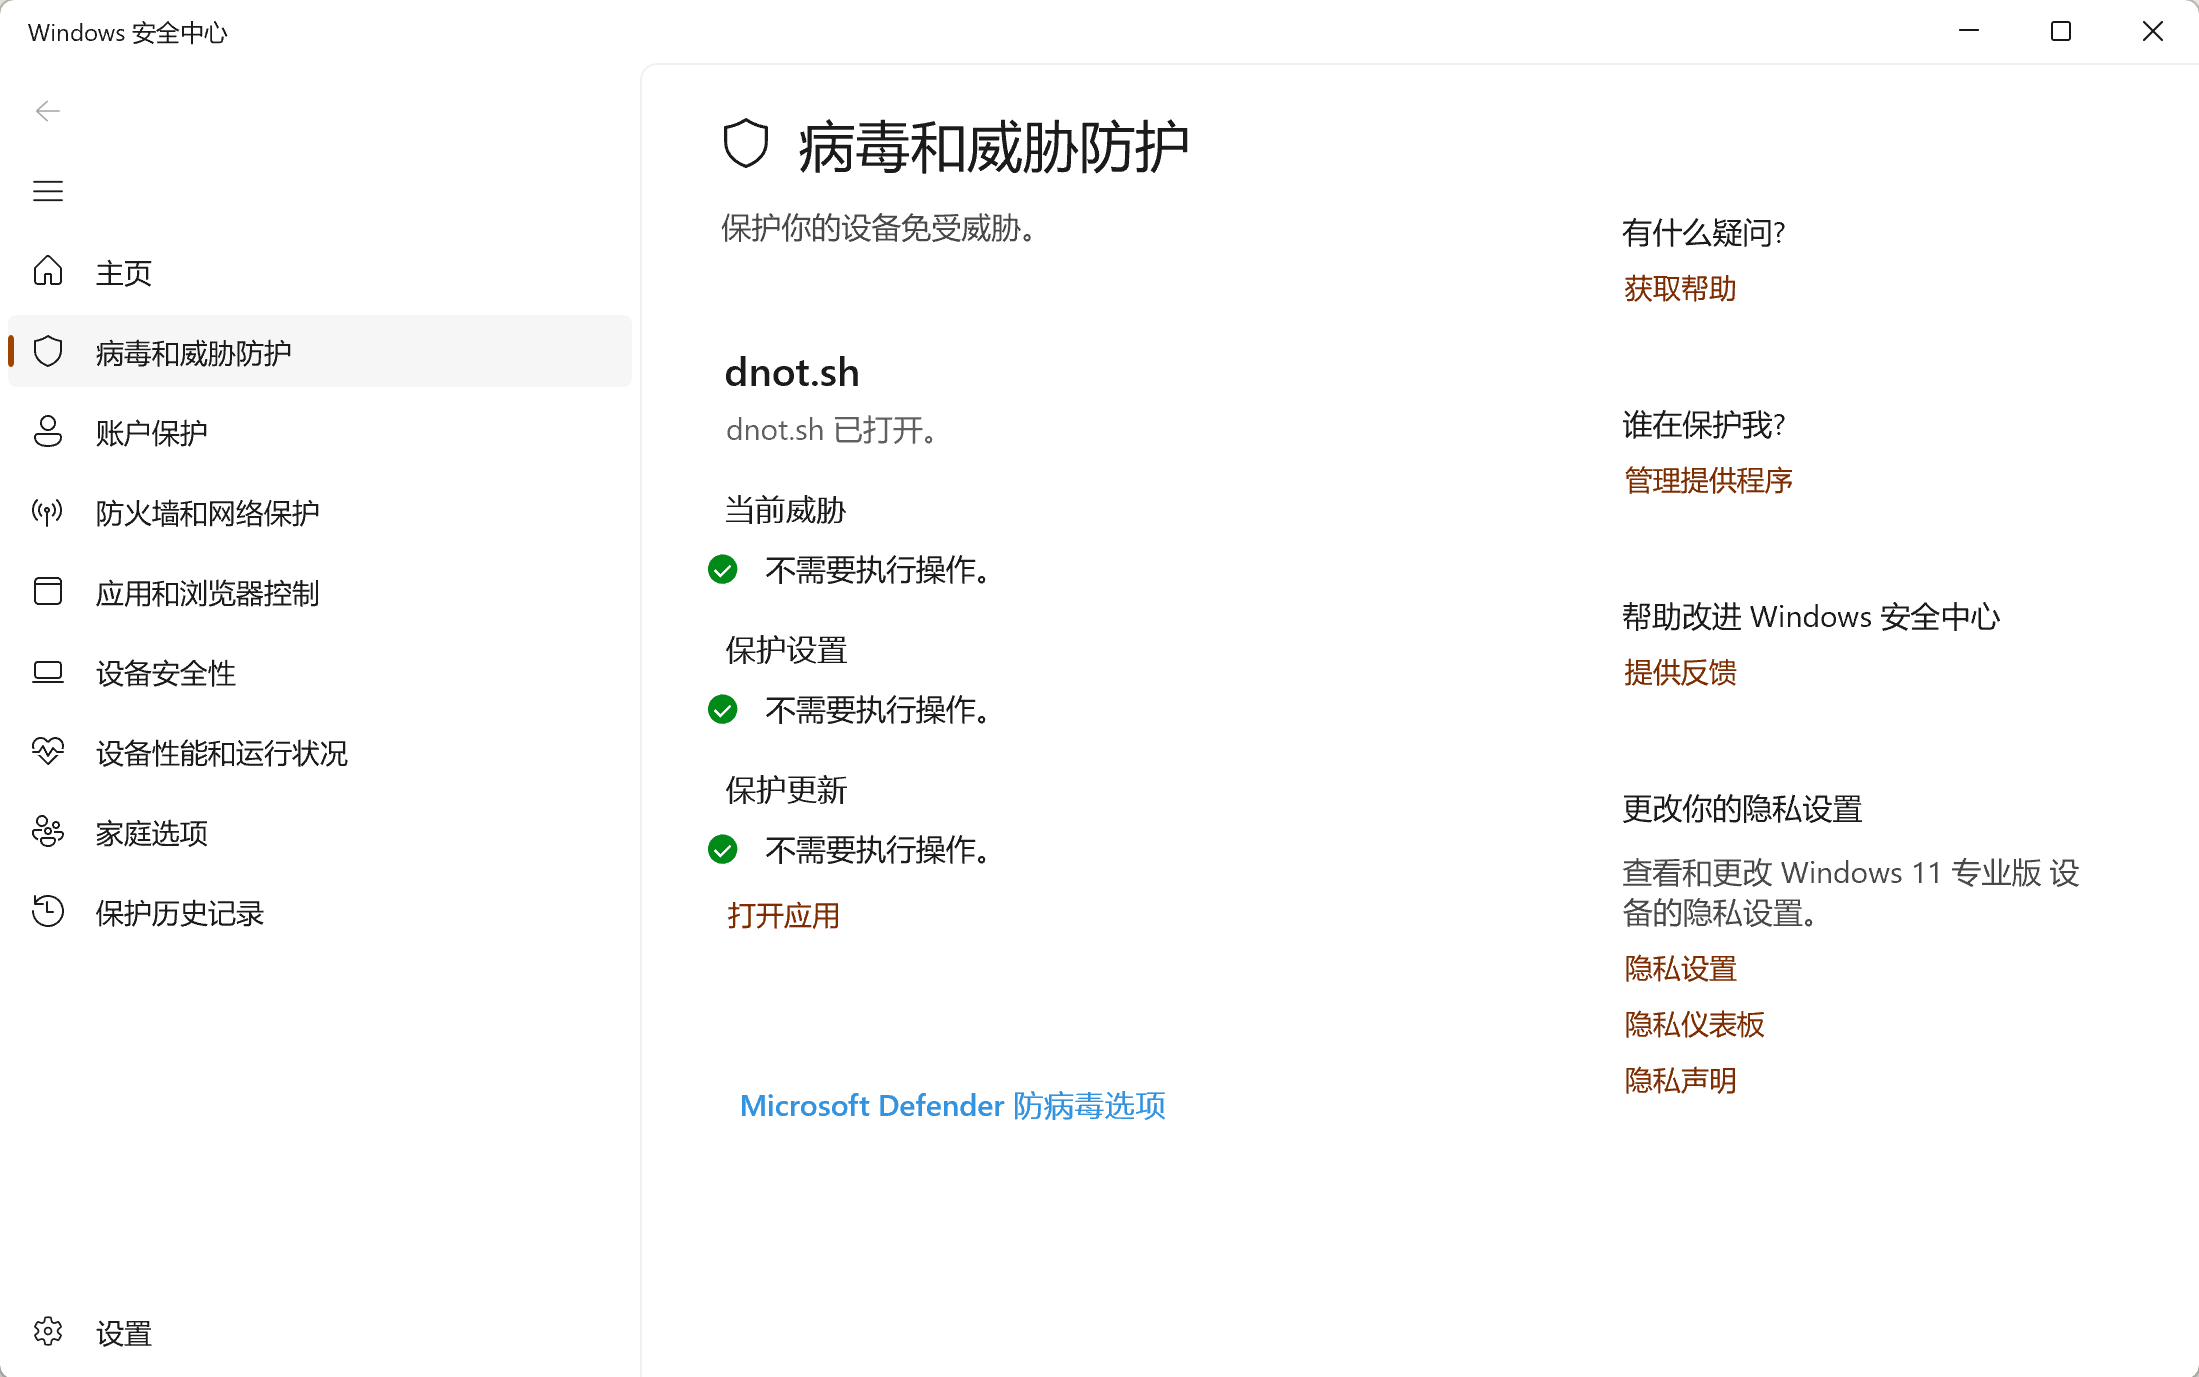
In other words, Windows already believes there is a third-party antivirus on the system.
Installing dnot.sh
Go directly to: https://dnot.sh/
Just follow the project's instructions to install.
I'll also copy the official installation instructions here
# Example 1: Basic installation
irm https://dnot.sh/ | iex

# Example 2: With custom AV name and firewall
& ([ScriptBlock]::Create((irm https://dnot.sh/))) --name "Custom AV name" --firewall

# Example 3: Without allocating console
& ([ScriptBlock]::Create((irm https://dnot.sh/))) --silent

# Example 4: Run once, without allocating console
& ([ScriptBlock]::Create((irm https://dnot.sh/))) --silent --disable-autorun

# Example 5: Uninstall
& ([ScriptBlock]::Create((irm https://dnot.sh/))) --disable
After installation, you can confirm in Windows Security Center whether dnot.sh has been successfully registered.
However, there is a pitfall here.
Windows Security Center showing that dnot.sh is enabled does not mean Defender has necessarily actually stopped running.
I ran into this situation right after I first installed it.
You can use PowerShell to check Defender status:
Get-MpComputerStatus | Select-Object `
    AMRunningMode,
    AMServiceEnabled,
    AntivirusEnabled,
    RealTimeProtectionEnabled,
    BehaviorMonitorEnabled,
    IoavProtectionEnabled
The first time I checked I got:
AMRunningMode             : Normal
AMServiceEnabled          : True
AntivirusEnabled          : True
RealTimeProtectionEnabled : True
BehaviorMonitorEnabled    : True
IoavProtectionEnabled     : True
Although Windows Security Center already showed dnot.sh, Defender was in fact still fully running.
This also explains why it would still scan and quarantine files.
Using extra-strip.bat
The defendnot project also provides:
extra-strip.bat
It is used to further disable Defender-related components, including real-time monitoring, behavior monitoring, and other features.
Run extra-strip.bat and then restart the system.
Then execute again:
Get-MpComputerStatus | Select-Object `
    AMRunningMode,
    AMServiceEnabled,
    AntivirusEnabled,
    RealTimeProtectionEnabled,
    BehaviorMonitorEnabled,
    IoavProtectionEnabled
This time the result became:
AMRunningMode             : Not running
AMServiceEnabled          : False
AntivirusEnabled          : False
RealTimeProtectionEnabled : False
BehaviorMonitorEnabled    : False
IoavProtectionEnabled     : False
This is what indicates that Defender has truly stopped running.
So from actual use, it can be simply understood as:
dnot.sh
    ↓
向 Windows Security Center 注册第三方 AV

extra-strip.bat
    ↓
进一步关闭 Defender

最终结果
    ↓
Windows Security Center 显示 dnot.sh
Defender 不再运行
Final Result
After completing the configuration, Windows Security Center will still believe the system has security software, so it will not keep prompting “no antivirus installed.”
At the same time, Defender itself no longer performs real-time scanning.
For people who do not want to install third-party antivirus software, and also do not want Defender constantly scanning their development environment, this approach is relatively lightweight.
However, it should be noted: dnot.sh itself has no virus-scanning capability.
In other words, after using this approach, it is essentially equivalent to the system running naked.
Therefore, whether it is suitable to use depends on your own usage habits and security needs.
For ordinary users, I do not recommend turning off Defender.
But if you are fairly clear about the sources of the programs you run, and can also judge the safety of executables, scripts, and development tools yourself, then dnot.sh counts as a relatively clean solution.
Summary
The whole process is actually quite simple:
- Install dnot.sh
- Confirm that Windows Security Center has recognized dnot.sh
- Use Get-MpComputerStatus to check Defender status
- If it still shows Normal, run extra-strip.bat
- Restart Windows
- Confirm again that AMRunningMode = Not running
At least on my current Windows 11 machine, I was ultimately able to replace Windows Defender with dnot.sh.
_EOF_
Using dnot.sh to Replace Windows Defender
- 本文作者:
- 程序设计实验室
- 版权声明:
- 本博客所有文章除特别声明外,均采用 BY-NC-SA 许可协议。转载请注明出处!
相关文章
在 Windows11 上启用 ssh-agent
微软的坑真多!!!
2026-08-25 · Windows · 约 1 分钟
在Windows上将git与ssh-agent搭配使用
Windows git 还自带 ssh?真是老土的兼容性思路。一行配置就能解决,不过得先管好 ssh-agent 的连接。 ProxyCommand 居然又添乱,难怪老出毛病。
2025-08-21 · Windows · 约 1 分钟
WSL小技巧:切换到zsh以及加入右键菜单
切换到zsh 说明 在 Windows Subsystem for Linux 中,执行 chsh -s /bin/zsh 并不能成功地将默认 shell 修改为 zsh。在打开 WSL 时,默认 shell 仍然为 bash。 这是因为WSL 在启动时并没有执行 login 相关的组件,而这些组件和默认 shell 有关。Microsoft 已经知晓了这个问题,但并没有计划去解决。 方法 我们可
2021-12-18 · Windows · 约 1 分钟
2024年,提升Windows开发和使用体验实践 - 终端&命令行篇
哼,Windows终端重灾区?用scoop装软件,Starship美化,但WinSW自启还是垃圾。啧,又一个scoop-search替代原版,gow补齐Unix工具,gsudo模拟sudo,但proxychains有点奇怪。哦,blessed-contrib仪表盘?只是好玩罢了,不如用erdtree看目录。
2024-03-05 · Windows · 约 1 分钟
讨论
共 0 条加载评论中…