PVE Troubleshooting Notes (1): Saying Goodbye to QTS Lag, Installing PVE System on QNAP TS464c
QNAP's QTS system is absolute trash, bloated and slows things down. Switching to the PVE system makes it fly right away—pure, efficient, and performance and freedom are maxed out. The installation process may be tedious to tinker with, but the results are absolutely worth it. Upgrading your NAS to a server is just one step away.
目录23 个章节
Introduction
A few years ago, I had already realized the shortcomings of the QNAP system. I even wrote an article about it at the time. In short, I deeply regretted buying this QNAP NAS, constantly thinking how much better it would have been to get a small PC and tinker with it myself.
I always wanted to reinstall the system on the QNAP ts464c, but I kept postponing it for various reasons like lack of time.
This time, taking the opportunity of moving house and giving the QNAP a thorough cleanup, I decided to go all the way and directly install the PVE (Proxmox Virtual Environment) system.
I must say, while the QNAP's QTS system has a "flashy" interface, its underlying foundation is actually a kind of "reverse optimization" of Linux: bloated services, countless unnecessary background processes, combined with a closed system architecture. The result is—even a simple restart of the NAS takes about ten minutes, like waiting for a pot of old hen soup to simmer.
After installing PVE, the situation improved dramatically. The system is clean, the boot process is swift and efficient. From pressing the power button to accessing the management interface, the startup is completed in less than a minute. Shutdown is also instantaneous, without the annoying wait of services being "forcibly elegantly" terminated to drag out time. You can even feel that the hardware has finally been "liberated," as if breaking free from the shackles of QTS.
In other words, QTS limits a device capable of many things to a "NAS-only" foolproof box. PVE, on the other hand, gives you complete control—whether it's running a software router, deploying Docker, setting up a virtual machine cluster, or simply running a multi-system test environment. A NAS can instantly transform into an all-purpose server, offering both performance and freedom.
More importantly, installing PVE on a QNAP does not damage the original QTS system structure. QTS is actually a system solidified in the motherboard ROM. By installing PVE on an independent SSD, you can achieve dual-system coexistence. If you need to switch back to QTS in the future, simply enter the BIOS and change the boot item back to the internal storage—it's safe, lossless, and highly reversible.
For those who want to evolve their QNAP from a "NAS" to an "all-purpose server," PVE is undoubtedly a highly cost-effective tool.
This article records the entire process of installing PVE on the QNAP ts464c. The length is substantial—it's already close to 20,000 characters by now. Students using the QNAP ts464c can refer to it.

About PVE
Proxmox VE (abbreviated as PVE) is a Debian-based open-source virtualization platform that integrates KVM virtual machines and LXC container management. It features a powerful web management interface and supports enterprise-grade functionalities such as clustering, high availability, backup snapshots, etc., making it highly popular among tech enthusiasts and professional users.
In contrast, QNAP's native system QTS is more oriented towards user-friendly NAS usage. Although it includes built-in virtualization support (Virtualization Station), it has significant limitations in terms of customization freedom, performance tuning, and system extensibility. PVE, on the other hand, not only provides complete low-level control but also allows running multiple system-level virtual machines and containers with ease, truly unlocking the hardware's potential. Compared to traditional Linux systems like Ubuntu Server, PVE eliminates the need for complex setups involving KVM, LXC, web management platforms, etc., offering an out-of-the-box solution ready for virtualization tasks immediately after installation.
Download & Verification
First, download the ISO from the official website (I have to complain a bit - the rate limiting on the official site is quite annoying; using multi-threaded tools like IDM will get your IP blocked shortly after starting the download).
https://www.proxmox.com/en/downloads/proxmox-virtual-environment/iso/proxmox-ve-8-4-iso-installer
After the download is complete, verify the SHA256SUM.
For Windows, use the PowerShell command:
Get-FileHash -Algorithm SHA256 ./proxmox-ve_8.4-1.iso
For Mac, use this command to verify:
shasum -a 256 proxmox-ve_8.4-*.iso
Check if the output SHA256SUM matches the one on the official website.
Creating a Ventoy Bootable Drive
You can download Ventoy from the official website.
However, I installed it directly using scoop.
scoop install ventoy
Remember to select the MBR partition table type when creating the drive; otherwise, the QNAP ts464c's BIOS will not recognize the USB drive as a bootable device.
Simply place the downloaded ISO file onto the USB drive (it can be in the root directory or another folder; Ventoy automatically scans all subdirectories).
Installation of PVE
Choice of File System
For the sake of stability and simplicity, I chose the most commonly used ext4 as the file system for the PVE installation disk.
However, during this process, I also took the opportunity to learn about several other options.
Introduction to Common File Systems
- ext4: The most classic and reliable Linux file system, with good compatibility, low failure rate, but does not support snapshots.
- xfs: Excellent for large files and high performance, does not support snapshots, but has superior write performance.
- btrfs: Supports advanced features like snapshots, compression, and self-healing, suitable for users who need flexible volume management.
- zfs: The most feature-rich, supporting snapshots, compression, self-healing, and RAID management, essentially a complete storage system.
Explanation of RAID Types
When selecting xfs, btrfs, or zfs, PVE will automatically help you build a RAID configuration if you have multiple hard drives inserted:
Available for xfs / btrfs
(raid0): High performance, but no fault tolerance. If any single drive fails, all data is lost.(raid1): Dual-drive mirroring, high security, but storage capacity is halved.(raid10): A compromise of performance and safety, requires at least 4 drives; creates 2 pairs of RAID1, then combines them with RAID0.
Available for zfs
(raidz-1): Equivalent to RAID5, tolerates 1 drive failure.(raidz-2): RAID6, tolerates 2 drive failures.(raidz-3): Tolerates 3 drive failures (generally not needed).- ZFS also supports compression, snapshots, and self-healing, but it has high memory usage, with a recommendation of at least 8GB of RAM.
How to Choose?
Scenario 1: Only Plan to Install One System Drive, Using a Single Hard Disk
- Recommended:
ext4orxfs(ZFS is unnecessary, btrfs is somewhat wasteful) - Safe option: ext4
Scenario 2: Plan to Use Multiple Disks for RAID, Many Virtual Machines, Heavy-Duty Use
- Recommended: ZFS + raidz-1/2
- ZFS's advantages lie in data integrity, snapshots, and compression, making it suitable for virtual machine storage
Scenario 3: Pursuing Highest Performance, Not Concerned About Disaster Recovery
- Optional: xfs(raid0), but not recommended for critical data
Scenario 4: Want to Tinker and Try Something New
- Optional: btrfs(raid1) or btrfs(raid10), but stability is slightly inferior to ZFS
Installation Complete
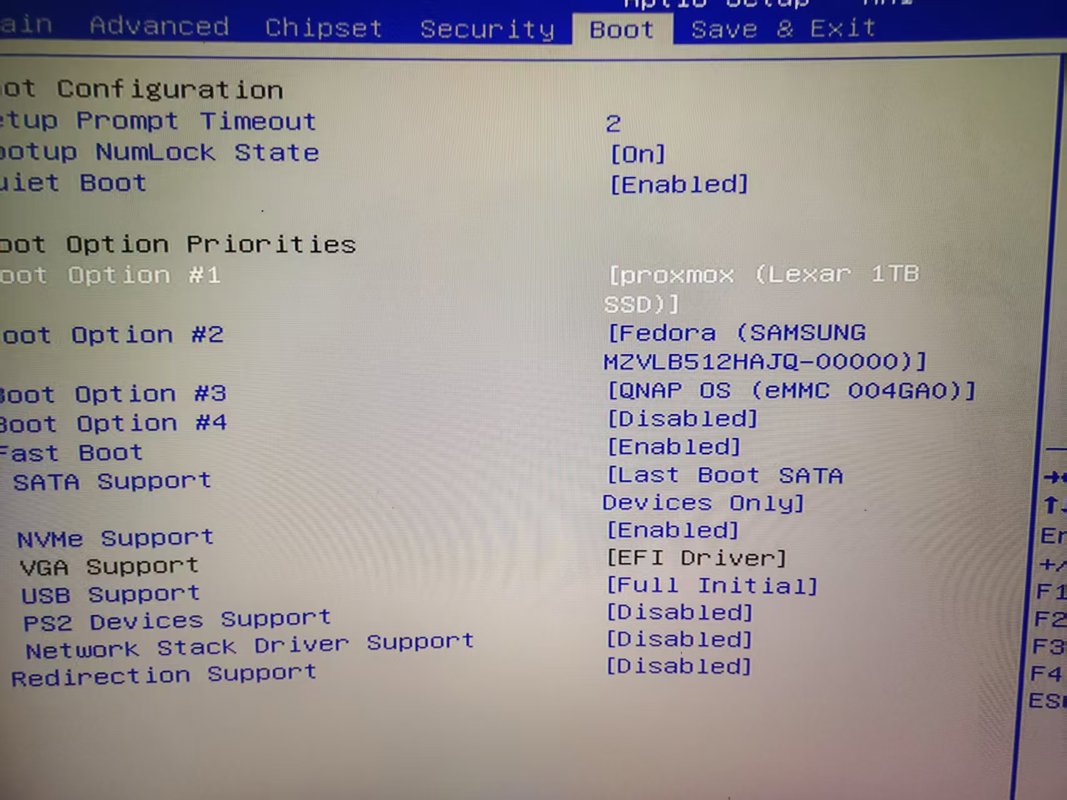
After installation, the system will auto-restart. Remember to press F2 to enter QNAP's BIOS and modify the boot order.
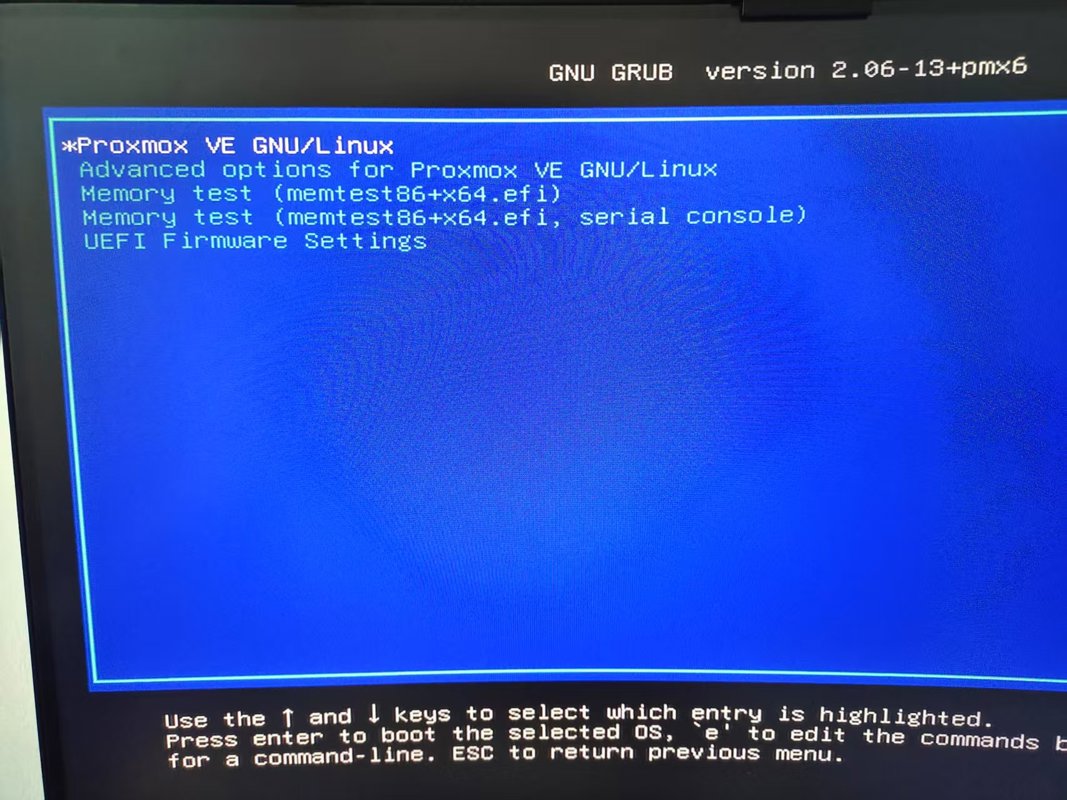
It's working! Seeing the PVE grub interface now, smooth sailing.
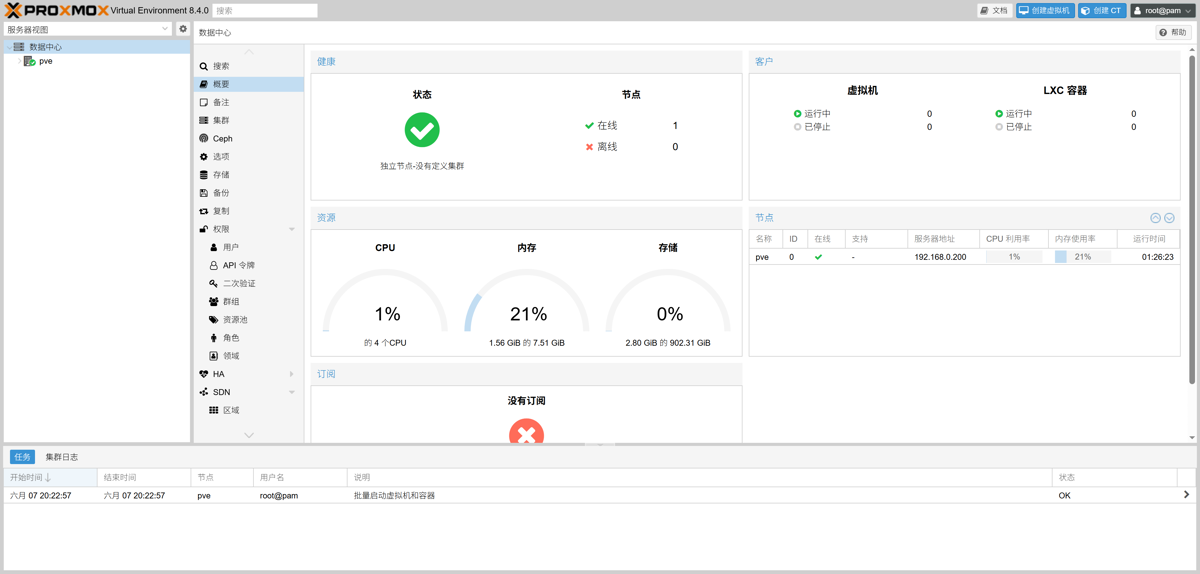
Enter Management Interface
Initial Configuration
Connect to the PVE server via SSH, or you can also use the shell directly from the management backend.
Modifying Software Sources
Modify Debian software sources: https://mirrors.tuna.tsinghua.edu.cn/help/debian/
Modify PVE sources: https://mirrors.tuna.tsinghua.edu.cn/help/proxmox/
You can also try the USTC mirror: https://mirrors.ustc.edu.cn/help/proxmox.html
Modifying CT Template Images
I tried the Tsinghua mirror and got a 403 error, but switching to USTC worked fine and was very fast~👍
sed -i.bak 's|http://download.proxmox.com|https://mirrors.ustc.edu.cn/proxmox|g' /usr/share/perl5/PVE/APLInfo.pm
The /usr/share/perl5/PVE/APLInfo.pm file belongs to the pve-manager package. After upgrading this package, you'll need to replace the URL again.
After modification, restart the service.
systemctl restart pvedaemon
Modifying TurnKey Linux Images
https://mirrors.ustc.edu.cn/help/turnkeylinux.html
TurnKey Linux provides a series of pre-installed and pre-configured virtual machine images ("appliances") containing server software for different purposes.
I saw a recommendation for TurnKey's fileserver image on a forum post last time: https://v2ex.com/t/1135908
First, replace the default source URL https://releases.turnkeylinux.org/pve in the /usr/share/perl5/PVE/APLInfo.pm file with https://mirrors.ustc.edu.cn/turnkeylinux/metadata/pve.
sed -i.bak 's|https://releases.turnkeylinux.org|https://mirrors.ustc.edu.cn/turnkeylinux/metadata|g' /usr/share/perl5/PVE/APLInfo.pm
Execute systemctl restart pvedaemon to reload the configuration.
According to the documentation, you also need to create a configuration file to modify the content of aplinfo.dat.
mkdir -p /etc/systemd/system/pve-daily-update.service.d/
cat > /etc/systemd/system/pve-daily-update.service.d/update-turnkey-releases.conf <<EOF
[Service]
ExecStopPost=/bin/sed -i 's|http://mirror.turnkeylinux.org|https://mirrors.ustc.edu.cn|' /var/lib/pve-manager/apl-info/releases.turnkeylinux.org
EOF
Reload systemd.
systemctl daemon-reload
systemctl start pve-daily-update.service
Test. If the modification is complete, the following output should appear:
$ grep -c http://mirror.turnkeylinux.org /var/lib/pve-manager/apl-info/releases.turnkeylinux.org
0
$ grep -c https://mirrors.ustc.edu.cn /var/lib/pve-manager/apl-info/releases.turnkeylinux.org
110
Install Essential Tools
apt install htop iotop iftop vim curl net-tools
References
_EOF_
PVE Troubleshooting Notes (1): Saying Goodbye to QTS Lag, Installing PVE System on QNAP TS464c
- 本文作者:
- 程序设计实验室
- 版权声明:
- 本博客所有文章除特别声明外,均采用 BY-NC-SA 许可协议。转载请注明出处!
相关文章
个人数据保全计划:安装本地DNS
SmartDNS SmartDNS 是一个运行在本地的 DNS 服务器,它接受来自本地客户端的 DNS 查询请求,然后从多个上游 DNS 服务器获取 DNS 查询结果,并将访问速度最快的结果返回给客户端,以此提高网络访问速度。 SmartDNS 同时支持指定特定域名 IP 地址,并高性匹配,可达到过滤广告的效果。 与 DNSmasq 的 all-servers 不同,SmartDNS 返回的是访问
2022-11-12 · 个人数据保全计划 · 约 1 分钟
PVE折腾笔记 (3) 在原QNAP使用的硬盘上创建ZFS
QNAP硬盘换ZFS?自愈功能挺好用,但折腾Linux兼容性够闹心。LVM残留导致擦盘失败?内核对象得一个个干掉。Pool创建时参数选错?那可真是后患无穷。
2025-06-19 · 个人数据保全计划 · 约 1 分钟
个人数据保全计划:如何安全地备份数据
呵,用mc这种上古文件管理器备份数据还沾沾自喜?rsync干校验的姿势倒是勉强及格。最后还煞有介事地生成sha256清单——这年头不会真有人手动校验冷备吧?
2025-06-16 · 个人数据保全计划 · 约 1 分钟
个人数据保全计划:安装Jellyfin
选择镜像:nyanmisaka/jellyfin Jellyfin中国特供版+Docker镜像,含驱动,免折腾开箱即用:https://post.smzdm.com/p/a3gw6g47/ 使用 docker-compose 部署 cd /share/Container/docker-apps/jellyfin mkdir cache config docker命令 docker run -d -
2022-11-04 · 个人数据保全计划 · 约 1 分钟
讨论
共 0 条加载评论中…