Project Completion Summary: Developing a Large Model Client Using Blazor and gRPC
Actually, a few years ago, I had used Blazor lightly. At first, I was a bit skeptical about it—I still preferred the traditional separation of front and back ends, using AspNetCore for the backend and React for the frontend, which has a rich ecosystem and makes it easy to create any component. This time, it was just a small demo project where I tried out Blazor, moving from feeling quite awkward at the beginning to getting more comfortable with it over time. I think Blazor Server is quite handy for small projects. I’ll continue refining the project and further explore B
目录13 个章节
Preface
Let me first introduce this project.
Recently, I have been exploring large language models, training several models for different scenarios. To allow users to test and use them, a frontend needs to be developed.
At this point, a frontend built with Gradio is not quite sufficient. Although there are many open-source ChatGPT frontends on GitHub, after looking around, I didn't find any that were easy to customize and develop further. Then I thought, for such simple functionality, why not just build it myself instead of copying from GitHub?
So, let's get started directly~
Initially, I planned to use React for the frontend and implement the typing effect in chat using WebSocket or EventSource. But then I thought, isn't there Blazor Server? This inherently maintains a long-lived connection with the server, eliminating the need for extra hassle. So I decided to give it a try.
See the effect first
PC Version
| Home Page | Chat Interface |
|---|---|
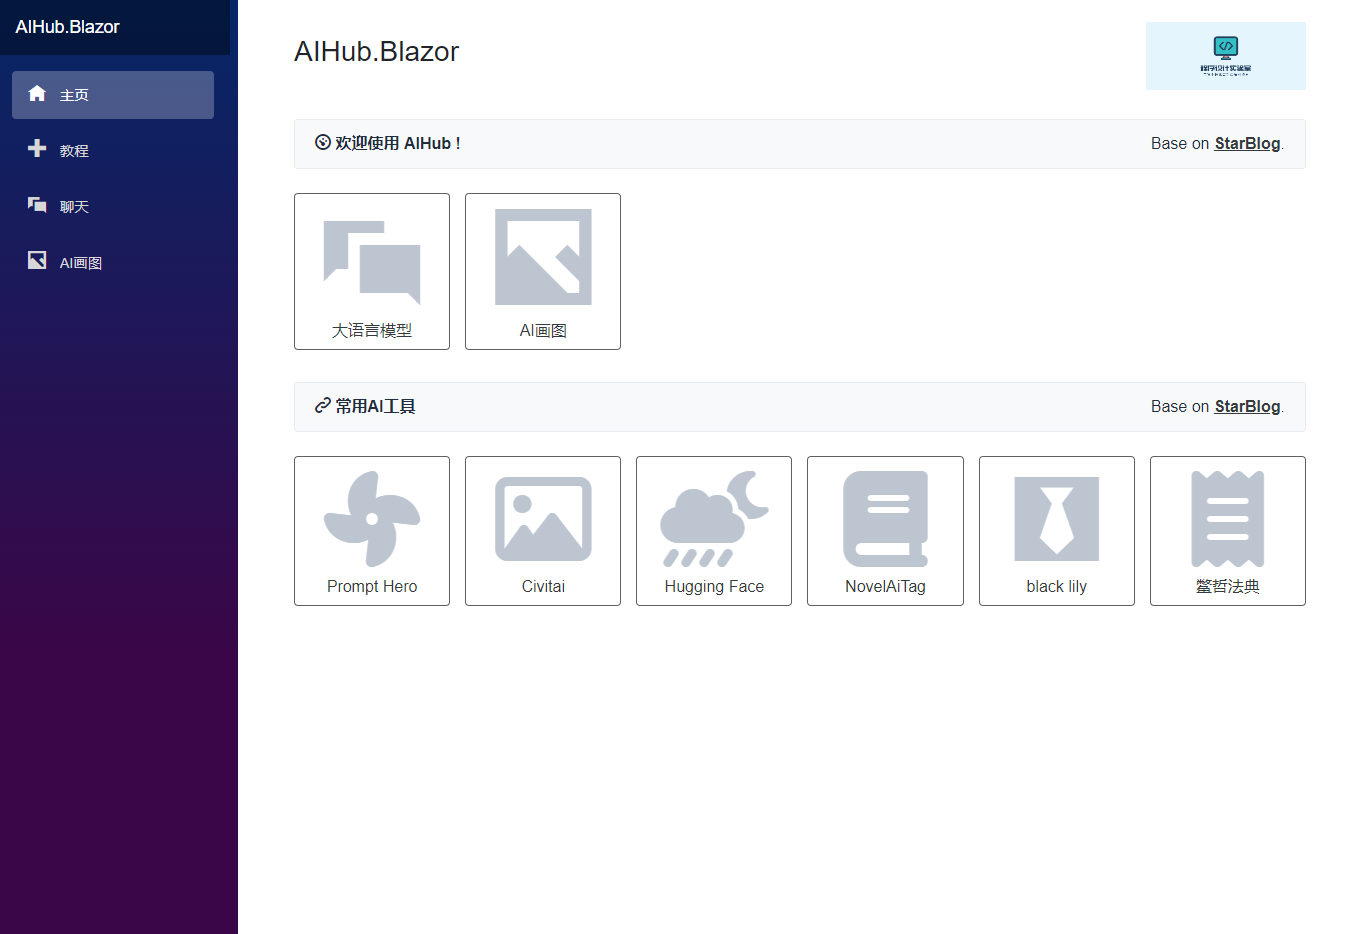 | 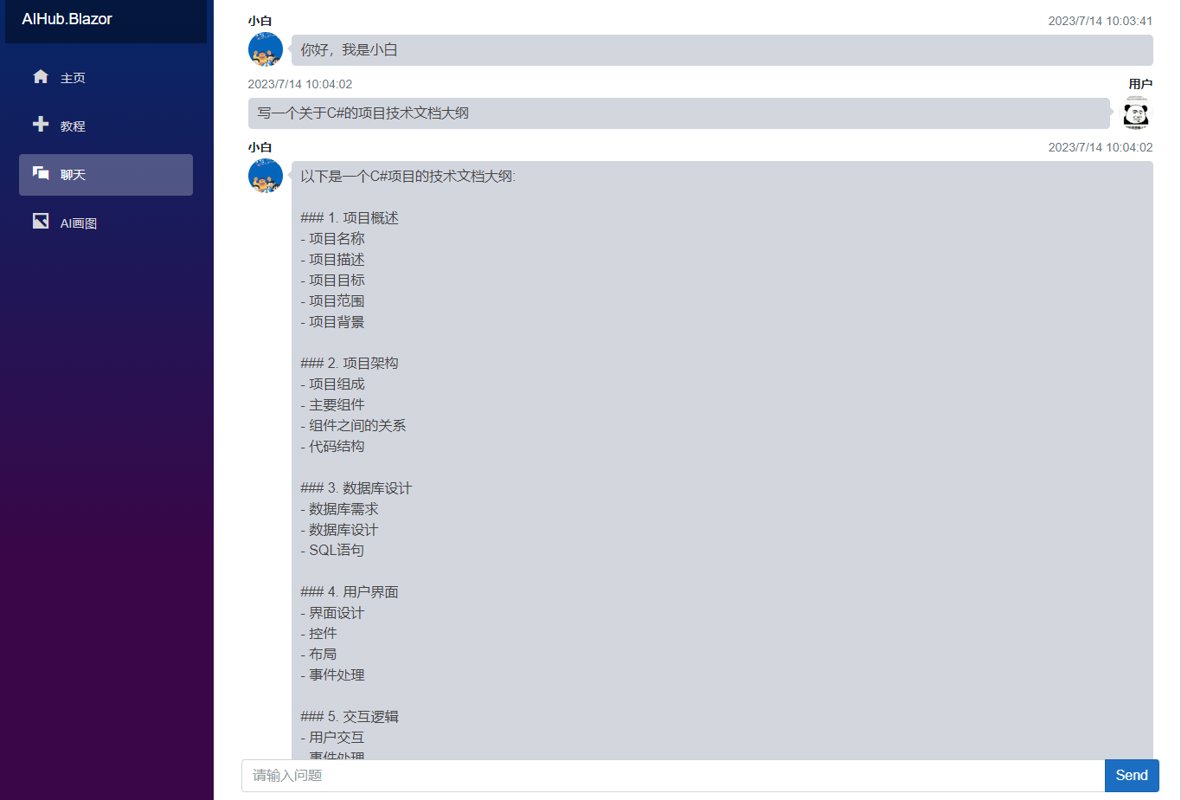 |
Mobile Version
| Home Page | Chat Interface |
|---|---|
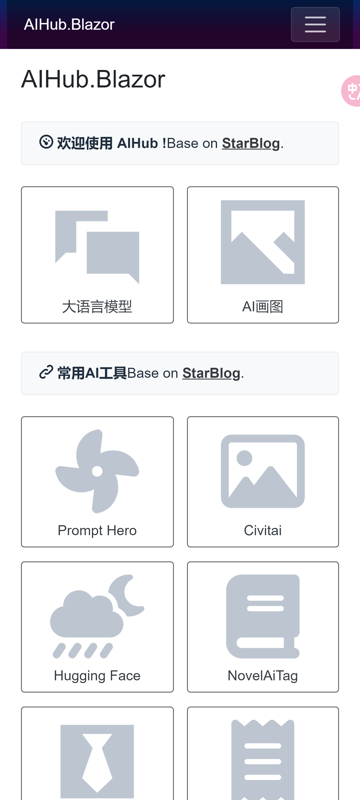 | 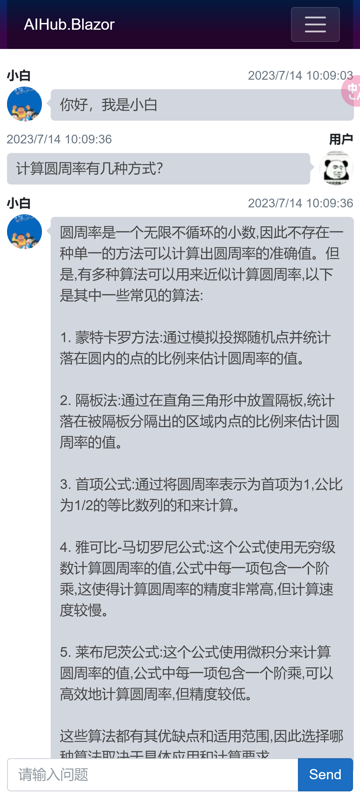 |
Project Design
Project Architecture Diagram
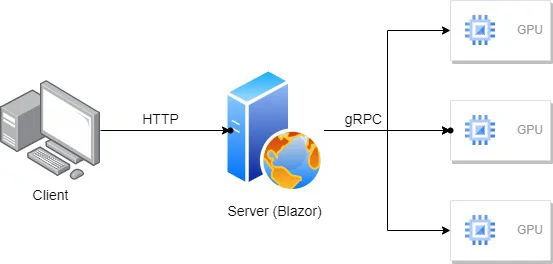
The backend uses gRPC to connect to the services of various models, and then implements the chat functionality using Blazor.
Regarding the use of gRPC, refer to this blog post written earlier: Asp-Net-Core Learning Notes: Quick Start with gRPC
About Blazor
Actually, I had lightly used Blazor a few years ago. For details, see the article: Asp-Net-Core Study Notes: 4. Blazor-WebAssembly Introduction
At first, I was a bit dismissive of Blazor. I was more inclined towards a traditional front-end/back-end separation, using ASP.NET Core for the backend and React for the frontend. The ecosystem is rich, and it's easy to find components for anything.
Blazor had a few pain points:
- Every small modification to the interface required a recompilation to see the effect.
- The ecosystem was relatively barren, with few good component libraries available.
- Whether in WebAssembly or server-rendered mode, you couldn't directly manipulate the DOM; you had to go through JSRuntime.
So, at the beginning of this project, I considered abandoning Blazor several times and reimplementing it with React. However, as my familiarity increased, I gradually started to feel that Blazor wasn't too bad after all. The efficiency for developing small applications was quite high.
Although these pain points affect the experience, they aren't unbearable:
- Having to compile every time is a bit slow. So, I just take a break after changing the interface 😃. For styles that need repeated adjustments, I tweak them directly in the browser's developer tools until I'm satisfied, then write them into the code.
- The barren ecosystem isn't a big deal. Blazor is essentially frontend. Even though Blazor has few native components, I can write my own. The frontend ecosystem has everything, and most things can be used with a little modification.
- The inability to operate the DOM is more troublesome. You just have to write more JavaScript to handle it. Blazor doesn't replace JS; you still can't do frontend development without knowing JavaScript.
So, this project stumbled along, learning Blazor as I went, and I managed to finish it. The result was actually pretty good 😂
As it turns out, Blazor (Server) is usable for small projects. The persistent connection of Server mode can do so much, and it saves a lot of effort on the data interaction side.
Front-end Dependencies
When creating a Blazor project using a built-in template, static files are directly included under the wwwroot/lib directory.
However, this approach isn't quite convenient for me. I'm used to managing static resources with npm and not adding third-party frontend dependencies to version control.
For reference, see my previous blog post: Asp-Net-Core Development Notes: Using NPM and Gulp to Manage Frontend Static Files.
In this project, I am using the following dependencies:
"dependencies": {
  "@fortawesome/fontawesome-free": "^6.0.0",
  "admin-lte": "^3.2.0",
  "bootstrap": "^4.6.2",
  "open-iconic": "^1.1.1"
}
I later found that Open Iconic doesn't look that great, and FontAwesome is actually better.
Implementing Typewriter Effect in Blazor
The chat interface needs to implement a typewriter effect similar to ChatGPT.
This requires the use of streaming output. I looked into ChatGPT's implementation, which uses EventSource. However, since we are using Blazor Server, we don't need to worry about these complex data interaction issues.
Following the previous gRPC call, defined as server-side streaming output, I then encapsulated a ChatService in the Blazor project.
Using a generator approach, it returns an IAsyncEnumerable object. (See the third reference for details.)
public async IAsyncEnumerable<string> StreamingChat(string prompt) {
  using var call = ClientRoute(prompt).StreamingChat(GetRequest(prompt));
  await foreach (var resp in call.ResponseStream.ReadAllAsync()) {
    yield return RenderText(resp.Response);
  }
}
When calling it within a Blazor component, you only need to use await foreach with StateHasChanged() to achieve the typewriter effect.
await foreach (var resp in ChatService.StreamingChat(input.Content)) {
  output.Content = resp;
  StateHasChanged();
}
PS: C# is really so easy to use~
DOM Manipulation (JS Interop)
Blazor, whether in server mode or WebAssembly mode, cannot directly manipulate the DOM.
Therefore, Blazor provides excellent JS interoperability capabilities by leveraging JavaScript directly.
I used this for automatically scrolling the chat interface to the bottom of the page.
First, write a JS function:
function scrollToEnd(elem) {
    elem.scrollTop = elem.scrollHeight
}
Initially, I read the official documentation and thought that JS files could be placed alongside components.
For example, my chat component is located in the Pages/Chat.razor file within the project.
The CSS file is at Pages/Chat.razor.css.
They are automatically associated.
Pages/_Layout.cshtml has a CSS reference:
<link href="AIHub.Blazor.styles.css" rel="stylesheet"/>
During the build, the compiler consolidates all CSS into this file.
However, this is not the case for JS.
When running in Debug mode, JS files are not automatically copied.
Only during a Release mode publish will the wwwroot directory be copied to the publish output.
Then, you also need to manually import this JS module within the Blazor component:
var module = await JS.InvokeAsync<IJSObjectReference>("import", "./Pages/Chat.razor.js");
Afterwards, you can use this module to execute JS calls.
But this way, it's not copied during debugging, which is inconvenient since you can't access the JS.
So, ultimately, I didn't adopt this approach. Instead, I placed the JS directly in the wwwroot/js directory.
Then, I referenced it in Pages/_Layout.cshtml:
<script src="js/common.js"></script>
Finally, using it in the Blazor component is very straightforward.
Chat Component Auto-scroll to Bottom
We previously discussed JS interoperability
Now you can call JS methods within a Blazor component to scroll to the page bottom
First define a ref (feels a bit like Vue)
private ElementReference _chatMessagesRef;
Then bind it to an element
<div class="chat-messages" @ref="_chatMessagesRef"></div>
Finally, call the JS method, passing this ref as a parameter
await foreach (var resp in ChatService.StreamingChat(input.Content)) {
  output.Content = resp;
  StateHasChanged();
  await Js.InvokeVoidAsync("scrollToEnd", _chatMessagesRef);
}
Done.
PS: It really resembles Vue too much.
Page Adaptive Design
The chat interface needs to adapt to both desktop and mobile views.
Reference Bootstrap's responsive design principles
The desktop version has a sidebar; the height can take up the full space, but the width must subtract the sidebar's width.
.chat-messages {
  --large-width: calc(100vw - 250px - 70px);
  max-width: var(--large-width);
  min-width: var(--large-width);
}
The mobile version has no sidebar but a top bar instead; the width takes up the full space, and the height subtracts the top bar's height.
@media screen and (max-width: 992px) {
  :root {
    --mobile-width: calc(100vw - 0);
    --mobile-height: calc(100vh - 1.2rem - 50px);
  }
  .chat-wrapper {
    height: var(--mobile-height);
  }

  .chat-messages {
    max-width: var(--mobile-width);
    min-width: var(--mobile-width);
  }

  .chat-controls {
    --mobile-width: calc(100vw - 0);
    max-width: var(--mobile-width);
    min-width: var(--mobile-width);
  }
}
For the Breakpoint, I only used 992px, which is equivalent to Bootstrap's lg.
Here is Bootstrap's width definition for reference.
| Breakpoint | Class infix | Dimensions |
|---|---|---|
| Extra small | None | <576px |
| Small | sm | ≥576px |
| Medium | md | ≥768px |
| Large | lg | ≥992px |
| Extra large | xl | ≥1200px |
| Extra extra large | xxl | ≥1400px |
PS: In the end, I decided it would be better to create a separate mobile version. Adaptive design is just too awkward. I suddenly remembered that an app I previously built with Flutter, when packaged into an HTML version, actually had a surprisingly good user experience.
Blazor Component Encapsulation
It's quite simple to use initially.
For example, for the nine-grid button (九宫格按钮) on the homepage, I encapsulated it into a component.
<div class="col-xl-2 col-lg-3 col-md-4 col-6 mt-2 mb-2">
    <a class="btn btn-outline-dark btn-block" href="@Href" target="@Target" style="border-color: rgba(52,58,64,.8)">
        <div class="mt-2" style="">
            <i class="@IconClass" style="font-size: 6em;color: #bdc6d0;"></i>
        </div>
        <div class="mt-2">@Title</div>
    </a>
</div>

@code {
    [Parameter]
    public string? IconClass { get; set; }

    [Parameter]
    public string? Href { get; set; }

    [Parameter]
    public string? Target { get; set; }

    [Parameter]
    public string? Title { get; set; }
}
Usage is simple.
<DialButton IconClass="oi oi-chat" Title="大语言模型" Href="chat"/>
Done~
Summary
This was just a small demo project where I tried out Blazor, going from initially feeling quite awkward to becoming increasingly comfortable.
I think Blazor Server is still quite useful for small projects. I'll continue to improve the project in the future, constantly exploring the capabilities of Blazor, and will update the blog as I go along~
References
- https://learn.microsoft.com/zh-cn/aspnet/core/grpc/
- Responsive Design: Loading different CSS styles based on device - https://www.cnblogs.com/supe/p/6692379.html
- https://learn.microsoft.com/en-us/archive/msdn-magazine/2019/november/csharp-iterating-with-async-enumerables-in-csharp-8#a-tour-through-async-enumerables
- https://learn.microsoft.com/zh-cn/aspnet/core/blazor/
_EOF_
Project Completion Summary: Developing a Large Model Client Using Blazor and gRPC
- 本文作者:
- 程序设计实验室
- 版权声明:
- 本博客所有文章除特别声明外,均采用 BY-NC-SA 许可协议。转载请注明出处!
相关文章
项目完成小结-民政局项目-Django3.x版本-开发部署小结
前言 最近因为政企部门的工作失误,导致我们的项目差点挂掉,客户意见很大,然后我们只能被动进入007加班状态,忙得嗷嗷叫,直到今天才勉强把项目改完交付,是时候写一个小结。 技术 因为前期需求不明确,数据量不大,人手也不多,所以我直接用Django做了后端,Django自带的admin可以作为管理后台使用,可以很快完成这个需求。 我们的前端有两个,一个数据展示大屏,一个可视化地图。前者使用Vue+El
2022-04-25 · 项目开发小结系列 · 约 1 分钟
项目完成小结:使用DjangoStarter v3和Taro开发的微信小程序
后端DjangoStarter v3秒杀开发,ninja API写起来真香。前端Taro做微信小程序?呵呵,微信烂得一坨但居然有护城河?django-filer和tailwindcss还行,分享搞定,就是拖太久没动代码。
2024-09-12 · 项目开发小结系列 · 约 1 分钟
项目开发小结-8月新项目-校车项目
Model/数据库设计建议 from django.db import models from django.utils import timezone class ModelManager(models.Manager): def get_queryset(self, *args, **kwargs): return super().get_queryset(*args
2022-08-28 · 项目开发小结系列 · 约 1 分钟
项目小结:使用Docker迁移服务到离线服务器
最近遇到的这个场景,需要把之前开发的一套系统迁移到一个离线的服务器上,这个服务器有点麻烦,接入VPN后通过堡垒机才能访问,速度也很慢,遇到不少坑,本文记录一下迁移过程。
2023-07-12 · 项目开发小结系列 · 约 1 分钟
讨论
共 0 条加载评论中…