

Kali Linux on WSL2 Installation and Simple Configuration Guide
After Windows was updated to version 2004, it officially enabled WSL2 support. This time it's a complete Linux system running in a Hyper-V virtual machine, which can be called a real Linux. Could it be that Windows is about to become the best Linux distro? The actual experience is pretty decent, though there are quite a few minor issues. If you like tinkering, give it a shot—it still helps a lot with improving the development experience on the Windows platform~ Kali on WSL2 Installation Guide Upgrade the System First check your current system version. Press Win+
目录15 个章节
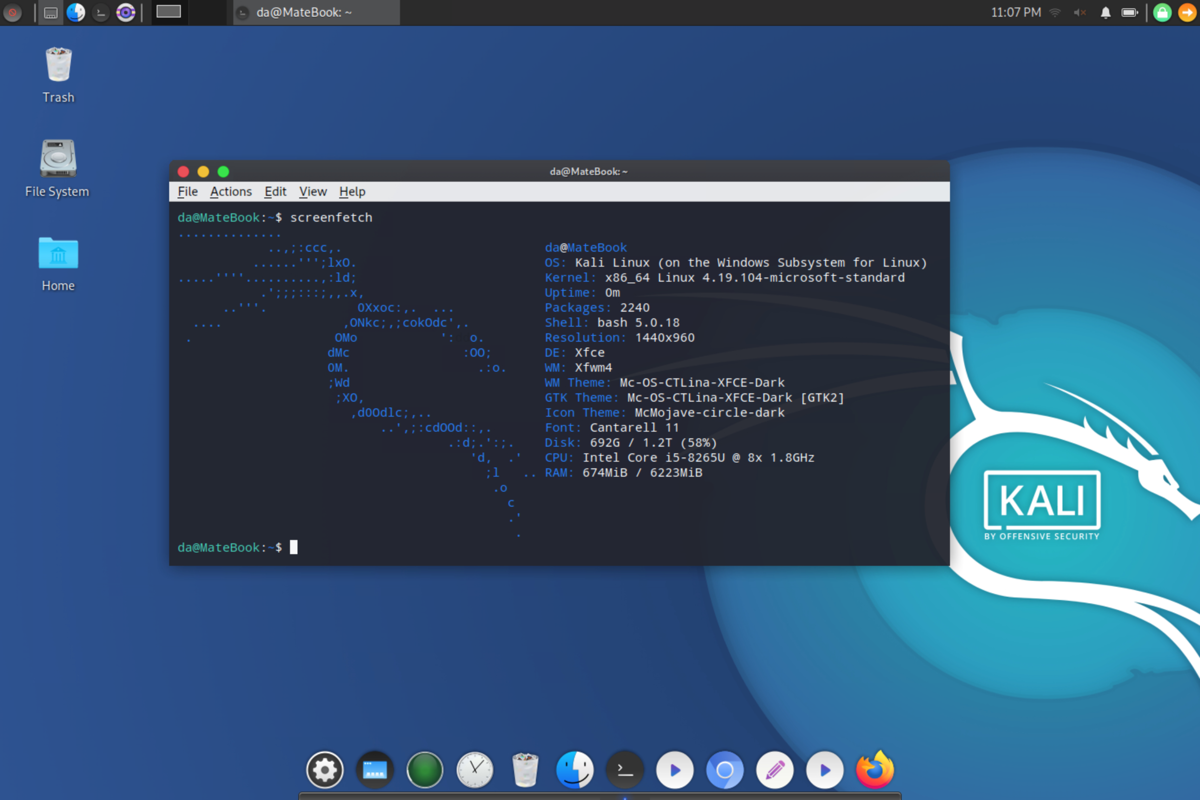
After Windows was updated to version 2004, it officially enabled WSL2 support. This time it's a complete Linux system running in a Hyper-V virtual machine, which can be called a real Linux. Could it be that Windows is about to become the best Linux distro?
The actual experience is pretty decent, though there are quite a few minor issues. If you like tinkering, give it a shot—it still helps a lot with improving the development experience on the Windows platform~
Kali on WSL2 Installation Guide
Upgrade the System
First check your current system version. Press Win+R, type winver, and you can see the current system version:
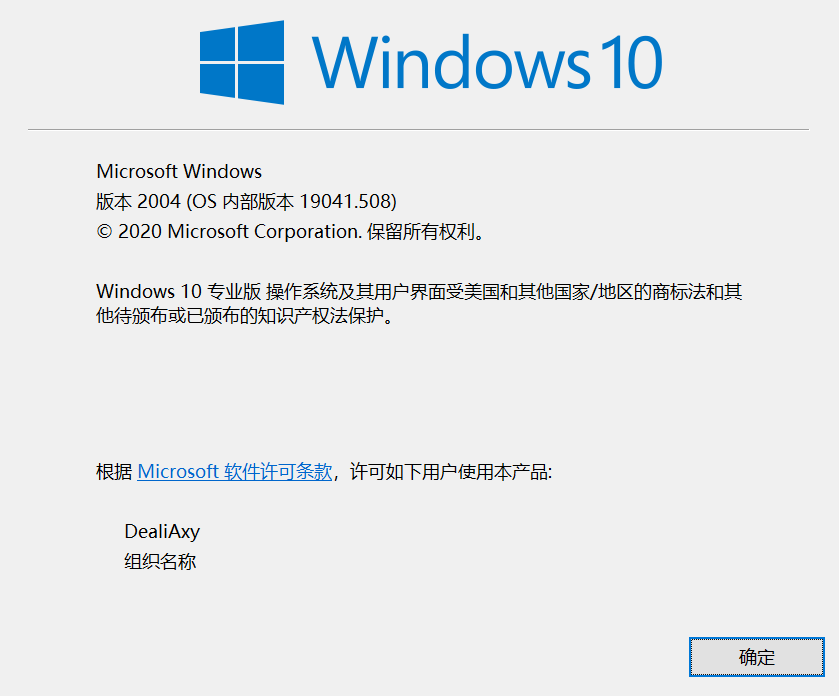
If it's not version 2004, you need to upgrade the system to version 2004. Microsoft says there is a push update, but it's hit or miss. If you can't find the update, please download the official “Update Assistant” (易升) tool yourself to check for updates.
Enable the Linux Subsystem
After upgrading to version 2004, you can start installing the system. If the Linux subsystem is not enabled, you need to enable it first.
PS: Since WSL2 uses a Hyper-V virtual machine, enabling it will conflict with VMware and VirtualBox. This can be resolved by upgrading VMware and VirtualBox to versions that support Hyper-V.
Open PowerShell with administrator privileges and enter the following command to enable the Linux subsystem:
Enable-WindowsOptionalFeature -Online -FeatureName Microsoft-Windows-Subsystem-Linux
A restart is required afterward.
Enable Virtualization
Open PowerShell with administrator privileges and enter the following commands:
dism.exe /online /enable-feature /featurename:VirtualMachinePlatform /all /norestart
dism.exe /online /enable-feature /featurename:Microsoft-Windows-Subsystem-Linux /all /norestart
Restart the system
Download the WSL2 Linux Kernel
Download link: https://aka.ms/wsl2kernel
Install it after downloading.
Set the Default Subsystem Version to WSL2
Open PowerShell with administrator privileges and enter the following command:
wsl --set-default-version 2
Install Kali Linux
Open the Microsoft Store, search for and install Kali Linux.
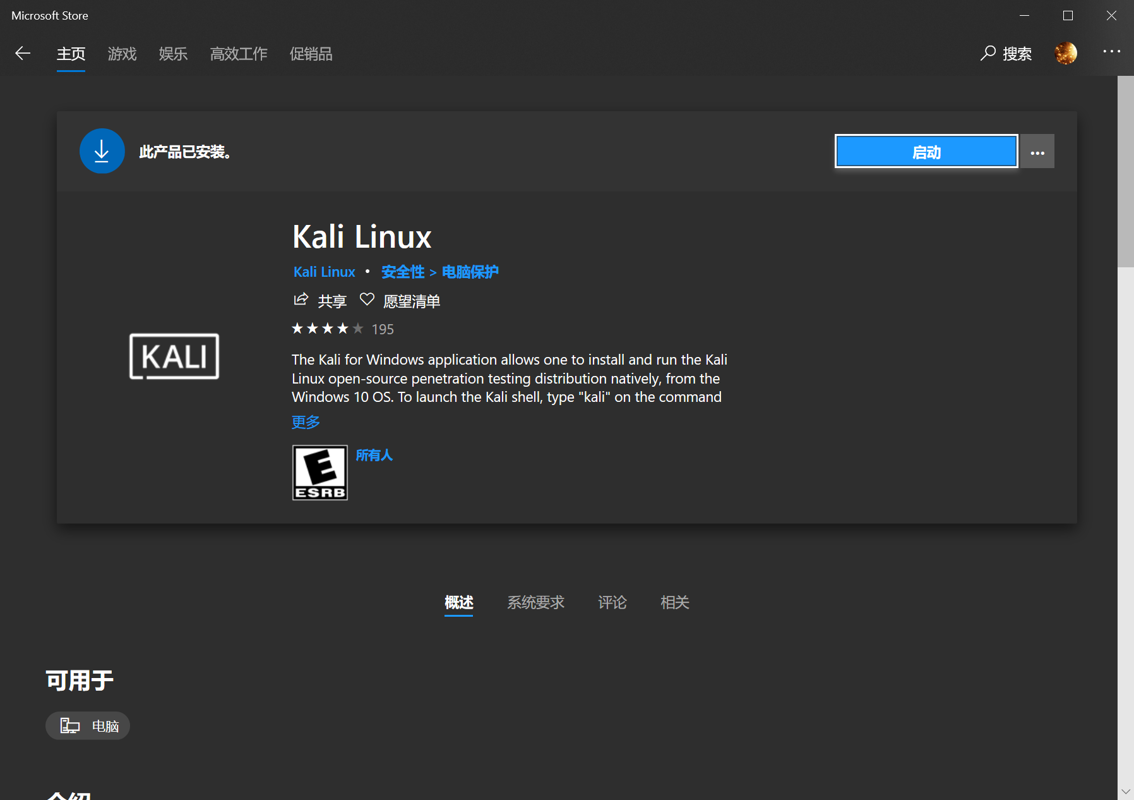
After installation, choose “Launch”, and it will start extracting and installing. Then enter a username and password and you're done.
Upgrade an Existing System to WSL2
If you already have WSL installed, you can upgrade it directly to WSL2.
Open PowerShell with administrator privileges and enter the following command:
wsl --set-version kali-linux 2
Install the Win-Kex Toolkit
The Win-Kex toolkit is a graphical toolkit provided by Kali for running on Windows. It lets you run a GUI in WSL in a one-click, foolproof way.
Enter the following command in the Kali command line to install:
sudo apt update && sudo apt install kali-win-kex
After installation, you can start the graphical interface with the following commands:
cd ~
kex
The first time you start it, you'll be asked to enter a new password. This password is saved as the kex password.
Note that you need to switch the current directory to the home directory before starting kex, otherwise it won't be able to get the key.
Simple Configuration
Install Kali Linux Toolkits
- Install the standard toolkit
sudo apt install kali-linux-default
- Install the large toolkit (about 7–8 GB)
sudo apt install kali-linux-large
Configure a Windows Terminal Shortcut
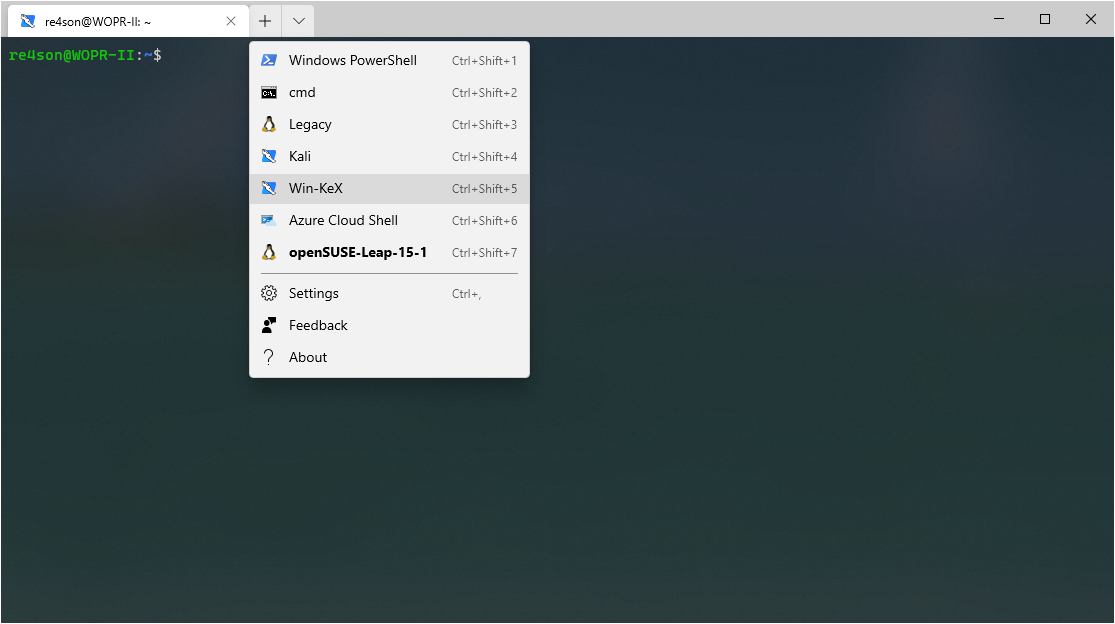
Opening it from the command line every time is too much hassle. You can configure a shortcut in Windows Terminal, and next time you can open Kex's graphical interface from this dropdown menu.
Open the Windows Terminal configuration file and add the following configuration items:
{
        "guid": "{55ca431a-3a87-5fb3-83cd-11ececc031d2}",
        "hidden": false,
        "name": "Win-KeX",
        "commandline": "wsl kex wtstart",
},
{
         "guid": "{55ca431a-3a87-5fb3-83cd-11ececc031d2}",
         "hidden": false,
         "icon": "file:///c:/users/<windows user>/pictures/icons/kali-menu.png",
         "name": "Win-KeX",
         "commandline": "wsl kex wtstart",
  	 "startingDirectory" : "//wsl$/kali-linux/home/<kali user>"
},
After that, click the “Win-Kex” menu item to launch the graphical interface directly.
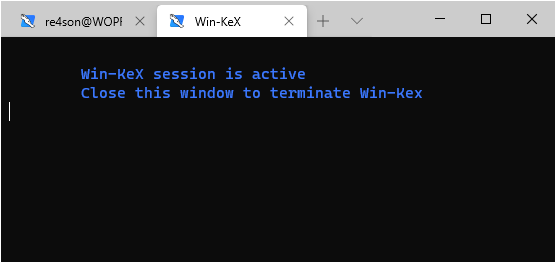
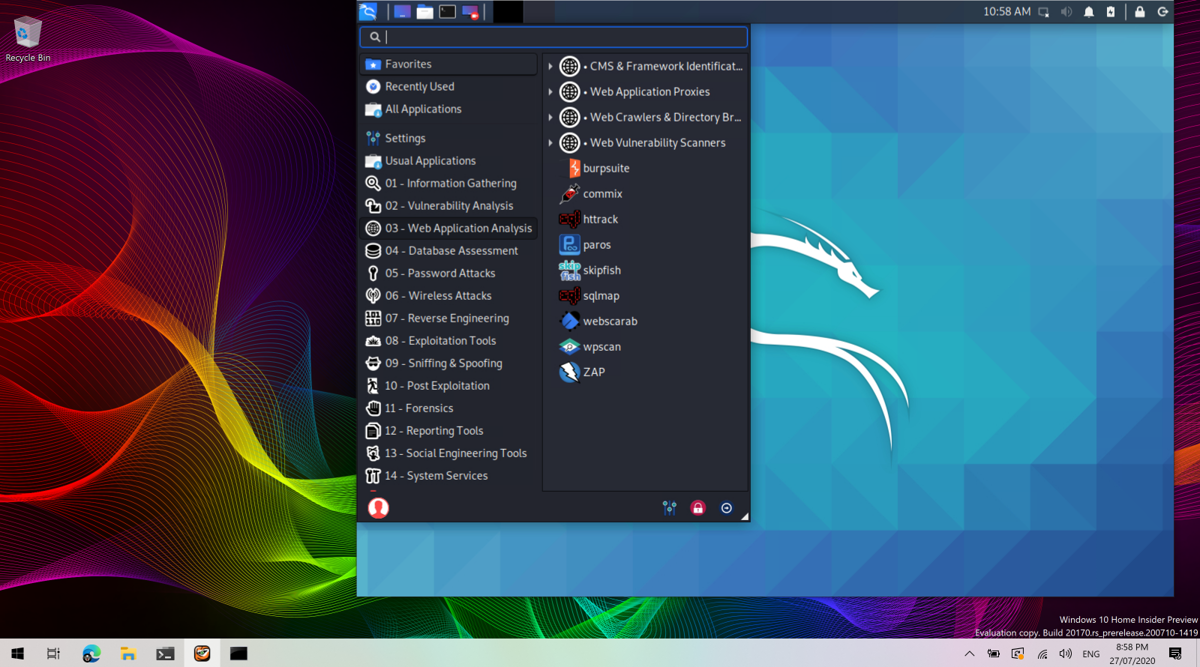
PS: After entering the fullscreen graphical interface, press F8 to open the context menu.
Fix the Unable to Connect to the Network Issue
- Create a file: /etc/wsl.conf.
- Put the following lines in the file
[network]
generateResolvConf = false
- In a cmd window, run wsl --shutdown
- Restart WSL2
- Create a file: /etc/resolv.conf. If it exists, replace existing one with this new file.
- Put the following lines in the file
nameserver 8.8.8.8
Repeat step 3 and 4. You will see git working fine now.
- Repeat step 3 and 4. You will see git working fine now.
Referenced from: https://github.com/microsoft/WSL/issues/4285
Fix the kex Unable to Start Issue
The error message is as follows:
unable to connect to socket: No connection could be made because the target machine actively refused it. (10061)
The Chinese prompt is something like the remote host actively refused
The solution is to run kex stop in bash, then restart kex.
Reference: https://unix.stackexchange.com/questions/605309/not-able-to-initialize-gui-for-kali-linux-in-wsl-2
References
_EOF_
Kali Linux on WSL2 Installation and Simple Configuration Guide
- 本文作者:
- 程序设计实验室
- 版权声明:
- 本博客所有文章除特别声明外,均采用 BY-NC-SA 许可协议。转载请注明出处!
相关文章
Windows也能拥有好用的命令行吗?Powershell+Terminal折腾记录(v1.0版本)
Windows一向以图形化操作入门容易著称,所以对于命令行的支持一直为人所诟病,比起Linux或者mac都是被吊打的。这一局面在最近几个版本的Windows10更新里,特别是微软官方出了WindowsTerminal这个大杀器之后有所改善~ 所以对于标题的这个问题,只能说「勉强可以吧」,本文介绍几个折腾命令行的方法。 效果图 ~~偷一张官方的截图,应该没人发现吧~~ 建议先熟读官方文档:https
2024-02-29 · Windows · 约 1 分钟
Win10安装Ubuntu子系统教程
一、启用“适用于Linux的Windows子系统” 通过Win10任务栏中的Cortana搜索框搜索打开“启用或关闭Windows功能”,向下滚动列表,即可看到“适用于Linux的Windows子系统”项。 勾选它,确定,然后按提示重启系统。 二、启用开发人员模式 然后进入“设置 - 更新和安全 - 针对开发人员”设置页面,选中“开发人员模式”。如图: 然后就会下载安装开发人员模式程序包,等待安装
2021-12-18 · Windows · 约 1 分钟
IT之家学院:让你的Win10桌面比macOS还简洁漂亮高大上
感谢IT之家网友 yiyueduzui 的原创投稿 直奔主题,先给大家看看我的电脑桌面: 有人开始骂了:你特么逗我呢?这明明就是一张图片好不啦! 我读书那么多,怎么会骗你,这真的是我的电脑桌面,不还有个桌面数字时钟呢嘛!论简洁,还有谁? 那这啥都没有,要怎么用啊? 看好啦,当我的鼠标移动到屏幕下方的时候, 出现了一个Dock栏,跟苹果系统的一样一样的。 有些图标其实是一个目录或者文件夹,当它展开的
2021-12-18 · Windows · 约 1 分钟
如何阻止Win10重置默认应用?
前言 Win10比之前版本的Windows系统更现代,然而却不见得更好用,喜欢自作主张重置默认应用就是一个大问题。 就像这样,真的是烦。 解决方法 改注册表。 新建一个 去除重置默认应用.reg 的注册表文件,粘贴一下代码。 Windows Registry Editor Version 5.00 ;Description: Prevents Windows 10 from resetting
2021-12-18 · Windows · 约 1 分钟
讨论
共 0 条加载评论中…