AI Drawing-StableDiffusion
Foreword AI is really hot lately🔥, first with AI drawing, and then ChatGPT. I've been using the latter for a while now—it's pretty good for writing compositions. But OpenAI has blocked Chinese IPs, and with so many users, it's not as smooth to use. However, there's no other option globally, so I can only grit my teeth and keep using it. AI drawing, on the other hand, is different—it's all open-source. You can deploy it yourself and have a great time~ We happen to have a workstation with a 2080Ti here, which was previously used for training models. Deploying a drawing tool should be a breeze, so I embarked on my tinkering journey~ Results Let's first take a look at what I've generated
目录41 个章节
Introduction
Recently, AI has become very popular 🔥. First, it was AI image generation, and then came ChatGPT. I've been using the latter for a while now, and it's quite good for writing essays. However, OpenAI has blocked Chinese IPs, and with so many users, the experience isn't as smooth. But there's no alternative globally—just this one option—so I have to grin and bear it. AI image generation is different, though; it's all open-source, and you can have a great time deploying it yourself~
As it happens, we have a 2080Ti workstation here that was previously used for training models. Deploying an image generation system on it should be a breeze, so I embarked on my tinkering journey~
Effects
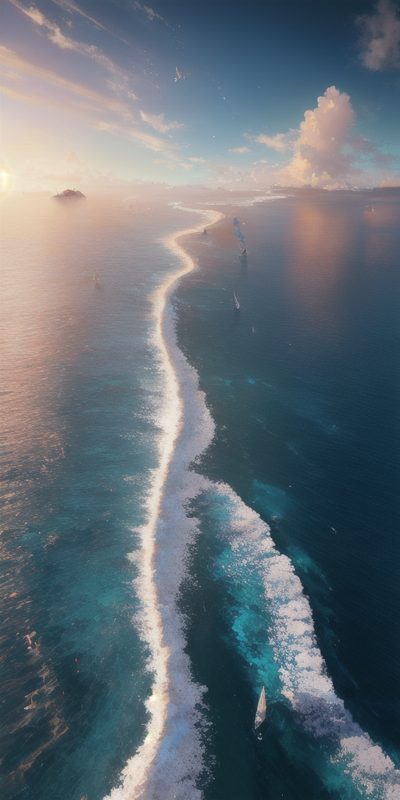
First, let's take a look at some images I generated.
| Hanfu (汉服) | COSER |
|---|---|
 |  |
| Ocean | 2B (from NieR: Automata) |
 |  |
Stable Diffusion
AI drawing models include Novel AI, Disco Diffusion, Stable Diffusion, and others. To get started quickly, I chose the simplest one, Stable Diffusion.
Stable Diffusion is a "text-to-image" AI model (AI drawing tool) that is open source and can be deployed on a home computer (with low hardware requirements). With Stable Diffusion, you can generate images on a computer with a 6GB VRAM graphics card, 16GB RAM, or even one that relies solely on a CPU. The process takes only a few seconds and requires no pre-processing or post-processing.
There is a project on GitHub that can quickly run Stable Diffusion using Docker, complete with a user interface, which is very convenient. This project is what I am using in this article.
Project address: https://github.com/AbdBarho/stable-diffusion-webui-docker
Prerequisites
- A Linux system (essential for model training, Ubuntu-based systems are recommended; Windows can be used via WSL, but it's more complicated)
- NVIDIA graphics card with 6GB or more of VRAM (using AMD graphics cards or even running on CPU is possible, but this is outside the scope of this article)
- CUDA version 11.6 or higher
- A stable network connection (with access to GitHub and the ability to download models)
Configure Docker Network
To install this Stable Diffusion model, many model files need to be downloaded. The base model and data alone will exceed ten gigabytes, and these must be downloaded from servers abroad. To ensure a smooth installation process, let's first configure the Docker proxy.
Dockerd Proxy
When executing docker pull, it is the daemon dockerd that performs the operation. Therefore, the proxy needs to be configured in the dockerd environment. This environment is managed by systemd, so the configuration is essentially done through systemd.
sudo mkdir -p /etc/systemd/system/docker.service.d
sudo touch /etc/systemd/system/docker.service.d/proxy.conf
In this proxy.conf file (it can be any *.conf file), add the following content:
[Service]
Environment="HTTP_PROXY=http://proxy.example.com:8080/"
Environment="HTTPS_PROXY=http://proxy.example.com:8080/"
Environment="NO_PROXY=localhost,127.0.0.1,.example.com"
Here, proxy.example.com:8080 should be replaced with an available password-free proxy.
Container Proxy
During container runtime, if you need to access the internet through a proxy, you must configure ~/.docker/config.json. The following configuration is only effective for Docker 17.07 or later.
{
  "proxies": {
    "default": {
      "httpProxy": "http://proxy.example.com:8080",
      "httpsProxy": "http://proxy.example.com:8080",
      "noProxy": "localhost,127.0.0.1,.example.com"
    }
  }
}
This is a user-level configuration. In addition to proxies, information such as docker login details is also stored here.
Docker Build Proxy
While the essence of docker build is also to start a container, the environment is slightly different—user-level configuration is ineffective. During the build, you need to inject parameters like http_proxy.
If you are starting a container via the docker command, you can use the following command:
docker build . \
    --build-arg "HTTP_PROXY=http://proxy.example.com:8080/" \
    --build-arg "HTTPS_PROXY=http://proxy.example.com:8080/" \
    --build-arg "NO_PROXY=localhost,127.0.0.1,.example.com" \
    -t your/image:tag
However, we usually use the Docker Compose tool, so let's look at the configuration for Compose.
version: '3.9'
services:
  app:
    build: ./services/AUTOMATIC1111
    image: sd-auto:49
    environment:
      - CLI_ARGS=--allow-code --medvram --xformers --enable-insecure-extension-access --api
Change it to:
version: '3.9'
services:
  app:
    build:
      context: ./services/AUTOMATIC1111
      args:
        - HTTP_PROXY=http://proxy.example.com:8080/
        - HTTPS_PROXY=http://proxy.example.com:8080/
    image: sd-auto:49
    environment:
      - CLI_ARGS=--allow-code --medvram --xformers --enable-insecure-extension-access --api
And that's it~
Tips
Remember to restart the Docker daemon after configuration.
sudo systemctl daemon-reload
sudo systemctl restart docker
Note: Both
docker runanddocker buildoperate with network isolation by default. If the proxy is set to uselocalhost:1234or similar, it will not function properly.
CUDA
It is recommended to use the driver manager built into the LinuxMint/Ubuntu system to install the latest graphics drivers.
Previously, I was using LinuxMint18 (based on Ubuntu16.04). After checking NVIDIA's official website, I realized the system was too old to support newer drivers and CUDA. So, I spent an afternoon upgrading the system to LinuxMint21 (based on Ubuntu22.04), then installed the drivers. Installing drivers on Ubuntu-based systems is really convenient—done with a single click, no hassle 😃. The CUDA version bundled with the driver was also installed automatically, so no extra configuration was needed. Very smooth.
Use nvidia-smi to check the driver information:
Thu Mar 30 21:39:45 2023
+-----------------------------------------------------------------------------+
| NVIDIA-SMI 525.89.02    Driver Version: 525.89.02    CUDA Version: 12.0     |
|-------------------------------+----------------------+----------------------+
| GPU  Name        Persistence-M| Bus-Id        Disp.A | Volatile Uncorr. ECC |
| Fan  Temp  Perf  Pwr:Usage/Cap|         Memory-Usage | GPU-Util  Compute M. |
|                               |                      |               MIG M. |
|===============================+======================+======================|
|   0  NVIDIA GeForce ...  Off  | 00000000:C1:00.0 Off |                  N/A |
|  0%   30C    P8    26W / 300W |   1350MiB / 11264MiB |      0%      Default |
|                               |                      |                  N/A |
+-------------------------------+----------------------+----------------------+

+-----------------------------------------------------------------------------+
| Processes:                                                                  |
|  GPU   GI   CI        PID   Type   Process name                  GPU Memory |
|        ID   ID                                                   Usage      |
|=============================================================================|
|    0   N/A  N/A      1394      G   /usr/lib/xorg/Xorg                114MiB |
|    0   N/A  N/A      3198      G   cinnamon                           38MiB |
|    0   N/A  N/A    508973      C   python                           1192MiB |
+-----------------------------------------------------------------------------+
The CUDA version is 12, perfect~ 😃
Setup Steps
Let's finally get started
First, clone the code
git clone https://github.com/AbdBarho/stable-diffusion-webui-docker.git
Build step 1: Download the model, which requires a model file of over ten gigabytes
(As long as the network connection is stable, this should complete without issues)
cd stable-diffusion-webui-docker
docker compose --profile download up --build
Build step 2: Run the main application
Here, you choose a UI set to launch. This auto is the name of the UI. Besides this, there are also auto-cpu (for systems without a graphics card), invoke, and sygil. After trying them out, auto is still the best with the most features.
The invoke interface is relatively simple and seems faster, but many models and LORAs, etc., can't be used~😑
Just go with auto, don't overthink it
docker compose --profile auto up --build
If the drivers and network are working properly, after the build completes, you'll see information similar to this
stable-diffusion-webui-docker-auto-1  | Creating model from config: /stable-diffusion-webui/configs/v1-inference.yaml
stable-diffusion-webui-docker-auto-1  | LatentDiffusion: Running in eps-prediction mode
stable-diffusion-webui-docker-auto-1  | DiffusionWrapper has 859.52 M params.
stable-diffusion-webui-docker-auto-1  | Applying xformers cross attention optimization.
stable-diffusion-webui-docker-auto-1  | Textual inversion embeddings loaded(1): pureerosface_v1
stable-diffusion-webui-docker-auto-1  | Model loaded in 41.4s (calculate hash: 38.2s, load weights from disk: 1.6s, create model: 0.3s, apply weights to model: 0.3s, apply half(): 0.2s, load VAE: 0.8s).
stable-diffusion-webui-docker-auto-1  | Running on local URL:  http://0.0.0.0:7860
Then, open http://ip:7860 in your browser to see this interface
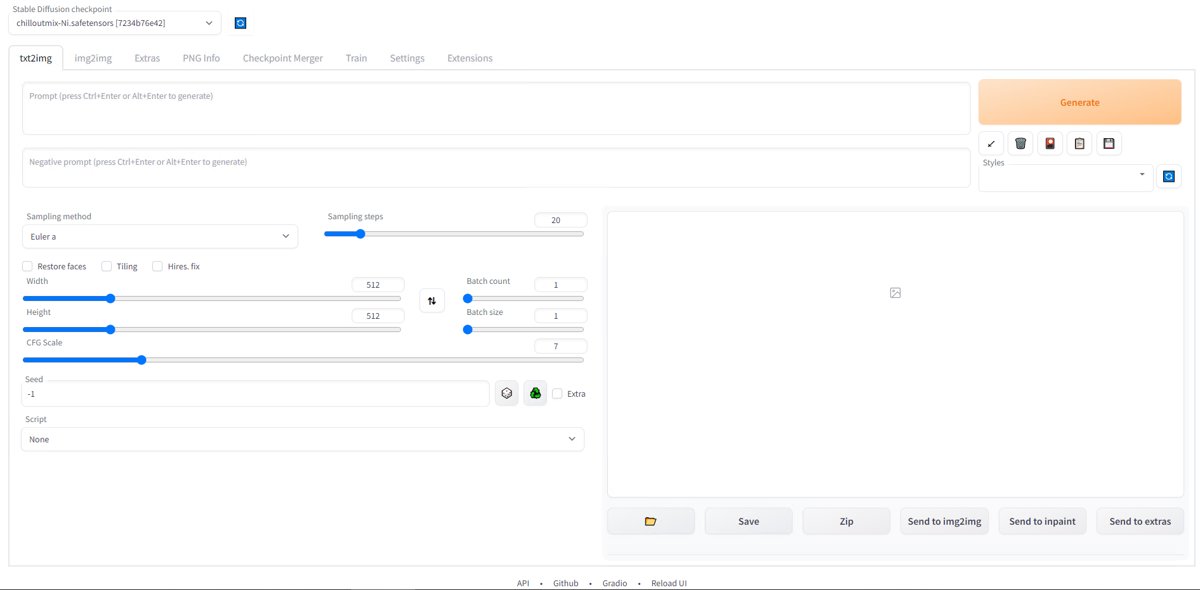
Input a prompt to generate an image. Here, I used a landscape model to draw a scenic picture
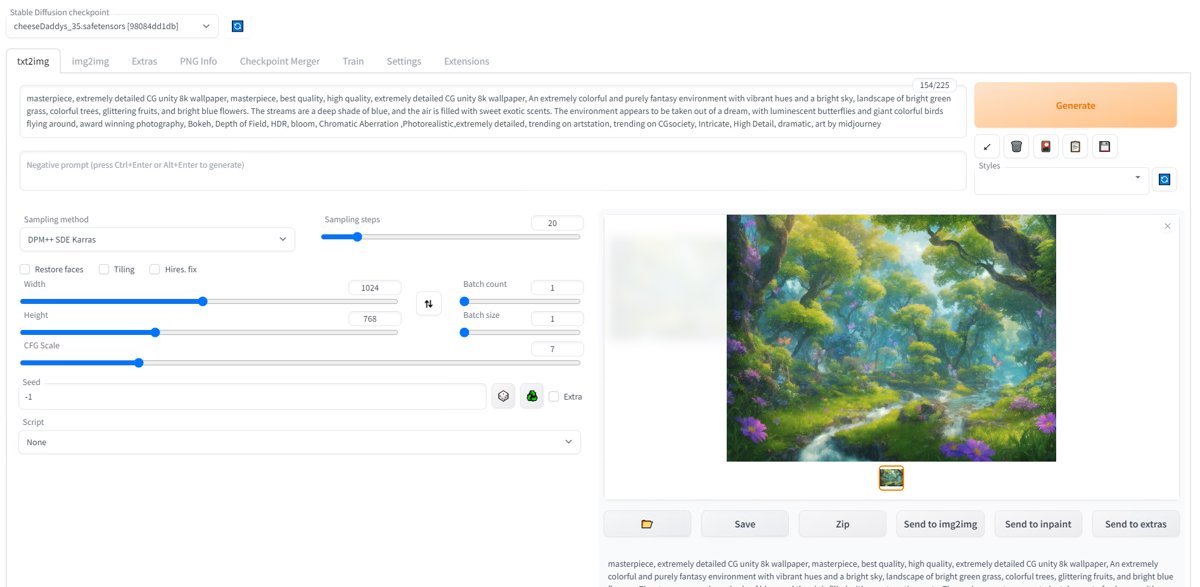
If it doesn't work, that's okay, you can check the "Troubleshooting" section later.
How to Use
At first, you might feel lost, wondering why you can't create high-quality images right away?
- prompt
- model
First, you need to learn how to use prompt, which is the description used to generate images. Stable Diffusion uses English text to describe scenes or objects, determining what appears in the generated image. The text description is a key factor in determining the quality of the generated image. The specifics of how to write a prompt are beyond the scope of this article—please search for related articles online, as there are plenty available.
Model is a general term that includes Checkpoints, LORA, Texture, etc. Without going into detail, you can install and use them according to the tutorials on the model websites.
These websites allow you to generate prompts by combining suggestions:
- https://promptomania.com/stable-diffusion-prompt-builder/
- https://weirdwonderfulai.art/resources/disco-diffusion-modifiers/
These websites have many finished images and description copies shared by others:
For models, you can download them from these websites:
Troubleshooting
failed to solve: rpc error:
Error Information
failed to solve: rpc error: code = Unknown desc = failed to solve with frontend dockerfile.v0: failed to solve with frontend gateway.v0: rpc error: code = Unknown desc = dockerfile parse error on line 8: unknown instruction: cat (did you mean cmd?)
Solution
https://github.com/AbdBarho/stable-diffusion-webui-docker/issues/190
Modify stable-diffusion-webui-docker/services/AUTOMATIC1111/Dockerfile
Change the first line
syntax=docker/dockerfile:1
Change to

```dockerfile
# 部署指南

## 环境需求

确保您的系统已安装以下软件:

- **操作系统**:Linux(推荐 Ubuntu 22.04)
- **CPU**:8核及以上(推荐16核)
- **内存**:16GB及以上(推荐32GB)
- **存储**:100GB及以上(推荐1TB)
- **Docker**:版本 20.10 及以上
- **Docker Compose**:版本 2.0 及以上

### GPU 环境需求(可选)

如果需要 GPU 推理,请确保:

- **NVIDIA 驱动**:版本 525 及以上
- **CUDA**:版本 12.1 及以上
- **NVIDIA Container Toolkit**:已正确安装

---

## 快速开始

### 1. 克隆项目

```bash
git clone https://github.com/your-org/project-name.git
cd project-name
2. 配置环境变量
复制环境变量模板文件并根据实际需求进行修改:
cp .env.example .env
编辑 .env 文件,配置以下关键参数:
| 参数名 | 说明 | 默认值 |
|---|---|---|
MODEL_NAME | 模型名称 | default-model |
PORT | 服务端口 | 8080 |
GPU_ENABLED | 是否启用 GPU | false |
LOG_LEVEL | 日志级别 | info |
MAX_WORKERS | 最大工作线程数 | 4 |
3. 启动服务
CPU 模式:
docker compose --profile auto up --build -d
GPU 模式:
首先确保 Dockerfile 第一行包含以下内容:
# syntax=docker/dockerfile:1.3-labs
然后添加 DOCKER_BUILDKIT=1 参数进行构建:
DOCKER_BUILDKIT=1 docker compose --profile auto up --build
服务启动后,可通过以下地址访问:
- API 文档:
http://localhost:8080/docs - 健康检查:
http://localhost:8080/health
4. 停止服务
docker compose --profile auto down
手动部署(非 Docker)
如果不使用 Docker,也可以手动部署:
1. 创建虚拟环境
python3 -m venv venv
source venv/bin/activate
2. 安装依赖
pip install -r requirements.txt
GPU 用户需要额外安装 PyTorch 相关依赖:
pip install torch torchvision --index-url https://download.pytorch.org/whl/cu121
3. 下载模型
python scripts/download_model.py --model-name $MODEL_NAME
4. 启动服务
uvicorn app.main:app --host 0.0.0.0 --port 8080 --workers 4
配置说明
日志配置
日志文件默认存放在 ./logs 目录下,支持以下日志级别:
debug:调试信息info:常规信息(默认)warning:警告信息error:错误信息
缓存配置
缓存数据存放在 ./cache 目录,可通过以下配置项调整:
# config.yaml
cache:
  enabled: true
  directory: "./cache"
  max_size_gb: 10
  ttl_seconds: 3600
常见问题
Q:构建时出现网络超时怎么办?
A:可以尝试使用国内镜像源,或者在构建时添加网络代理参数:
docker compose build --build-arg HTTP_PROXY=http://proxy:port --build-arg HTTPS_PROXY=http://proxy:port
Q:如何查看服务日志?
A:使用以下命令查看实时日志:
docker compose --profile auto logs -f
Q:如何更新服务?
A:拉取最新代码并重新构建:
git pull origin main
docker compose --profile auto up --build -d
Q:GPU 模式下如何监控显存使用情况?
A:可以使用以下命令实时监控:
watch -n 1 nvidia-smi
项目结构
project-name/
├── app/
│   ├── main.py              # 主应用入口
│   ├── config.py             # 配置管理
│   ├── models/               # 数据模型定义
│   ├── routes/               # API 路由
│   ├── services/             # 业务逻辑
│   └── utils/                # 工具函数
├── scripts/
│   ├── download_model.py     # 模型下载脚本
│   └── benchmark.py          # 性能测试脚本
├── tests/                    # 测试文件
├── Dockerfile                # Docker 镜像定义
├── docker-compose.yml        # Docker Compose 配置
├── requirements.txt          # Python 依赖
├── .env.example              # 环境变量模板
└── README.md                 # 项目说明文档
pip Dependency Installation Failure
Network issue: Although the Docker proxy has been configured previously, the build process will not use the configured proxy. You need to add build args to configure it again.
Add build args in the Docker Compose configuration to configure the proxy server.
Reference documentation: https://docs.docker.com/compose/compose-file/compose-file-v3/
Modify the docker-compose.yml file:
auto: &automatic
  <<: *base_service
  profiles: ["auto"]
  build: ./services/AUTOMATIC1111
  image: sd-auto:49
  environment:
    - CLI_ARGS=--allow-code --medvram --xformers --enable-insecure-extension-access --api
Change to:
auto: &automatic
  <<: *base_service
  profiles: ["auto"]
  build:
    context: ./services/AUTOMATIC1111
    args:
      - HTTP_PROXY=http://host:port/
      - HTTPS_PROXY=http://host:port/
  image: sd-auto:49
  environment:
    - CLI_ARGS=--allow-code --medvram --xformers --enable-insecure-extension-access --api
Graphics Driver Issues
Error Message
Error response from daemon: could not select device driver "nvidia" with capabilities: [[gpu]]
You need to install the NVIDIA Container Toolkit.
Reference documentation: https://docs.nvidia.com/datacenter/cloud-native/container-toolkit/install-guide.html#setting-up-nvidia-container-toolkit
Note that this requires CUDA version 11.6 or higher. If you don't have it, please update your CUDA version first.
Adding the Software Repository
distribution=$(. /etc/os-release;echo $ID$VERSION_ID) \
      && curl -fsSL https://nvidia.github.io/libnvidia-container/gpgkey | sudo gpg --dearmor -o /usr/share/keyrings/nvidia-container-toolkit-keyring.gpg \
      && curl -s -L https://nvidia.github.io/libnvidia-container/$distribution/libnvidia-container.list | \
            sed 's#deb https://#deb [signed-by=/usr/share/keyrings/nvidia-container-toolkit-keyring.gpg] https://#g' | \
            sudo tee /etc/apt/sources.list.d/nvidia-container-toolkit.list
Note: If you are using an Ubuntu derivative like LinuxMint, please manually set the distribution environment variable to the corresponding Ubuntu release. For example, if you are using Mint 21, which is based on Ubuntu 22.04, you need to set distribution=ubuntu22.04.
Installation
sudo apt install -y nvidia-container-toolkit
Configuration
sudo nvidia-ctk runtime configure --runtime=docker
Restart the Docker daemon
sudo systemctl restart docker
References
- Project URL - https://github.com/AbdBarho/stable-diffusion-webui-docker
- Introductory Blog - https://newzone.top/posts/2022-09-05-stable_diffusion_ai_painting.html
_EOF_
AI Drawing-StableDiffusion
- 本文作者:
- 程序设计实验室
- 版权声明:
- 本博客所有文章除特别声明外,均采用 BY-NC-SA 许可协议。转载请注明出处!
相关文章
你的显卡能跑多少算子?用 55 个检查项,给 PyTorch GPU 环境做一次冒烟测试
一个破脚本能测的只是输出是否还在cuda上,跟真正的gpu性能有个毛线关系。跑出来54/55的“通过率”就敢吹ROCm完美?麻烦先去搞清batch_norm为什么挂,再看看你那些操作到底调了哪个后端的kernel。
2026-05-20 · AI-炼丹 · 约 1 分钟
AI 如何重塑劳动力市场:基于 Claude 数据的深度分析
Anthropic 的报告揭示,AI 主要用于编程和写作,36% 职业至少 25% 任务涉及 AI,增强占 57% 而非自动化。中高薪职业更常见,低薪和超高薪反而少用,真讽刺?数据开源,但分不清工作用途,局限性明显。
2025-02-11 · AI-炼丹 · 约 1 分钟
小老板的账都在微信里,我做成了 AI 产品,然后…
一年了终于憋出第一篇文章,自称AI产品却干着ERP的活。核心就一句话:小老板不缺记账,缺的是“这单到底赚没赚”——还得靠AI把微信聊天变账本。最后成本压垮项目?醒醒,先想清楚卖给谁再谈开发。
2026-07-31 · Production · 约 1 分钟
2022-生日
本来打算前几天来写的,不过果然还是等到当天更有气氛一些~ 就写个随笔吧。 算起来,我毕业工作也是几年时间了,回头想想,读书的十几年,学到的还真不一定有比工作的这几年多,不愧是「社会大学」啊。最大的影响大概是世界观吧,对社会的了解,以前的管中窥豹和现在的身处其中是完全不同的感受。 读书的时候,特别学理工科的人,特别容易走入一个误区,以为世界是线性运行的,严格按照某种规律运动的,但其实世界是个混沌系统
2022-11-07 · 2022 · 约 1 分钟
讨论
共 0 条加载评论中…